
As I whisked together a few simple ingredients, the rich, tangy aroma of Greek yogurt filled the kitchen, immediately transporting me to sunlit Mediterranean summers. This Healthy Greek Yogurt Cheesecake is a delightful twist on the classic dessert, perfect for those of us seeking a guilt-free indulgence. Not only is it high in protein, but it can also be made entirely gluten-free and even vegan if you prefer. In just a matter of minutes, you’ll have a creamy, no-bake cheesecake that’s not only delicious but also easy to personalize with various crust options. Whether you’re celebrating a special occasion or simply satisfying a sweet craving, this cheesecake promises to be a crowd-pleaser with minimal effort. What toppings will you choose to make it your own?
Why Choose Greek Yogurt Cheesecake?
Healthier Indulgence: This cheesecake offers all the creaminess you crave without the guilt, thanks to Greek yogurt’s protein-packed goodness.
Versatile Options: You can customize it for any dietary preference—vegan, gluten-free, or low-carb—making it perfect for everyone at your table. Creative twist? Try adding a drizzle of homemade Nutella or fresh berries on top for a touch of flair!
Quick and Easy: With a simple preparation time of just a few minutes, this no-bake dessert fits seamlessly into your busy lifestyle.
Guilt-Free Indulgence: Savor the rich flavor without compromising nutrition—it’s a sweet treat you can feel good about enjoying time and again.
Delightful Texture: Experience a luscious, custard-like consistency that elevates the standard cheesecake into a healthier version of bliss.
Get ready to treat your taste buds with this Healthy High-Protein Greek Yogurt Cheesecake that promises indulgence without the remorse!
Greek Yogurt Cheesecake Ingredients
For the Filling
• Greek Yogurt – A natural source of creaminess and protein, offering a healthy base for your cheesecake.
• Cream Cheese or Tofu – Adds extra creaminess; swap with firm silken tofu for a vegan version.
• Salt – Just a hint of salt enhances the overall flavor.
• Pure Vanilla Extract – Brings warmth and depth to your cheesecake; no substitutions needed if using flavored yogurt.
• Lemon Juice – Brightens up the taste; fresh lemon juice is the best choice for flavor.
• Maple Syrup or Agave – Choose your preferred sweetener to customize the sweetness of your Greek yogurt cheesecake; sugar substitutes can work too.
• Cornstarch or Arrowroot – Acts as a thickening agent; for lower carbs, consider almond flour instead.
For the Crust
• Graham Cracker Crumbs – Classic choice for a delightful base.
• Keto Almond Flour – A low-carb alternative that provides a nutty flavor.
• Store-bought Pie Crust – Quick and convenient; select according to your dietary needs.
Optional for Topping
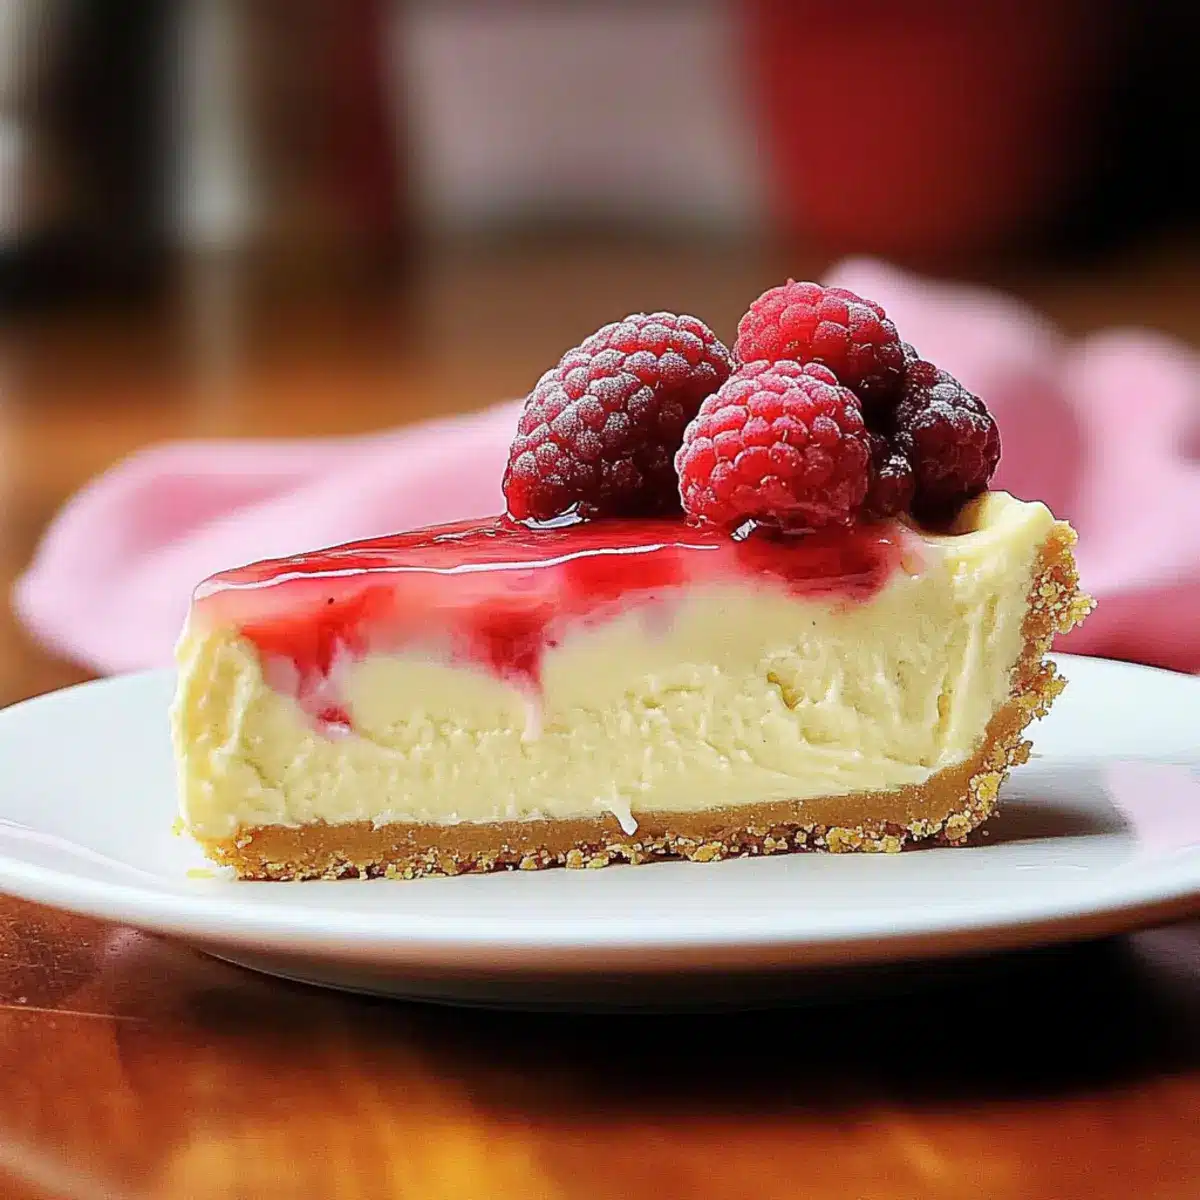
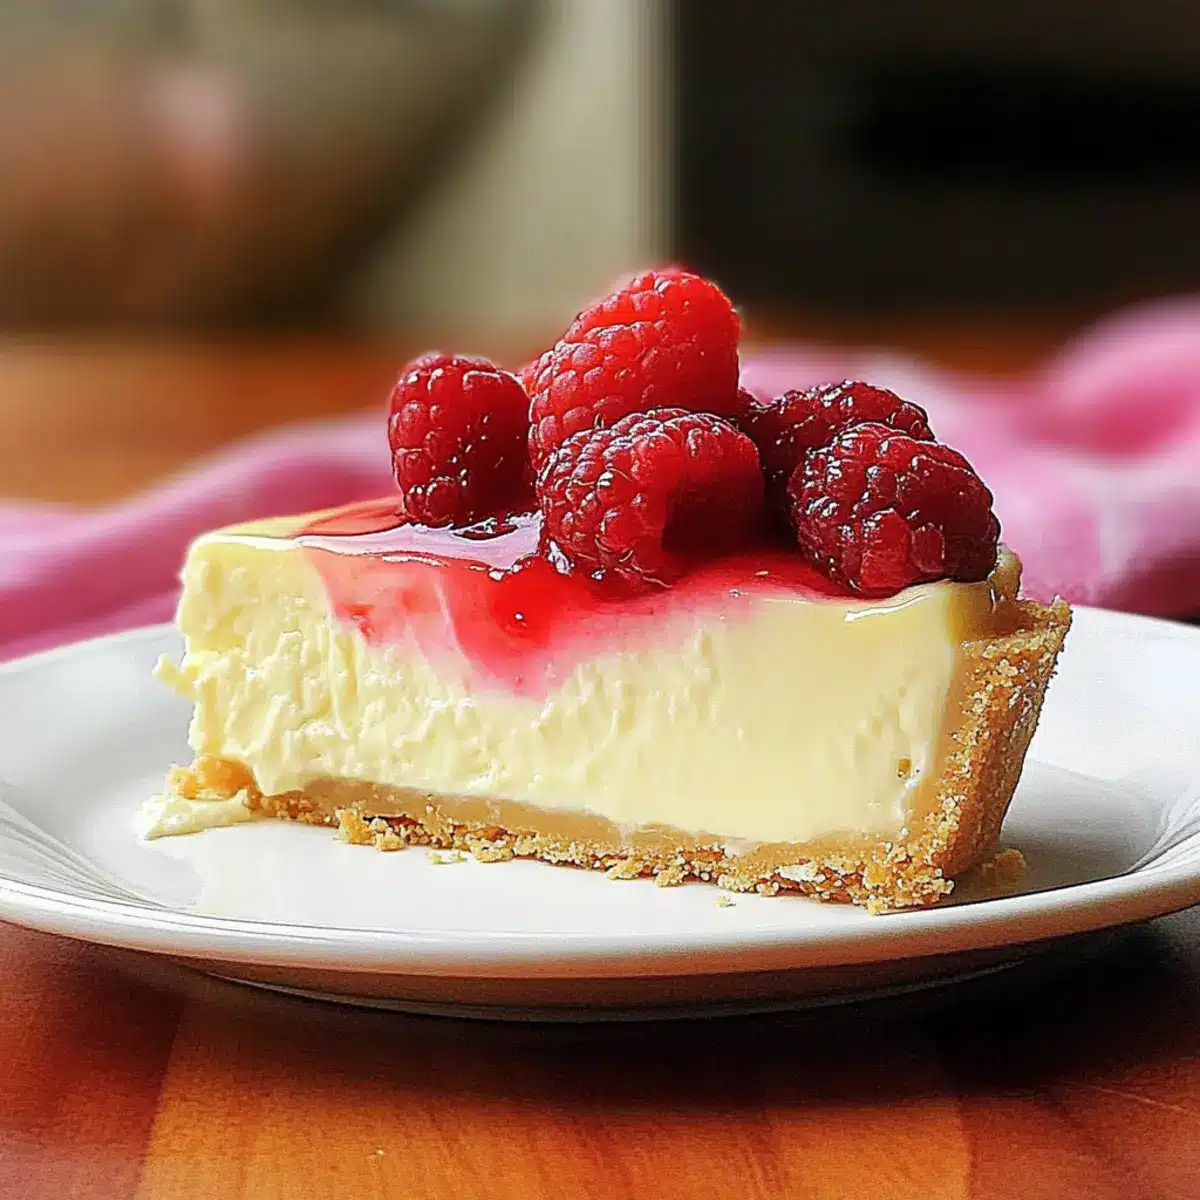
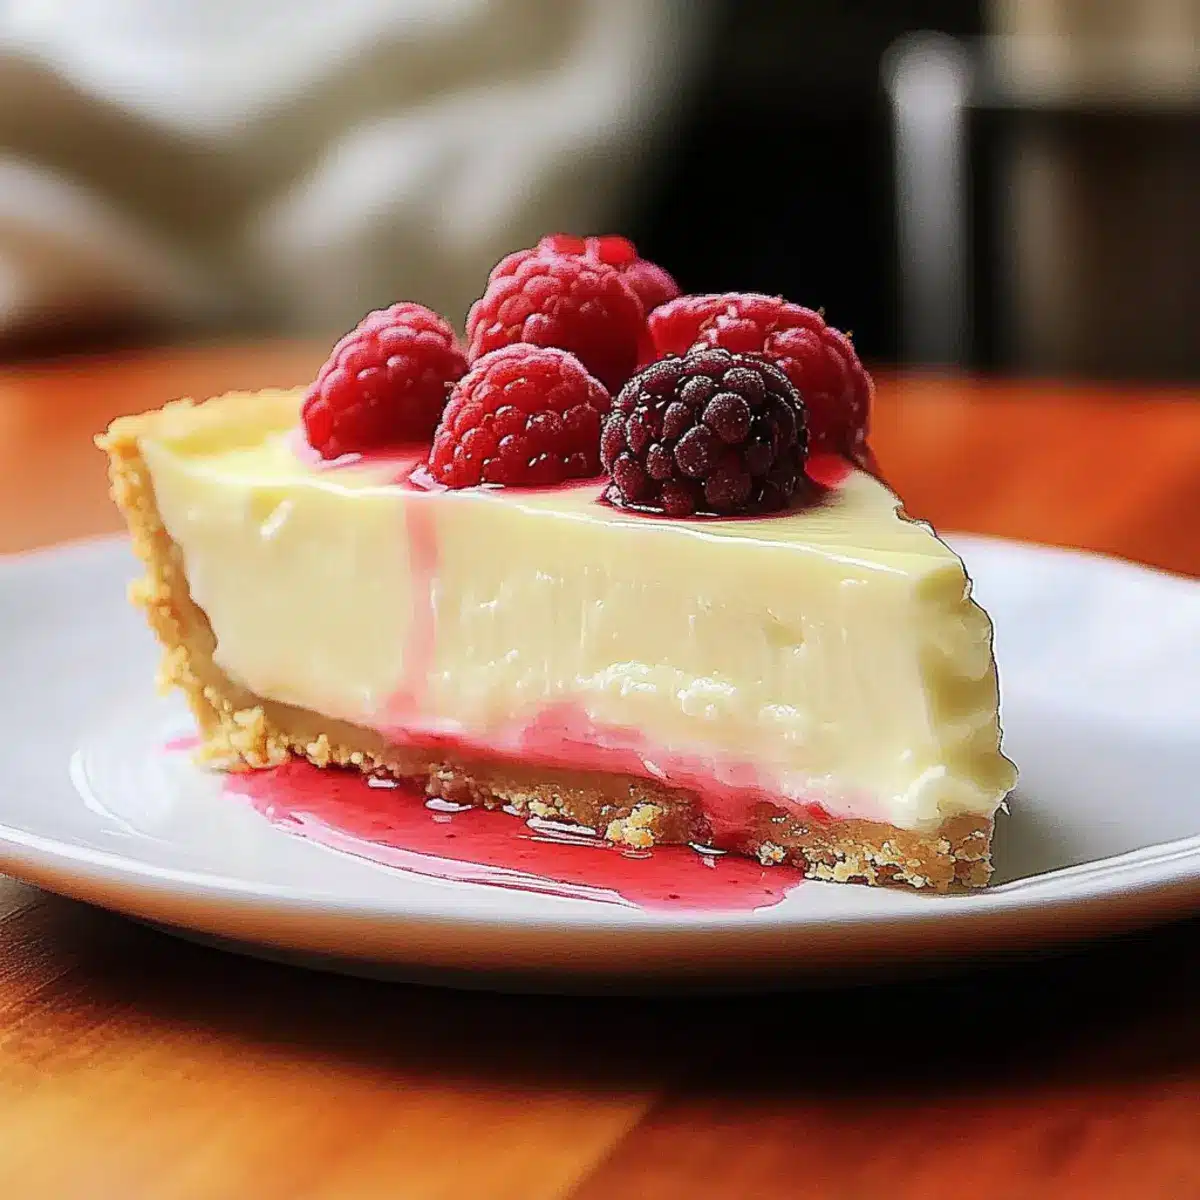
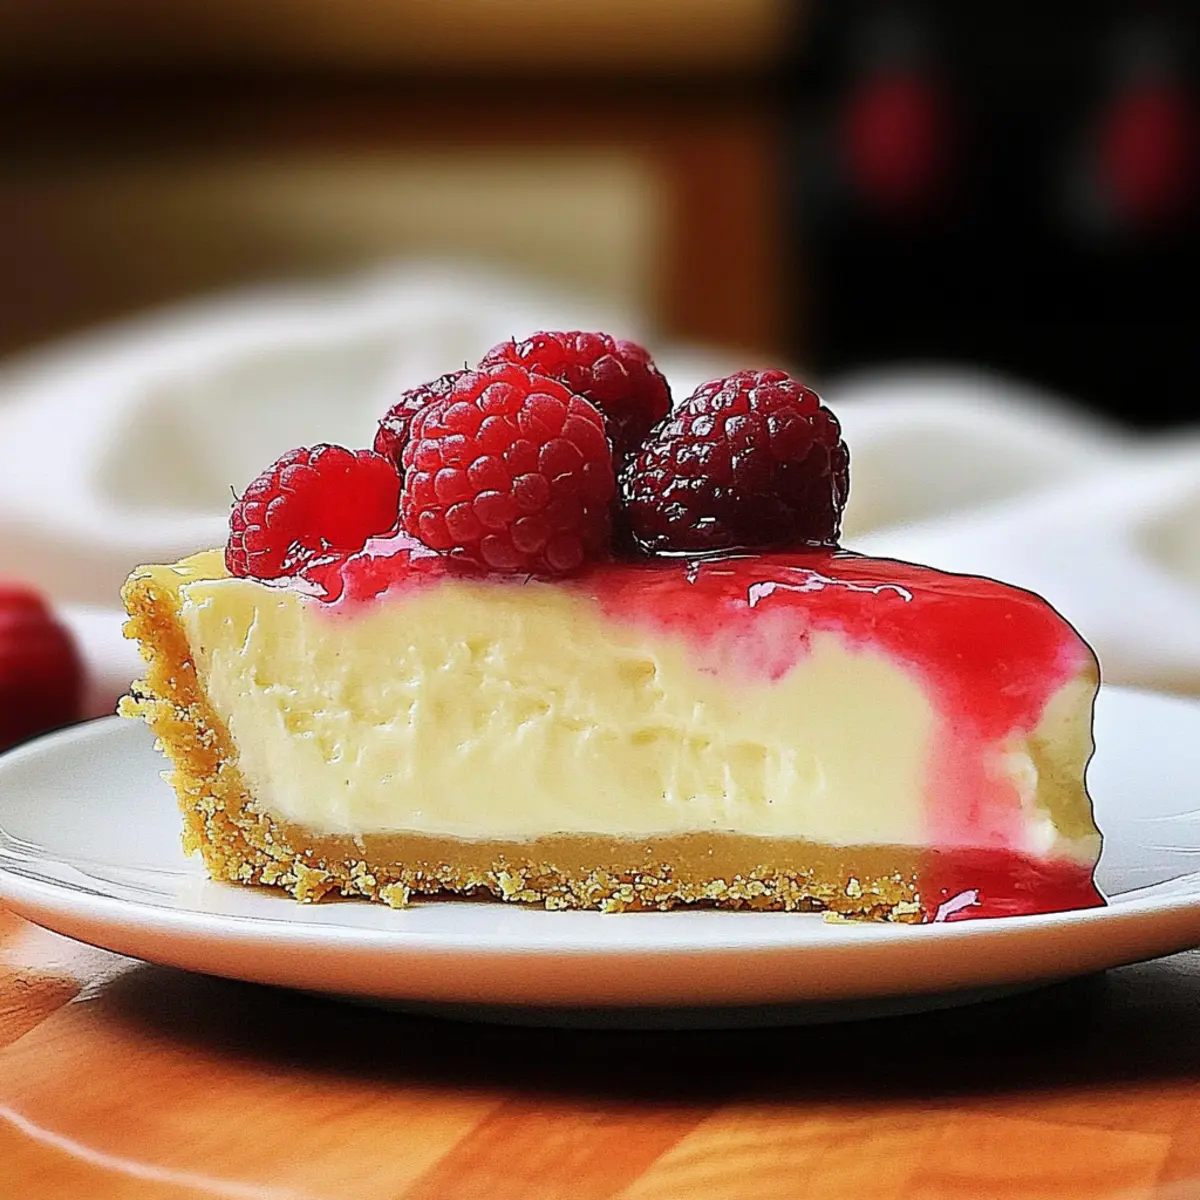
• Fresh Berries – A splash of color and freshness that pairs beautifully with the cheesecake.
• Coconut Whipped Cream – A dairy-free topping that adds an extra layer of creaminess.
• Homemade Nutella – A luscious drizzle to elevate your dessert experience!
Step‑by‑Step Instructions for Greek Yogurt Cheesecake
Step 1: Preheat the Oven
Begin by preheating your oven to 350°F (175°C). This ensures it’s hot enough to bake the cheesecake evenly. While the oven warms up, gather all your ingredients so they’re ready to go. The aroma of warmth and anticipation fills the kitchen, setting the stage for your delicious Greek Yogurt Cheesecake.
Step 2: Blend the Cheesecake Filling
In a high-powered blender or food processor, combine Greek yogurt, cream cheese or tofu, salt, pure vanilla extract, lemon juice, maple syrup, and cornstarch. Blend until the mixture is completely smooth and creamy, roughly 2-3 minutes. Keep blending until you achieve a velvety texture with no lumps—this step is crucial for your Greek Yogurt Cheesecake’s consistency.
Step 3: Prepare the Crust
If using a crust for your cheesecake, prepare it now. For a store-bought graham cracker or keto almond flour crust, simply place it in a suitable springform or pie pan. If making a homemade crust, combine your ingredients and press it firmly into the base. Once ready, pour the creamy cheesecake filling into the prepared crust, smoothing it out with a spatula.
Step 4: Bake the Cheesecake
Carefully place the cheesecake in the preheated oven and bake for approximately 50 minutes. Look for the edges to be set while the center remains slightly jiggly, indicating that it’s just underbaked for the perfect texture. This ensures your Greek Yogurt Cheesecake will remain creamy and delightful, a true indulgence without the guilt.
Step 5: Cool at Room Temperature
Once the baking time is up, turn off the oven and crack the door open slightly, allowing the cheesecake to cool slowly for about an hour. This gradual cooling process helps prevent cracks on the surface and promotes an even texture, making your Greek Yogurt Cheesecake even more visually appealing and divinely creamy.
Step 6: Chill in the Refrigerator
Transfer the cheesecake to the refrigerator and let it chill for 6-8 hours or overnight if possible. This resting period is crucial for setting the cheesecake and enhancing its flavors. The anticipation builds as you wait, knowing that your homemade Greek Yogurt Cheesecake will soon be ready to enjoy.
Step 7: Serve and Garnish
Once chilled, remove the cheesecake from the refrigerator. Carefully release it from the springform pan, if used, and transfer it to a serving platter. Feel free to garnish with fresh berries, a dollop of coconut whipped cream, or a drizzle of homemade Nutella. Your Greek Yogurt Cheesecake is now ready to be savored—a delicious, guilt-free treat!
What to Serve with Healthy Greek Yogurt Cheesecake
Elevate your dessert experience by pairing this creamy delight with the perfect accompaniments that enhance its flavors and textures.
-
Fresh Berries: A mix of strawberries, blueberries, and raspberries adds a vibrant, juicy burst, balancing the cheesecake’s richness beautifully.
-
Coconut Whipped Cream: This luscious, dairy-free topping adds extra creaminess and a hint of sweetness, complementing the cheesecake perfectly.
-
Dark Chocolate Drizzle: A warm, rich chocolate sauce provides a decadent contrast to the tangy yogurt flavor, making each bite feel indulgent.
-
Nuts and Seeds: A sprinkle of toasted almonds or sunflower seeds offers a delightful crunch and nutty flavor that pairs wonderfully with the cheesecake’s smoothness.
-
Matcha Green Tea Latte: This warm drink creates an earthy contrast that beautifully complements the cheesecake’s sweetness, making for a sophisticated pairing.
-
Homemade Nutella: Drizzle this chocolate-hazelnut spread on top for a luxurious touch, enhancing each bite with an extra layer of flavor.
-
Citrus Salad: A refreshing mix of grapefruit, orange, and mint adds a zesty brightness that cuts through the creaminess, revitalizing your palate.
-
Iced Herbal Tea: Serve a chilled glass of floral or fruity herbal tea for a refreshing, light drink that pairs harmoniously with your Greek yogurt cheesecake.
Expert Tips for Greek Yogurt Cheesecake
• Smooth Blending: Use a high-powered blender to achieve a lump-free, creamy texture. Avoid overmixing to keep your cheesecake light and airy.
• Perfect Baking: Monitor baking time closely; the center should be slightly jiggly when you take it out. Overbaking can lead to a dry cheesecake.
• Chilling is Key: Allow the cheesecake to chill for at least 6-8 hours to develop flavors and set properly. Plan ahead for the best results!
• Creative Crusts: Experiment with different crust options, like gluten-free cookies or a keto almond flour base. Each adds a unique twist to the Greek yogurt cheesecake flavor.
• Leftover Storage: Store any leftovers in an airtight container in the refrigerator for up to 4 days, or freeze for up to 3 months. This preserves the deliciousness for later!
Make Ahead Options
These Healthy Greek Yogurt Cheesecakes are perfect for meal prep enthusiasts! You can prepare the cheesecake filling up to 24 hours in advance by blending all the ingredients and storing the mixture in an airtight container in the refrigerator. This keeps the flavors fresh and ready to go. If you’re using a crust, you can assemble the cheesecake by pouring the filling into the prepared crust up to 3 days ahead of time; just cover it tightly to prevent drying out. When you’re ready to serve, bake as instructed for about 50 minutes, and then chill for 6-8 hours before enjoying. This way, you’ll have a delightful dessert waiting for you at the end of a busy day!
Greek Yogurt Cheesecake Variations
Feel free to get creative with this delightful cheesecake recipe—there’s a world of flavor waiting just for you!
-
Vegan Option: Use non-dairy yogurt in place of Greek yogurt and substitute silken tofu for cream cheese to go completely vegan. It’s just as creamy and delightful; you won’t even notice the difference!
-
Gluten-Free Crust: Swap out traditional graham crackers for gluten-free alternatives like almond flour or gluten-free cookies. These crunchy options offer the same satisfying texture without the gluten.
-
Low-Carb Delight: For a keto-friendly cheesecake, use almond flour for the crust and opt for erythritol or stevia as sweeteners. This way, you can indulge without the carbs!
-
Flavor Infusion: Experiment with flavored Greek yogurts—think lemon, raspberry, or even coconut—for a unique twist. A splash of zest can elevate your cheesecake experience to a whole new level of deliciousness.
-
Chocolate Indulgence: Add cocoa powder or melted chocolate to the filling for a chocolatey Greek yogurt cheesecake. The rich flavor will satisfy any chocolate lover’s cravings!
-
Fruity Twist: Fold in fresh berries or pureed fruit into the cheesecake mixture before baking. It not only adds flavor but creates a visually stunning marbled effect that everyone will love.
-
Citrusy Kick: Enhance the flavor with a bit of orange or lime zest. Pairing zesty citrus with Greek yogurt creates a refreshing contrast that brightens every bite.
-
Nutty Finish: Top your cheesecake with chopped nuts like almonds or pecans for a delightful crunch. A sprinkle of toasted coconut can also add an additional layer of flavor and texture.
For a truly indulgent dessert, consider garnishing your cheesecake with fresh berries and a drizzle of homemade Nutella. It might just become a new family favorite! Enjoy experimenting, and let your taste buds guide you to delicious new variations of this Healthy High-Protein Greek Yogurt Cheesecake!
How to Store and Freeze Greek Yogurt Cheesecake
Fridge: Store your Greek Yogurt Cheesecake in an airtight container for up to 4 days. This will help maintain its creamy texture and fresh flavor.
Freezer: To freeze, wrap the cheesecake tightly in plastic wrap and then foil, ensuring it’s airtight; it can last for up to 3 months.
Thawing: When ready to enjoy, transfer the cheesecake from the freezer to the fridge for 6-8 hours to thaw slowly, preserving its delightful texture.
Reheating: If you prefer a warm slice, gently reheat individual pieces in the microwave for about 15-20 seconds. Enjoy this guilt-free indulgence!
Greek Yogurt Cheesecake Recipe FAQs
What type of Greek yogurt should I use?
Absolutely! For maximum creaminess and protein, I recommend using full-fat Greek yogurt. However, if you’re looking for a lighter version, you can opt for low-fat Greek yogurt or even a vegan yogurt alternative. Just keep in mind that the consistency may vary slightly.
How long can I store the Greek Yogurt Cheesecake in the fridge?
You can keep your Greek Yogurt Cheesecake in an airtight container in the refrigerator for up to 4 days. Just ensure it’s tightly sealed to maintain its delightful creaminess and flavor.
Can I freeze the Greek Yogurt Cheesecake?
Very! To freeze your cheesecake, wrap it tightly in plastic wrap, followed by a layer of aluminum foil to prevent freezer burn. It can hold up beautifully for up to 3 months. When you’re ready to enjoy a slice, just move it to the fridge to thaw slowly for about 6-8 hours.
What should I do if my cheesecake cracks on top?
No worries, it happens! If your cheesecake cracks, you can easily disguise it with a fruit topping or whipped cream. To prevent cracking in the future, ensure you’re cooling the cheesecake gradually in the oven (with the door slightly ajar) and avoid overbaking.
Is this cheesecake suitable for people with allergies?
Absolutely! This Greek Yogurt Cheesecake is adaptable for various dietary needs. For those with lactose intolerance, substitute Greek yogurt and cream cheese with lactose-free or vegan options. Just be sure to double-check any pre-made crusts for allergens like gluten or nuts.
Greek Yogurt Cheesecake: Creamy Delight Without Guilt
Ingredients
Equipment
Method
- Preheat your oven to 350°F (175°C). Gather all your ingredients.
- Blend Greek yogurt, cream cheese or tofu, salt, vanilla extract, lemon juice, maple syrup, and cornstarch until smooth, about 2-3 minutes.
- Prepare your crust and pour the cheesecake filling into it, smoothing it with a spatula.
- Bake the cheesecake for approximately 50 minutes until the edges are set and the center is slightly jiggly.
- Turn off the oven and crack the door slightly, allowing the cheesecake to cool for about an hour.
- Transfer the cheesecake to the refrigerator and chill for 6-8 hours or overnight.
- Remove from the refrigerator, garnish with toppings, and enjoy your delicious Greek Yogurt Cheesecake.
Leave a Reply