
As I rummaged through my pantry last week, I stumbled upon a jar of Biscoff cookie butter, and my mind sparked with inspiration. Why not create a no-bake vegan Biscoff cheesecake? The creamy, tangy goodness of this delightful dessert feels both indulgent and surprisingly light, making it the perfect treat for any occasion. With a crunchy biscuit base and the velvety touch of vegan cream cheese, it’s incredibly easy to whip up without the fuss of baking. Not to mention, it’s a wonderful crowd-pleaser that will leave your guests begging for the secret behind its luscious flavor. Ready to treat yourself and impress your friends? Let’s dive into this delicious adventure together!
Why is This Cheesecake So Irresistible?
Easy to Make: The no-bake method means you can whip this cheesecake up in no time, making it ideal for busy days or unexpected guests.
Deliciously Indulgent: With rich Biscoff flavor and a creamy texture, it’s a dessert that feels decadent while being completely vegan!
Crowd-Pleasing: Perfect for parties or family gatherings, this cheesecake is sure to impress everyone at the table. Serve it alongside a slice of my Strawberry Swirl Cheesecake for even more variety!
Versatile Toppings: Drizzle with warm Biscoff or sprinkle with crushed cookies for that extra touch that makes each bite heavenly.
Nutritious Twist: Made from wholesome ingredients, this cheesecake is dairy-free and aligns with vegan dietary choices, so you can indulge without guilt!
Vegan Biscoff Cheesecake Ingredients
For the Crust
• Biscoff Cookies – Use a full pack for the crust and save some for decoration.
• Vegan Block Butter – Melted for easy mixing, it binds the crust together; coconut oil can be a good substitute.
For the Filling
• Vegan Cream Cheese – Choose a firm-textured brand for optimal results; avoid low-fat versions for the best creaminess.
• Vegan Greek Style Yogurt – This lightens the filling and contributes a soft texture; you can swap it for more cream cheese if desired.
• Smooth Biscoff Cookie Butter – Enriches the filling with its delicious flavor; have extra on hand for drizzling.
• Lemon Juice – Adds a nice tanginess to balance the sweetness of the Biscoff spread.
• Vanilla Extract – Enhances the overall flavor profile of the filling.
• Vegan Whipping Cream – Creates that airy texture; make sure it can form stiff peaks for the filling.
• Icing (Powdered) Sugar – Sweetens the filling slightly and stabilizes the whipped cream mixture.
This Vegan Biscoff Cheesecake is not only simple to prepare but offers a taste experience incredibly difficult to resist—perfect for anyone looking to indulge without compromising on their dietary choices!
Step‑by‑Step Instructions for Vegan Biscoff Cheesecake
Step 1: Prepare the Base
Begin by crushing the Biscoff cookies into fine crumbs using a food processor or a rolling pin. Melt the vegan block butter in a small saucepan or microwave until fully liquid. Combine the cookie crumbs with the melted butter in a mixing bowl until the mixture resembles damp sand. Firmly press this mixture into the base of a lined 20 cm/8 in springform tin, ensuring an even layer for the crust.
Step 2: Make the Filling
In a large mixing bowl, add the vegan cream cheese, vegan Greek yogurt, smooth Biscoff cookie butter, fresh lemon juice, and vanilla extract. Using an electric mixer, whisk the ingredients on medium speed until you achieve a smooth and creamy consistency, approximately 3–5 minutes. Pay attention to avoiding lumps, as you want a silky filling for your Vegan Biscoff Cheesecake.
Step 3: Whip Cream
In a separate bowl, pour in the vegan whipping cream and icing (powdered) sugar. With a hand mixer or stand mixer, beat the cream on high speed until stiff peaks form. This should take about 4–6 minutes, and the cream should be light and fluffy. Properly whipped cream will help create that airy texture in your cheesecake filling.
Step 4: Combine Mixtures
Gently fold the whipped cream into the Biscoff mixture using a spatula. Be careful not to overmix, as you want to retain the lightness of your whipped cream. Use a folding motion to combine until just incorporated, ensuring a harmonious blend of flavors and textures in your Vegan Biscoff Cheesecake filling.
Step 5: Assemble Cheesecake
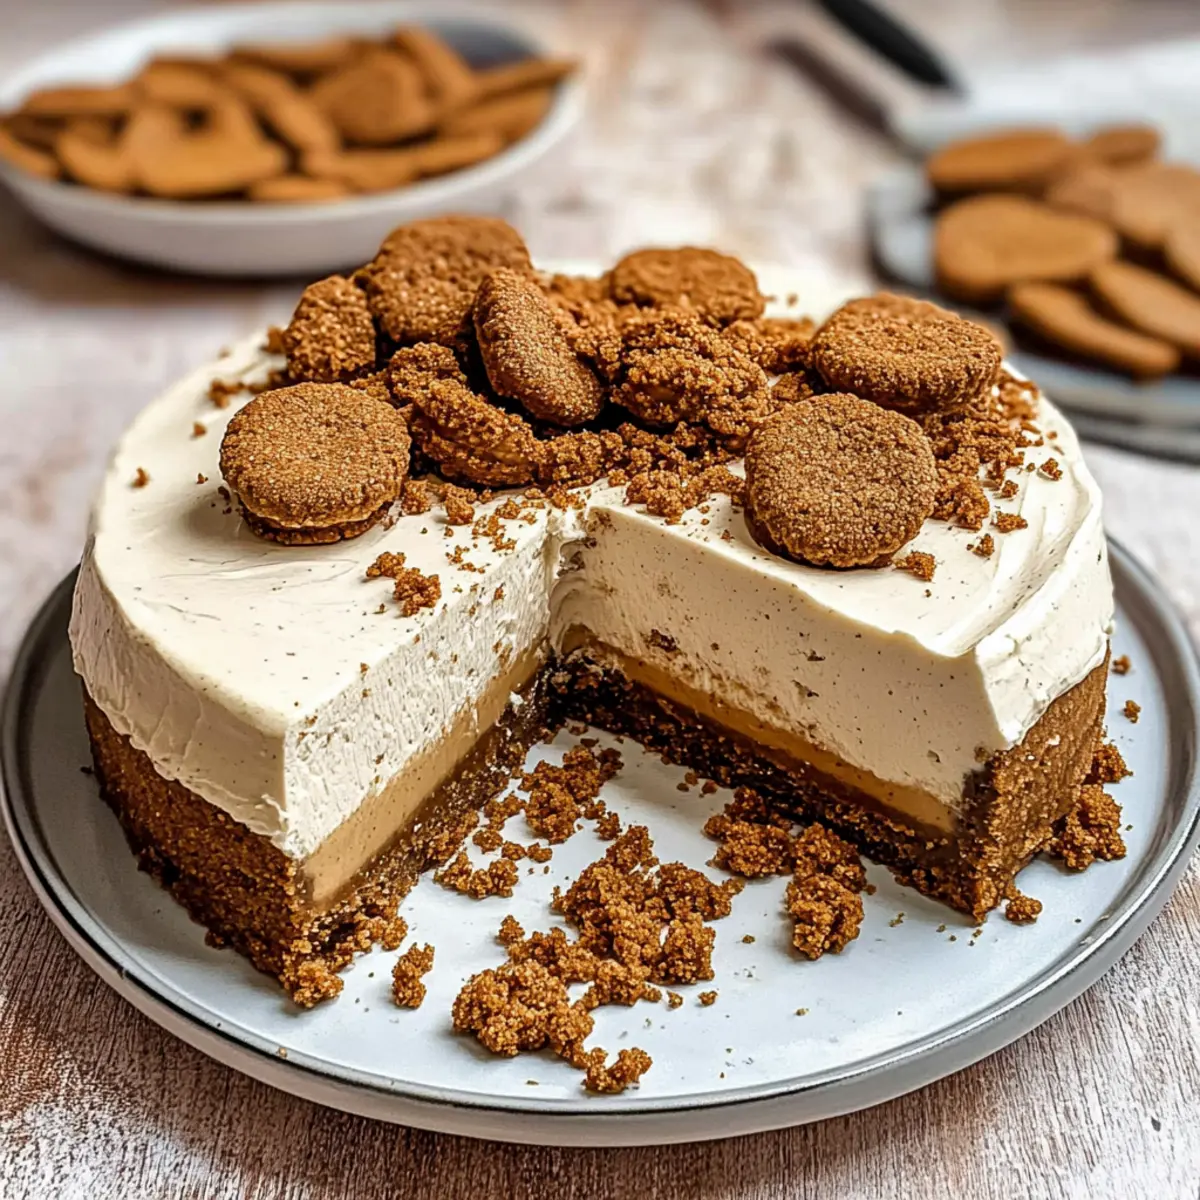
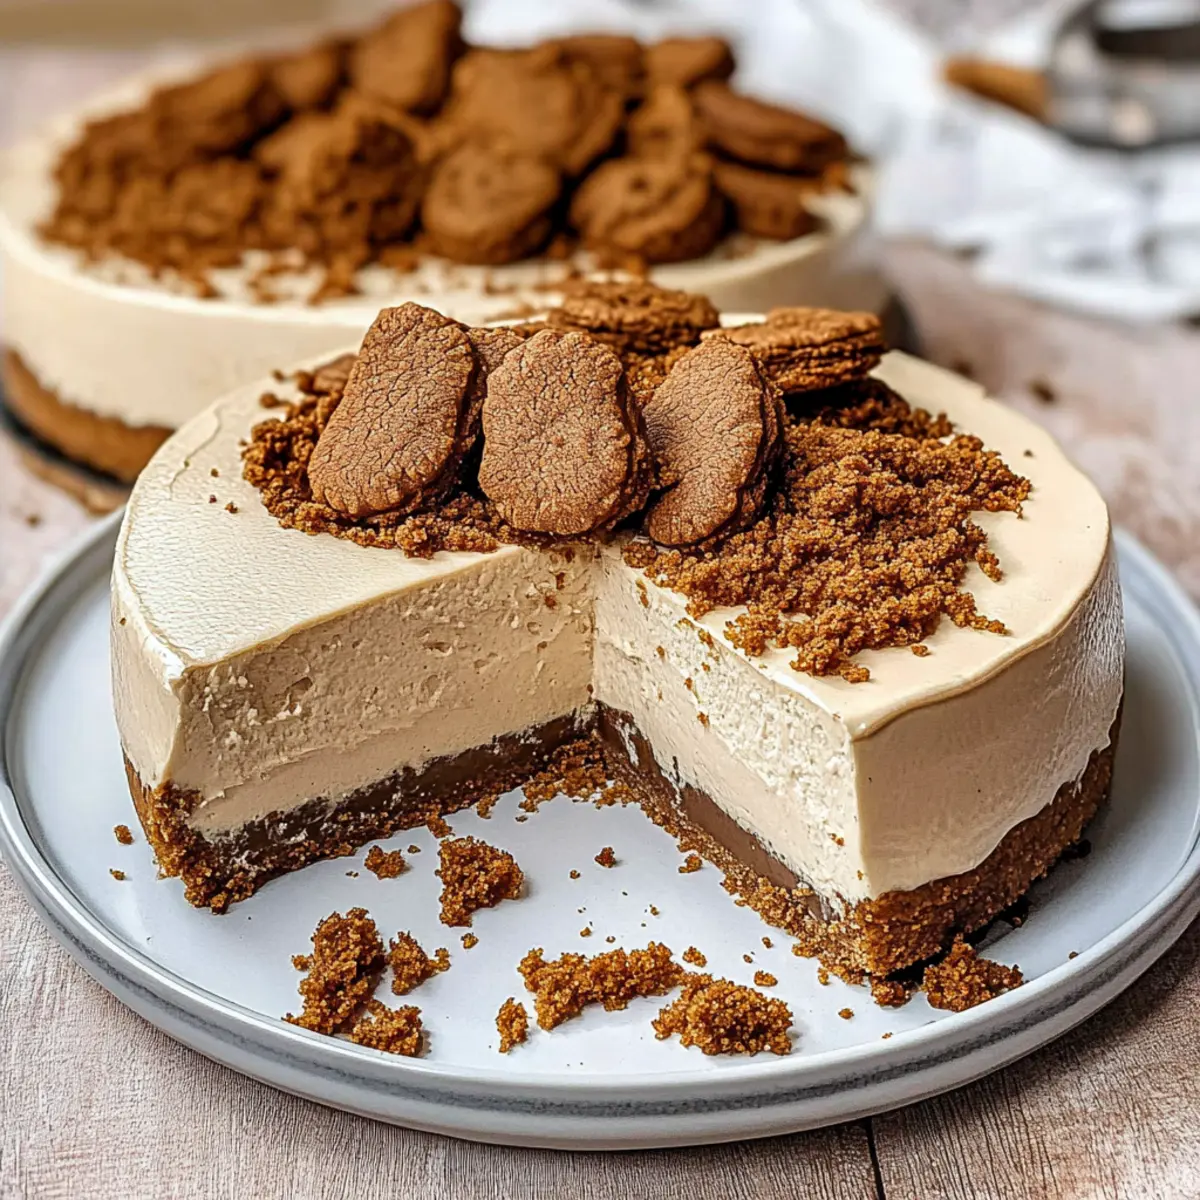
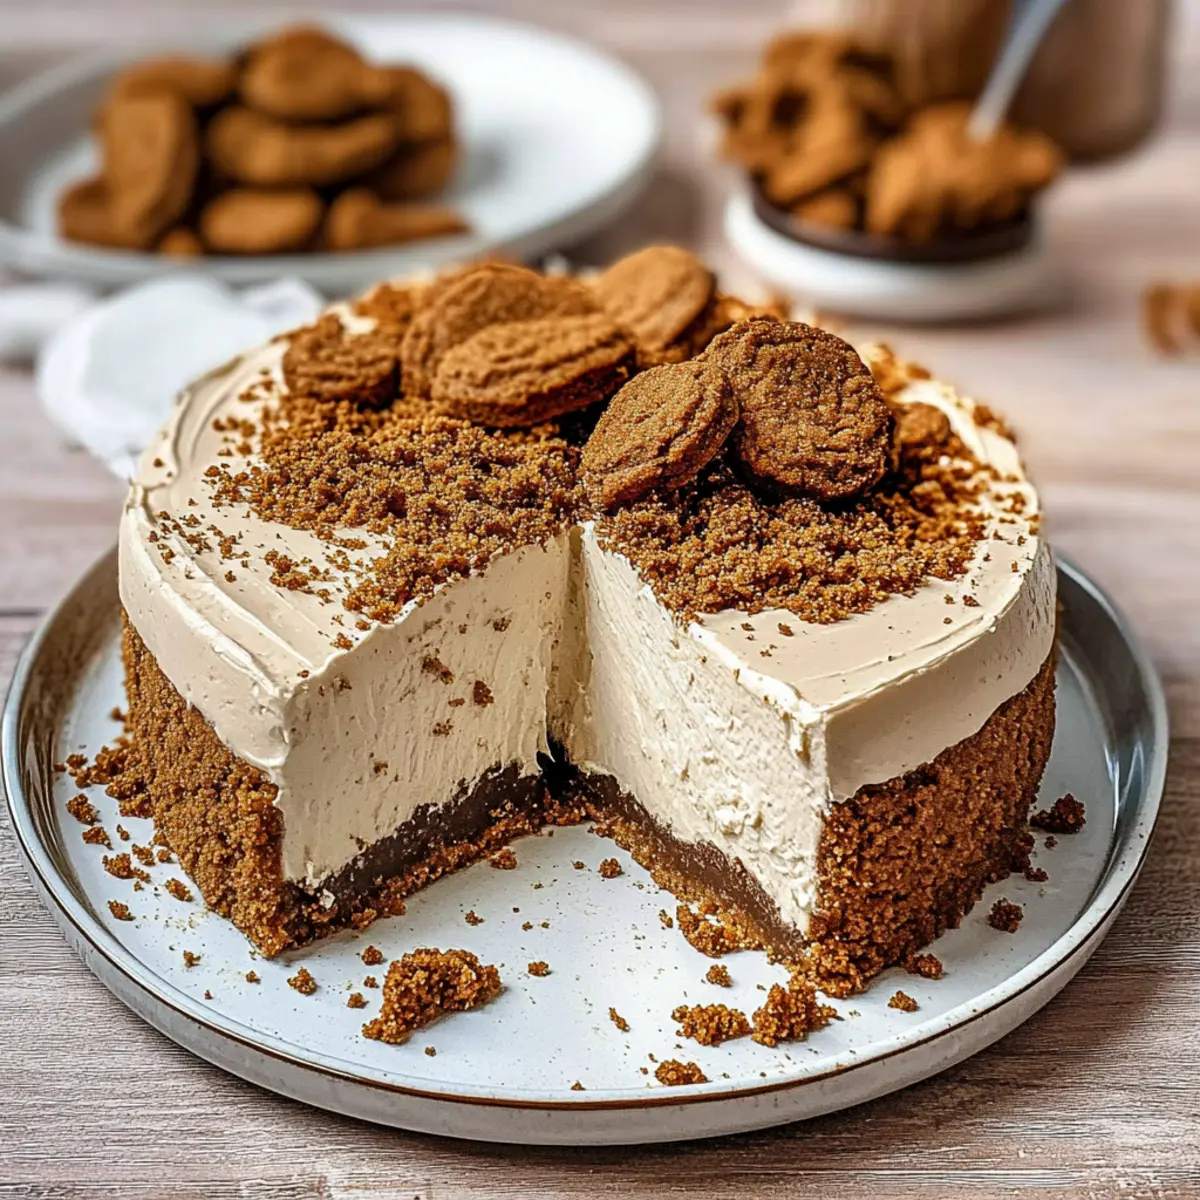
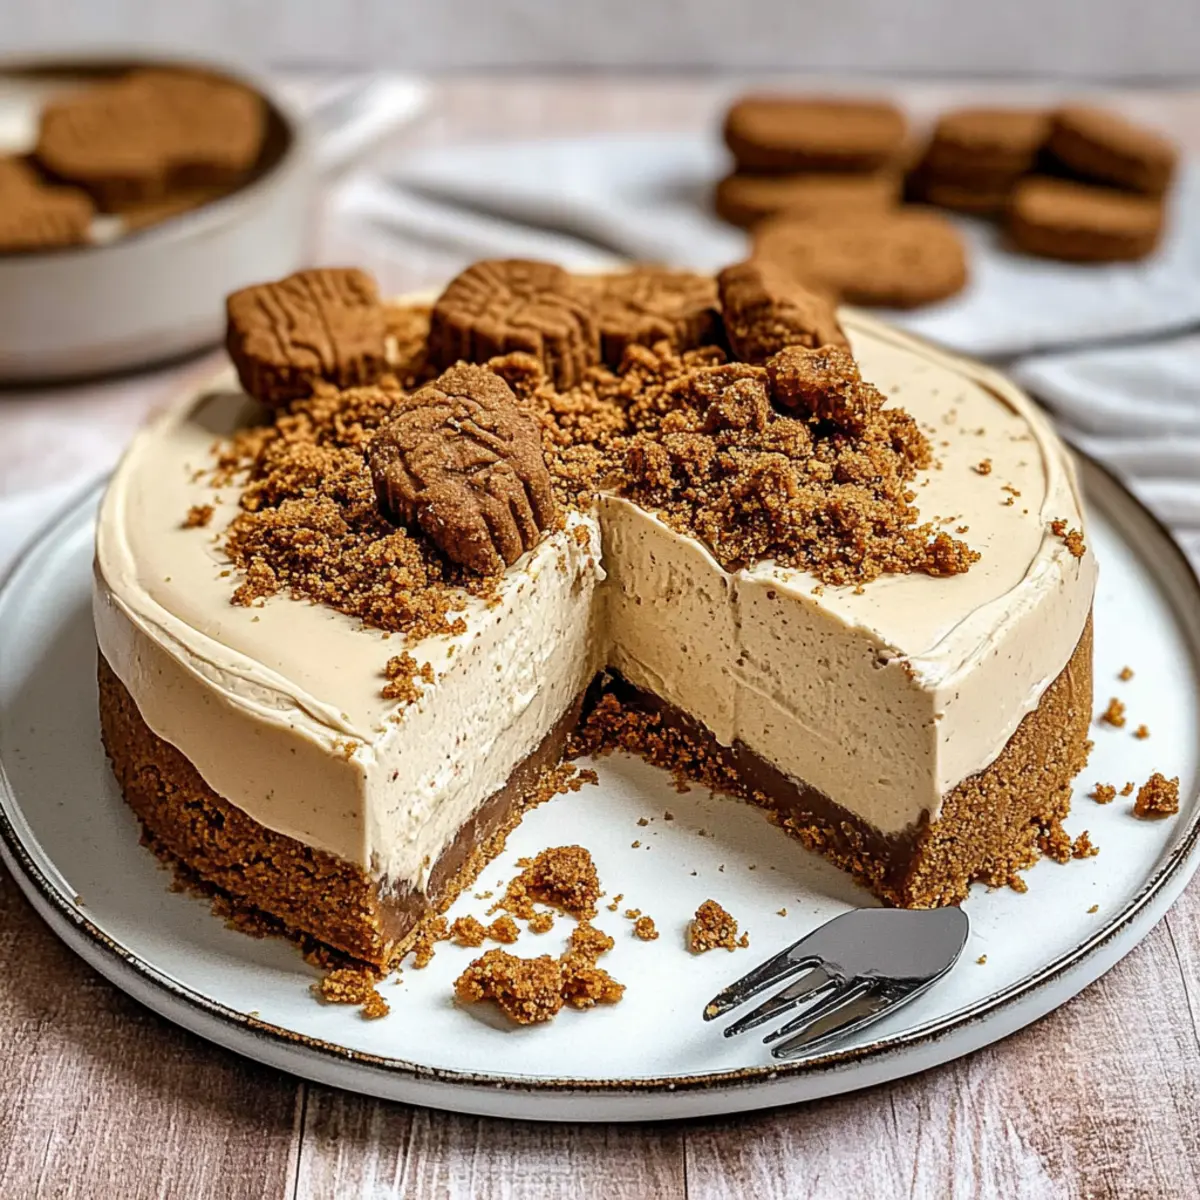
Transfer the luscious filling into the prepared crust, smoothing it out with a spatula to create an even surface. Cover the springform tin with plastic wrap or a lid, and refrigerate the cheesecake for at least 6 hours, or preferably overnight for ideal setting. This time allows the flavors to meld beautifully and the texture to firm up perfectly.
Step 6: Serve
Once chilled and set, carefully remove the cheesecake from the springform tin. Drizzle warmed Biscoff spread generously on top and optionally sprinkle crushed Biscoff cookies for an extra touch of deliciousness. Slice and serve your Vegan Biscoff Cheesecake to delighted friends and family, reveling in this creamy, decadent treat!
What to Serve with No-Bake Vegan Biscoff Cheesecake
The delightful creaminess of this cheesecake pairs beautifully with a variety of accompaniments to create a memorable meal experience.
-
Fresh Berries: The tartness of strawberries, raspberries, or blueberries adds a refreshing contrast to the rich cheesecake.
-
Coconut Whipped Cream: Light and airy, this complements the cheesecake’s smooth texture while adding a hint of tropical flavor. It’s a perfect match!
-
Chocolate Drizzle: A rich chocolate sauce drizzled over the cheesecake enhances the Biscoff goodness and adds a touch of indulgence that’s hard to resist.
-
Almond Biscotti: Crunchy, slightly sweet, and perfect for dipping, these cookies provide a wonderful texture contrast alongside each creamy bite of cheesecake.
-
Mint Tea: A soothing cup of mint tea offers a refreshing palate cleanse and complements the dessert’s sweetness beautifully.
-
Vegan Ice Cream: Creamy, dairy-free ice cream serves as a delightful sidekick, perfect for those wanting extra richness with their slice of cheesecake.
-
Citrus Salad: A mix of citrus fruit with a drizzle of honey adds a bright, zesty touch that balances the dessert’s sweetness.
-
Sparkling Cider: This bubbly, non-alcoholic option brings a festive feel to the table while enhancing the cheesecake’s flavors with its crispness.
Expert Tips for Vegan Biscoff Cheesecake
• Choose Quality Ingredients: Opt for firm-textured vegan cream cheese to ensure a rich, creamy filling. Avoid low-fat options that might compromise texture.
• Whip It Right: Use a high-quality vegan whipping cream that easily forms stiff peaks. Properly whipped cream is key to a light Vegan Biscoff Cheesecake.
• Chill Time Matters: While you can refrigerate for 6 hours, overnight is best for a firmer cheesecake. If in a hurry, consider using the freezer to speed up the setting.
• Avoid Overmixing: When folding the whipped cream into the Biscoff mixture, be gentle. Overmixing can deflate the airiness you worked hard to achieve.
• Keep It Lined: Always line both the base and sides of your springform tin to prevent sticking. This ensures a clean and easy removal of your cheesecake.
How to Store and Freeze Vegan Biscoff Cheesecake
Fridge: Keep your Vegan Biscoff Cheesecake covered in the fridge for up to 3 days for optimal flavor and texture. A tight seal will prevent it from absorbing other odors.
Freezer: For longer storage, freeze your cheesecake for up to 2 months. Wrap securely in plastic wrap, then foil, to maintain its delicious flavor and texture.
Thawing: When ready to enjoy, transfer the cheesecake to the fridge and let it thaw for 15 minutes before serving. This will ensure it regains its creamy consistency.
Reheating: There’s no need to heat this cheesecake; simply enjoy it chilled as the rich flavors are best savored cold!
Make Ahead Options
These Vegan Biscoff Cheesecakes are perfect for meal prep enthusiasts! You can prepare the crust and the filling up to 24 hours in advance. To make ahead, simply crush the Biscoff cookies and mix them with melted vegan butter, then press this mixture into a lined springform tin. For the filling, combine the vegan cream cheese, yogurt, Biscoff spread, lemon juice, and vanilla, then refrigerate it separately until you’re ready to assemble. When you’re set to serve, pour the filling over the crust, smooth the top, and refrigerate for at least 6 hours (overnight is best) to firm up. This way, you’ll have a delightful dessert ready with minimal effort while maintaining its creamy texture and delicious flavor!
Vegan Biscoff Cheesecake Variations
Feel free to add your own twist to this delightful cheesecake and make it truly yours!
- Gluten-Free Option: Substitute Biscoff cookies with gluten-free cookies or make a crust from almonds and dates for a nutty flavor.
- Flavor Infusion: Add spices like cinnamon or nutmeg to the filling for a warm, spiced vibe that complements the sweetness.
- Chocolate Delight: Incorporate melted dark vegan chocolate into the filling for an indulgent chocolate Biscoff cheesecake experience.
- Nutty Crunch: Fold in crushed nuts like walnuts or pecans into the filling for added texture and a delightful crunch.
- Sweetener Swaps: Use maple syrup or agave nectar instead of icing sugar for a less processed sweetener while still achieving that sweetness.
- Layered Delight: Create a layered dessert by alternating layers of Biscoff filling with layers of a fruit puree, like raspberry or strawberry.
- Fruity Twist: Top your cheesecake with fresh berries or sliced bananas for a burst of freshness and natural sweetness.
- Extra Creamy: For an even creamier filling, increase the amount of vegan cream cheese, reducing the yogurt content for a more luxurious texture.
With endless possibilities, your creation can be uniquely tailored for any gathering—check out my delicious Churro Cheesecake Indulge for more inspiration!
Vegan Biscoff Cheesecake Recipe FAQs
What type of Biscoff cookies should I use?
Absolutely! Use the classic Biscoff cookies for the crust. They provide the ideal sweet and crunchy texture. If you prefer a different flavor, feel free to substitute with graham crackers or another cookie, though this may affect the vegan status.
How long can I store this cheesecake in the fridge?
You can keep your Vegan Biscoff Cheesecake in the fridge for up to 3 days. Make sure to cover it well to prevent it from absorbing other odors, which can impact the delicious flavor.
Can I freeze the Vegan Biscoff Cheesecake?
Very! For longer storage, you can freeze your cheesecake for up to 2 months. To do so, wrap the cheesecake securely in plastic wrap and then in aluminum foil. This helps maintain its wonderful texture and flavor.
How do I thaw the cheesecake once it’s frozen?
When you’re ready to dig in, start by transferring the cheesecake to the fridge. Allow it to thaw for about 15 minutes before serving for the best creamy consistency. There’s no need to heat it; this cheesecake is best enjoyed chilled!
What if my cheesecake is not setting properly?
If your cheesecake isn’t firm after chilling, it may need additional time in the fridge or freezer. Ensure you’ve whipped your cream to stiff peaks, as this lightens the filling. If using coconut oil, make sure it’s not too warm while mixing, as it can cause the mixture to remain runny.
Is this cheesecake safe for those with allergies?
This Vegan Biscoff Cheesecake is dairy-free, making it suitable for vegans. However, it may contain allergens related to gluten, so check the cookie packaging if you or your guests have gluten sensitivities. Always consider individual allergies when serving!
Irresistible Vegan Biscoff Cheesecake That's No-Bake Delicious
Ingredients
Equipment
Method
- Begin by crushing the Biscoff cookies into fine crumbs using a food processor or a rolling pin. Melt the vegan block butter and combine with the cookie crumbs. Press into the base of a lined springform tin.
- In a large mixing bowl, add the vegan cream cheese, vegan Greek yogurt, Biscoff cookie butter, lemon juice, and vanilla extract. Whisk until smooth and creamy.
- In a separate bowl, beat the vegan whipping cream and icing sugar until stiff peaks form.
- Gently fold the whipped cream into the Biscoff mixture until just incorporated.
- Transfer the filling into the prepared crust and smooth out the surface. Cover and refrigerate for at least 6 hours or overnight.
- Once set, remove from the tin, drizzle with Biscoff spread, and sprinkle crushed cookies before serving.
Leave a Reply