
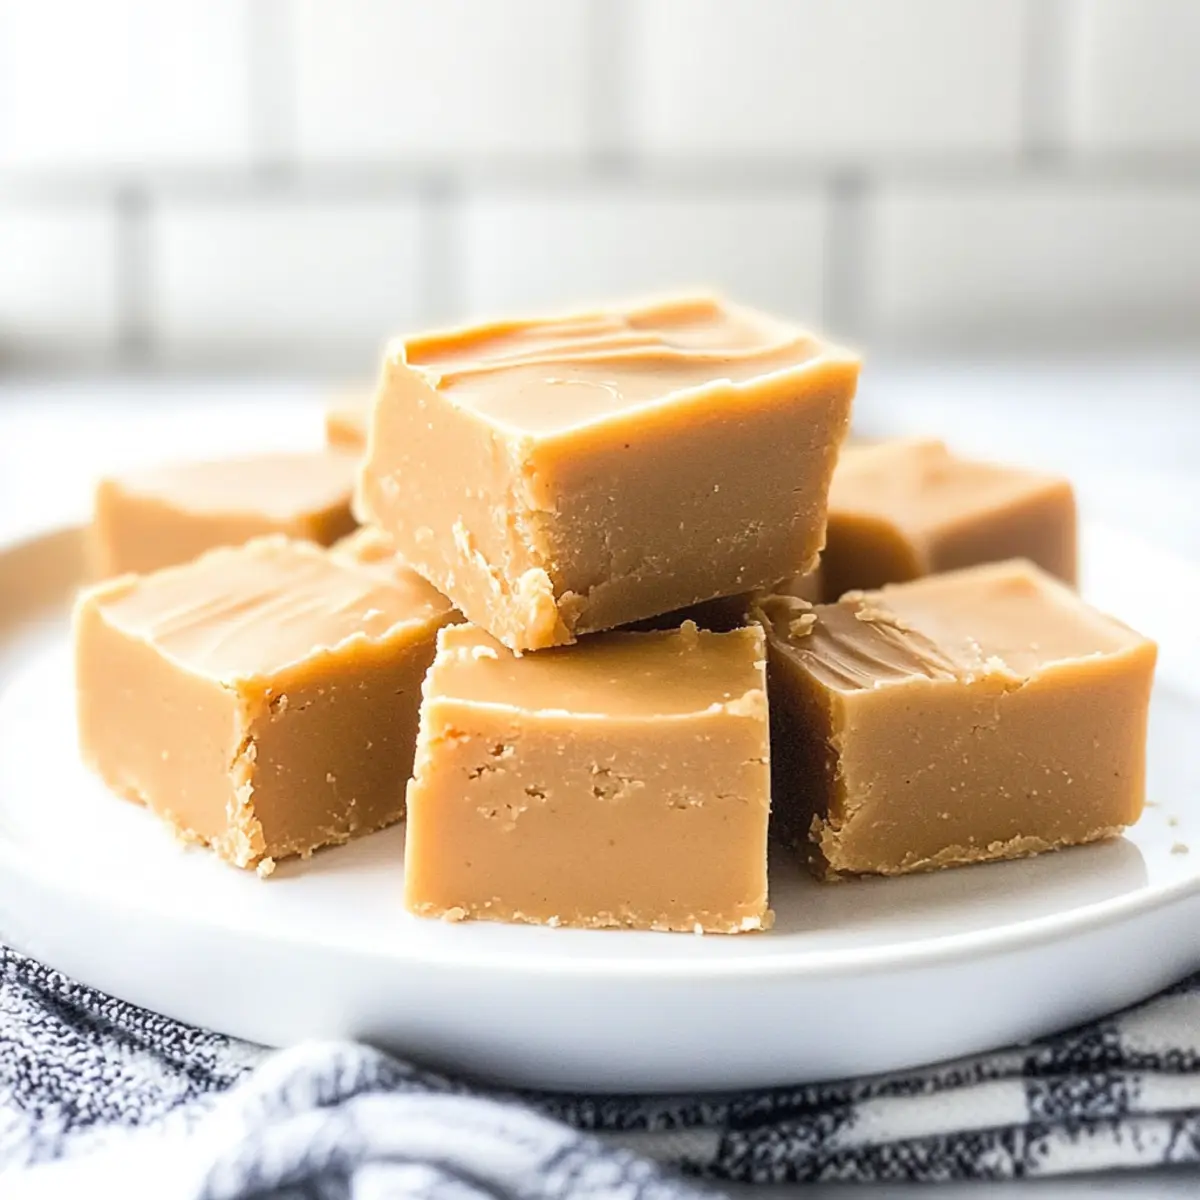
There’s something special about a sweet treat that beckons you back to simpler times. This Easy Peanut Butter Fudge recipe does exactly that, conjuring warm memories of my childhood, where the kitchen was alive with laughter and the scent of melting chocolate. With just a handful of simple ingredients, you’ll find yourself crafting a creamy, no-bake dessert that not only satisfies your sweet cravings but also brings joy to anyone who tries it. This peanut butter fudge is incredibly quick to prepare, making it a perfect last-minute gift or festive addition to any dessert tray. Plus, its smooth texture and rich flavor will have everyone asking for seconds. Are you ready to whip up a batch and indulge in a delightful nostalgia trip?
Why is this Peanut Butter Fudge a must-try?
Creamy, Dreamy Bliss: This Easy Peanut Butter Fudge is a celebration of flavors, combining creamy peanut butter with sweet, smooth textures that melt in your mouth.
Quick and Simple: With just 10 minutes of prep time, you can whip up this no-bake dessert that’s perfect for any occasion.
Crowd-Pleasing Treat: Ideal for holiday gift-giving or potluck desserts, everyone loves a homemade fudge treat!
Nostalgic Flavors: Relive the joy of childhood with every bite, reminiscent of Grandma’s kitchen delights.
Versatile and Delicious: Customize your fudge with chocolate chips or nuts for an extra twist, or enjoy it as-is for that classic flavor.
If you enjoy quick treats, be sure to check out our amazing Garlic Butter Chicken for another delicious, easy recipe that you can make in no time!
Peanut Butter Fudge Ingredients
• To make your Easy Peanut Butter Fudge, gather these simple ingredients!
For the Fudge Base
- Granulated Sugar – This is what sweetens the fudge and provides structure; avoid using powdered sugar for a smoother finish.
- Milk – Adds creaminess and moisture; whole milk is the best choice for achieving a rich texture.
- Vanilla Extract – Enhances the overall flavor; for a unique twist, substitute with almond extract.
- Creamy Peanut Butter (¾ cup) – The star of your peanut butter fudge; choose a brand like Jif for a perfect creamy consistency, as natural brands can separate.
Optional Toppings
- Chocolate Chips – Stir in for a delicious chocolate-peanut butter combo; semi-sweet or milk chocolate works beautifully.
- Crushed Nuts – Add these for a delightful crunch and extra flavor; pecans or peanuts are great choices.
Preparing this Easy Peanut Butter Fudge is a breeze with these key ingredients!
Step‑by‑Step Instructions for Peanut Butter Fudge
Step 1: Combine Sugar and Milk
In a medium saucepan, mix together granulated sugar and milk over medium-low heat. Stir continuously until the mixture begins to simmer gently, which should take about 2–3 minutes. You’ll know it’s ready when small bubbles start to appear around the edges. This process is essential for creating the smooth texture of your peanut butter fudge.
Step 2: Boil the Mixture
Allow the mixture to come to a full boil, cooking for 2 ½ minutes while stirring frequently to avoid burning. The boiling process is crucial; you want it to bubble continuously, creating a thick syrup-like consistency. Keep a close eye on it, as constant stirring promotes even cooking and helps maintain that velvety texture perfect for fudge.
Step 3: Incorporate Peanut Butter and Vanilla
Once the boiling time is complete, remove the saucepan from heat immediately. Stir in the creamy peanut butter and vanilla extract, mixing vigorously until everything is completely blended and smooth. The mixture should look glossy and luscious, indicating that your peanut butter fudge is coming together beautifully. Ensure no lumps remain for that ideal texture.
Step 4: Cool and Set
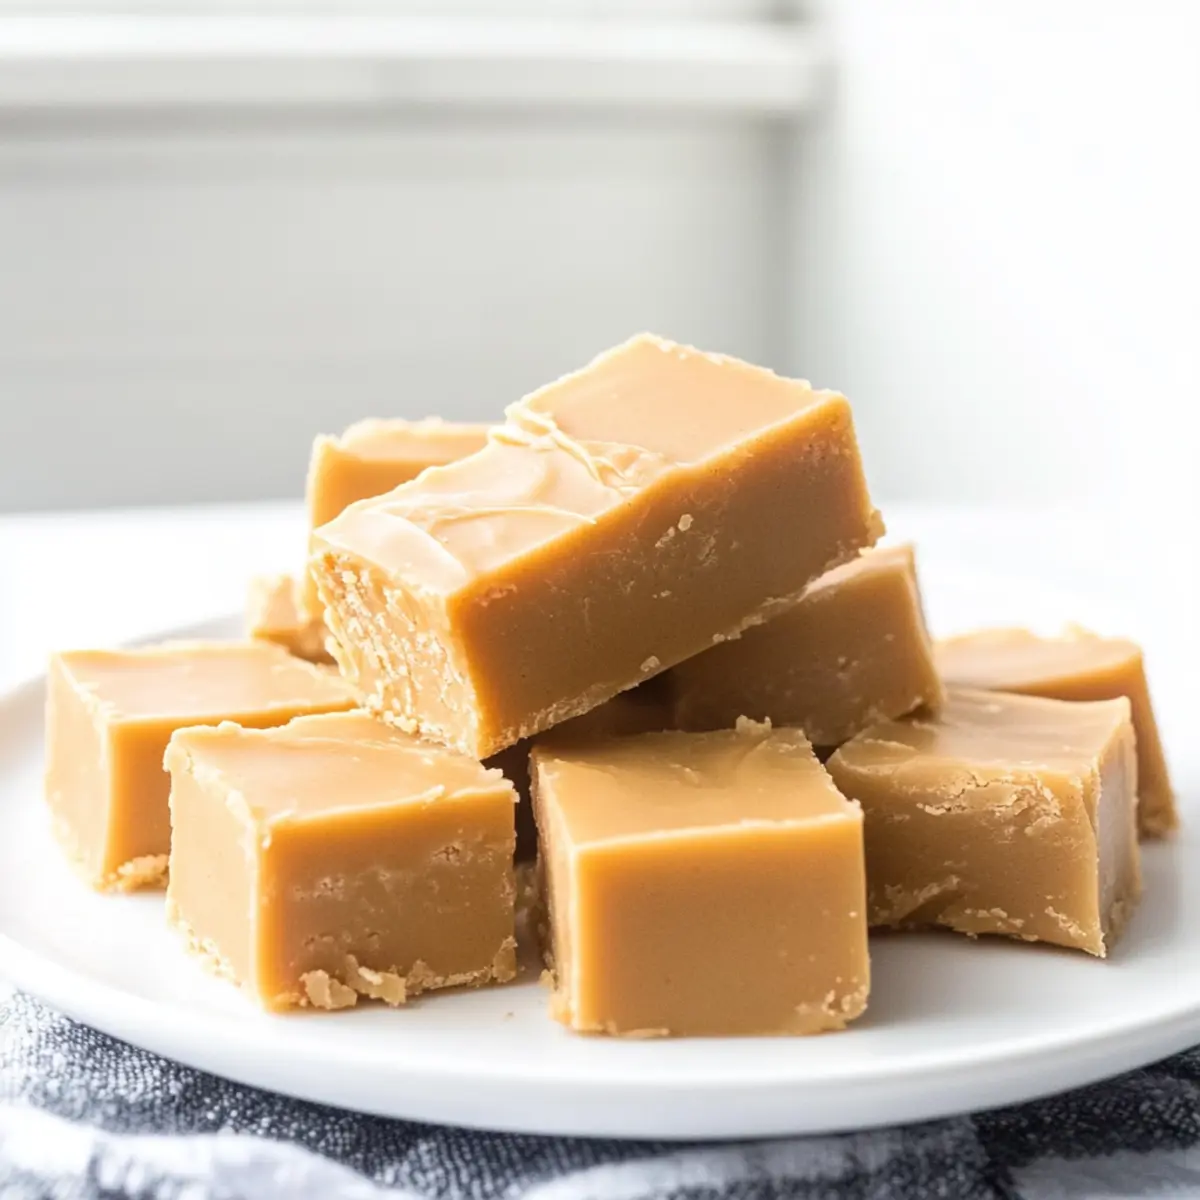
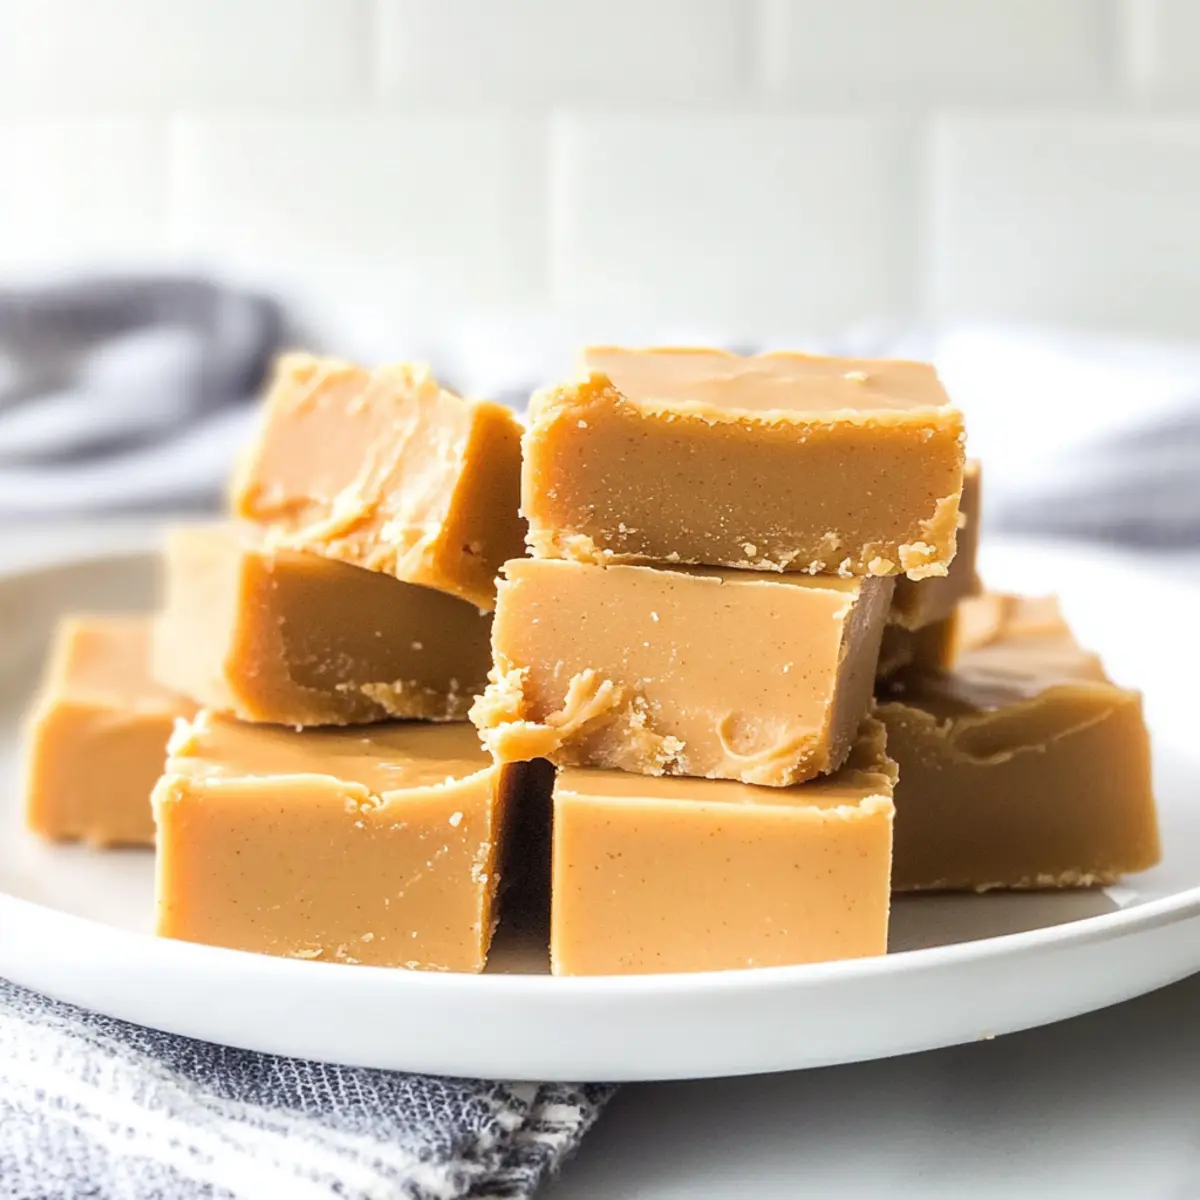
Pour the smooth mixture into a lightly greased 8×8 dish lined with parchment paper, spreading it evenly with a spatula. Let the fudge cool completely at room temperature, which may take about 1–2 hours. You’ll know it’s ready when it firms up and holds its shape but still has a slight softness, making it easy to cut into squares later on.
Peanut Butter Fudge Variations & Substitutions
Get ready to explore delightful twists and personal touches on your homemade peanut butter fudge!
- Crunchy Peanut Butter: Swap creamy for crunchy peanut butter to add delightful texture and a nutty bite to your fudge.
- Chocolate Swirl: Stir in melted chocolate chips for a rich, dreamy chocolate-peanut butter swirl that elevates the flavor. This decadent combination is sure to satisfy any sweet tooth.
- Nutty Add-Ins: Toss in chopped nuts like pecans or walnuts for extra crunch; they enhance the taste and provide a delightful contrast in texture.
- Dairy-Free: Use almond milk and coconut cream instead of regular milk for a dairy-free version that’s just as creamy and delicious.
- Flavored Extract: Mix in a touch of maple extract alongside the vanilla for a subtle hint of maple flavor that complements the peanut butter beautifully.
- Spicy Kick: Add a pinch of cayenne pepper or crushed red pepper flakes for a surprising warmth that contrasts wonderfully with the sweetness.
- Oreo Crust: Press crushed Oreo cookies into the bottom of your dish before pouring on the fudge mixture for a chocolate cookie crust twist. This adds an irresistible crunch and flavor!
- Whipped Topping: Spread a layer of whipped cream on top once the fudge has set, and sprinkle crushed chocolate or peanut butter candies for an extra treat that looks as good as it tastes!
If you find these variations inspiring, you might also enjoy whipping up some delicious Garlic Butter Chicken as a savory counterpart to your sweet fudge creations!
Expert Tips for Peanut Butter Fudge
-
Stir Constantly: To avoid burning or graininess, make sure to stir the fudge mixture continuously while it boils.
-
Boiling Time Matters: If your fudge is too soft after cooling, you may not have boiled it long enough; ensure it bubbles for the full 2 ½ minutes.
-
Choose the Right Peanut Butter: For a silky texture, stick with creamy brands like Jif; natural peanut butter may separate and affect consistency.
-
Cool Completely: Allow the fudge to cool at room temperature for the best texture before slicing; this ensures it sets properly without becoming crumbly.
-
Storage Savvy: Keep your peanut butter fudge in an airtight container at room temperature for up to a week, or freeze for longer storage and festive gifting.
What to Serve with Easy Peanut Butter Fudge
There’s nothing quite like discovering delightful accompaniments to elevate your sweet treat experience.
- Classic Vanilla Ice Cream: The cool creaminess contrasts beautifully with the rich fudge, creating a blissful combination for your taste buds.
- Fresh Berries: Juicy strawberries or raspberries add a refreshing burst of fruity acidity, cutting through the fudge’s sweetness and enhancing your dessert.
- Crunchy Pretzels: The salty crunch of pretzels provides a delicious textural contrast to the smooth fudge, making each bite a delightful experience.
- Chocolate Dipping Sauce: Drizzling warm chocolate over fudge creates an indulgent twist, taking your treat to new chocolaty heights that no one can resist.
- Nutty Granola: A sprinkle of crunchy granola on top adds both texture and a nutty flavor, complementing the creaminess of the fudge seamlessly.
- Hot Coffee or Tea: A warm cup of your favorite brew balances the sweet flavors of the fudge, enhancing the overall experience with soothing warmth.
- Toast with Peanut Butter: Spread a little extra creamy peanut butter on toasted bread for a nostalgic twist that pairs wonderfully with your fudge!
These pairings not only enhance the flavor profile of the Easy Peanut Butter Fudge but also create a delightful spread for any gathering or cozy evening at home.
Make Ahead Options
These Easy Peanut Butter Fudge squares are perfect for busy home cooks looking to streamline their meal planning! You can prepare the fudge mixture up to 24 hours in advance by following the first three steps and then pouring it into the dish. Cover the pan tightly with plastic wrap to maintain freshness and prevent drying out. When you’re ready to serve, let it sit at room temperature for about 30 minutes to soften slightly before cutting into squares. With this make-ahead approach, you’ll have a delightful, homemade dessert that’s just as delicious, saving you precious time when entertaining or gifting!
Storage Tips for Peanut Butter Fudge
Room Temperature: Store your peanut butter fudge in an airtight container at room temperature for up to 1 week, keeping it fresh and ready for indulgence.
Fridge: For longer freshness, refrigerate your fudge in an airtight container for up to 2 weeks, allowing it to maintain its delicious texture without drying out.
Freezer: If you want to enjoy your fudge even longer, freeze it in a freezer-safe container lined with parchment paper for up to 3 months; simply thaw in the fridge when ready to enjoy!
Reheating: To soften, leave the fudge at room temperature for about 15–30 minutes before serving, allowing that creamy goodness to return without losing flavor.

Easy Peanut Butter Fudge Recipe FAQs
What kind of peanut butter should I use?
Absolutely! For this Easy Peanut Butter Fudge, I recommend using creamy brands like Jif. Natural peanut butters can separate and create an uneven texture, affecting the final product. You want that smooth, luscious feel that store-bought creamy peanut butter brings to your fudge.
How should I store leftover fudge?
Keep your peanut butter fudge in an airtight container at room temperature for up to 1 week. If you wish to extend its life, transfer it to the fridge where it can last for up to 2 weeks. For longer storage, you can freeze it in a freezer-safe container lined with parchment paper for up to 3 months. Just remember to thaw it in the fridge before enjoying!
What if my fudge is too soft after cooling?
No worries! If your fudge is too soft, it might be due to insufficient boiling time. Make sure to boil the sugar and milk mixture for a full 2 ½ minutes while stirring continuously. If the fudge doesn’t set properly this time, try again but keep a close eye on the boiling process to achieve that perfect, firm texture.
Can I add mix-ins to my fudge?
Very! You can customize your Easy Peanut Butter Fudge with little to no effort. Feel free to stir in chocolate chips or crushed nuts before pouring the mixture into your dish. Chocolate chips add a delightful sweetness, while nuts provide a lovely crunch. Just be sure not to overload it; balance is key!
Is this fudge safe for pets?
While the ingredients in peanut butter fudge are safe for humans, it’s best to keep this treat away from pets. Chocolate can be harmful to dogs and cats, so if you decide to add any chocolate chips, make sure they stay out of reach! Always give pet-friendly treats instead.
How do I freeze peanut butter fudge?
Great question! To freeze your Easy Peanut Butter Fudge, first, allow it to cool completely. Then, cut it into squares and place them in a single layer on a parchment-lined baking tray. Once frozen, transfer the squares to a freezer-safe container or bag, separating layers with parchment paper. This way, it maintains its shape and flavor perfectly for up to 3 months!
Creamy Peanut Butter Fudge for a Sweet Nostalgic Treat
Ingredients
Equipment
Method
- In a medium saucepan, mix together granulated sugar and milk over medium-low heat, stirring continuously until the mixture simmers gently, about 2–3 minutes.
- Allow the mixture to come to a full boil and cook for 2 ½ minutes while stirring frequently to avoid burning.
- Remove the saucepan from heat and stir in the creamy peanut butter and vanilla extract until smooth and glossy.
- Pour the mixture into a greased 8x8 dish lined with parchment paper and let cool completely at room temperature for about 1–2 hours.
Leave a Reply