
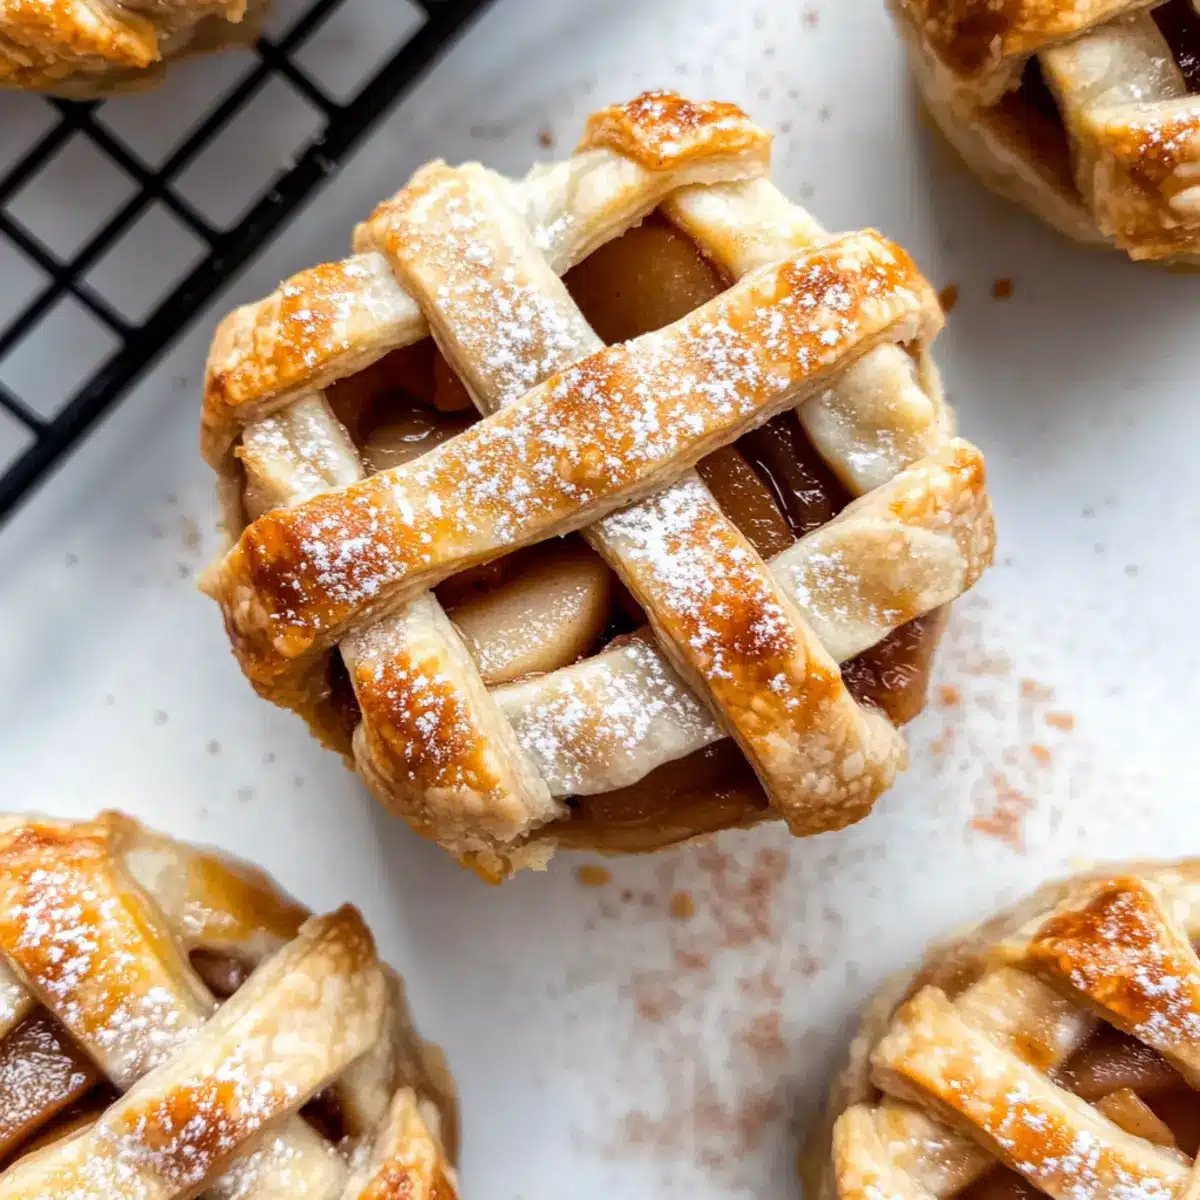
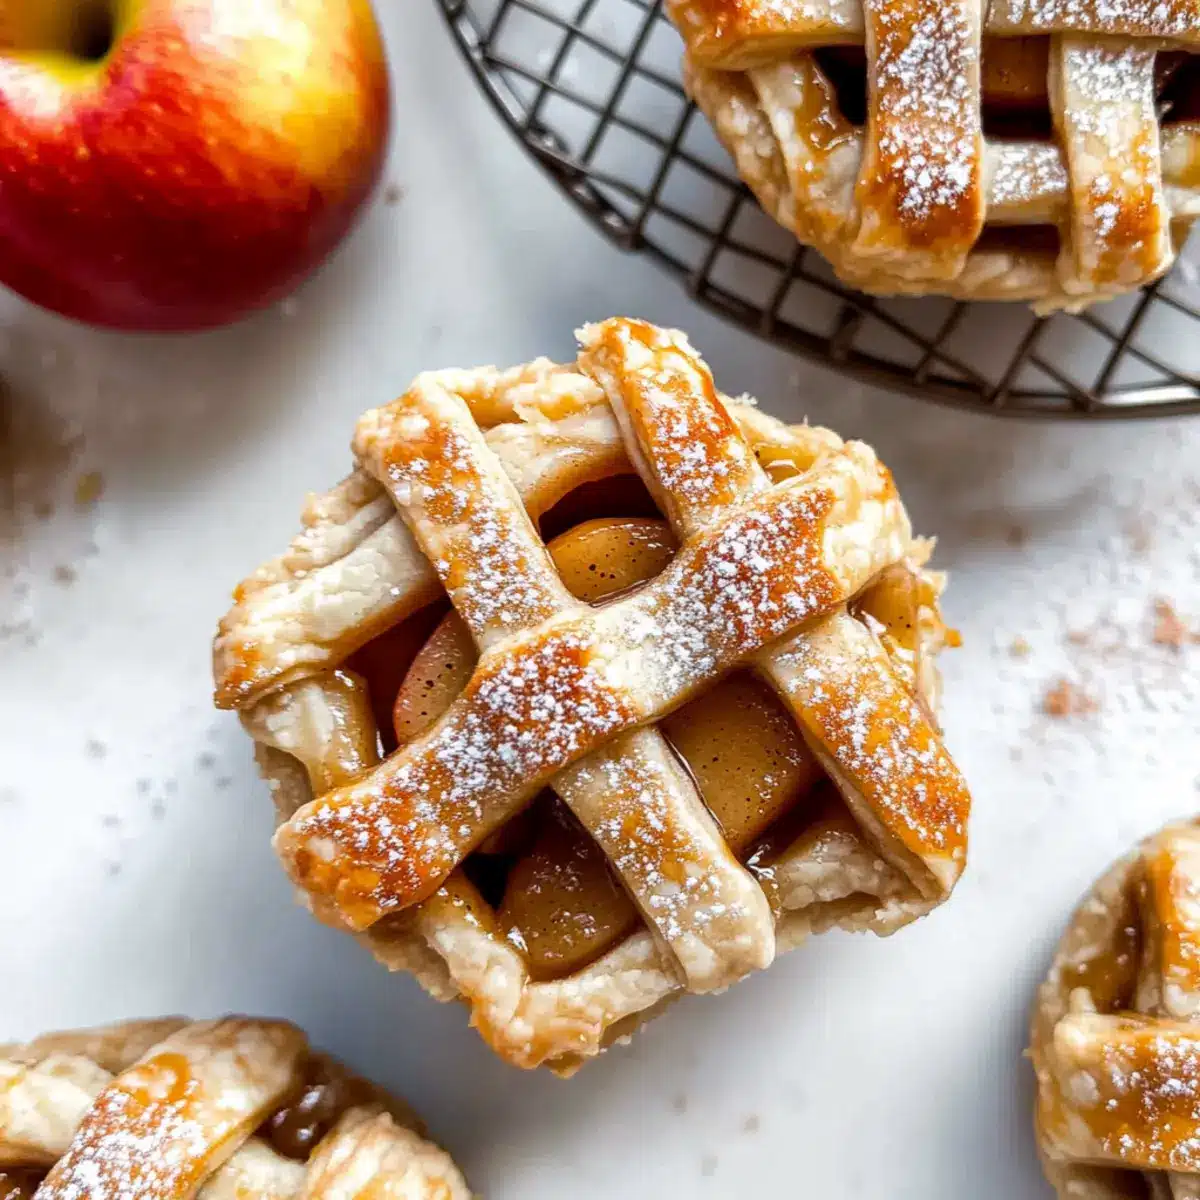
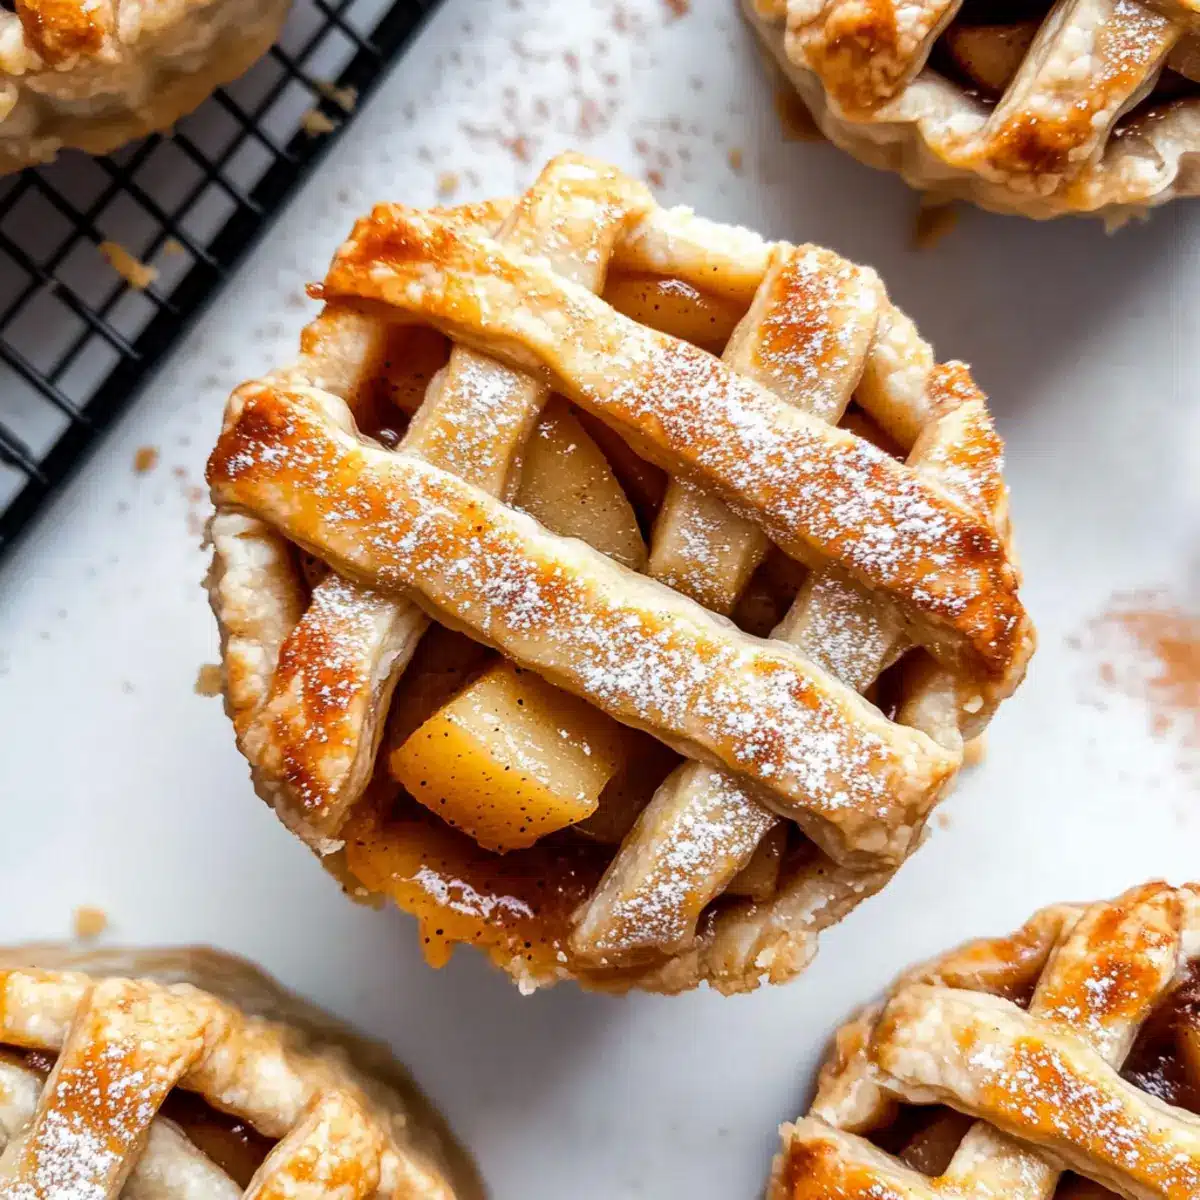
As the cool breeze of autumn sweeps in, there’s nothing quite like the aroma of freshly baked pies wafting through the kitchen. This Mini Apple Pies Recipe is my go-to for capturing that cozy, fall feeling in a bite-sized treat that’s gluten-free and utterly delightful. These adorable pies not only satisfy your sweet tooth but also come together in no time, making them a perfect choice for unexpected guests or a fun family dessert night. Plus, they’re easily stored for later enjoyment, so you can indulge at your own pace. Ready to layer on some sweet memories and create a dessert that’s perfect for any occasion? Let’s dive into the heartwarming world of mini apple pies together!
Why Make Mini Apple Pies?
Cozy Comfort: There’s nothing like the warm scent of cinnamon and baked apples to bring everyone together during fall.
Quick and Easy: With a simple method that even beginner bakers can master, these gluten-free treats are a breeze to whip up.
Customizable Goodness: From Caramel Apple Pie to berry variations, feel free to personalize your mini pies for different tastes!
Perfect for Sharing: Their bite-sized nature makes them ideal for sharing with friends and family during gatherings.
Deliciously Portable: Pack them in lunchboxes or serve at picnics! These mini desserts are easy to transport and enjoy anywhere.
Mini Apple Pies Recipe Ingredients
For the Pie Crust
• Gluten-Free All-Purpose Baking Flour – Provides structure for the pie crust; use a blend that includes xanthan gum for best results.
• Salt – Enhances flavor; sea salt or kosher salt are great options.
• Granulated Sugar – Adds sweetness to the crust; can be substituted with coconut sugar for a lower glycemic option.
• Unsalted Butter – Creates a flaky, buttery crust; for a dairy-free version, use plant-based butter.
• Ice Water – Binds the crust ingredients without making them soggy; use cold water to keep the dough firm.
For the Apple Filling
• Peeled & Finely Diced Apples – The main filling ingredient, providing natural sweetness and texture; any firm apples like Granny Smith or Honeycrisp work well.
• Light Brown Sugar – Adds depth of sweetness; substitute with maple syrup for added richness.
• Ground Cinnamon – Provides the characteristic spice flavor; use freshly ground for enhanced taste.
• Nutmeg – Adds warmth and complexity to the filling; can be omitted if not preferred.
• Gluten-Free All-Purpose Flour (for filling) – Thickens the apple filling; ensure it is gluten-free.
For the Egg Wash
• Egg – Promotes browning of the crust; for vegan version, use a milk substitute for brushing.
With these quality mini apple pies recipe ingredients, you’re on your way to crafting a delightful dessert that is gluten-free and sure to impress!
Step‑by‑Step Instructions for Mini Apple Pies Recipe
Step 1: Prepare the Pie Crust
In a large mixing bowl, combine gluten-free all-purpose baking flour, salt, and granulated sugar. Cut in cold unsalted butter using a pastry cutter or fork until the mixture resembles coarse crumbs. Gradually add ice water, one tablespoon at a time, mixing until the dough forms a ball. Aim for a firm yet pliable texture; avoid overworking the dough.
Step 2: Chill the Dough
Cover the prepared dough with plastic wrap and refrigerate for at least 30 minutes. This crucial step helps the gluten-free crust firm up for a flaky texture. Meanwhile, you can prepare your apple filling, allowing that delicious homemade aroma to fill the air as you get excited for your mini apple pies!
Step 3: Make the Filling
In a mixing bowl, combine the finely diced apples, light brown sugar, ground cinnamon, nutmeg, and gluten-free flour. Toss until the apples are thoroughly coated with the sugar and spices, ensuring an evenly flavored filling. Set the mixture aside to let the flavors meld while your dough chills.
Step 4: Preheat Oven
Preheat your oven to 425°F (220°C). This high temperature will give your mini apple pies perfect golden-brown crusts. While the oven is heating, take a moment to roll out your chilled dough so you can fill your muffin tin with those delightful apple goodness.
Step 5: Roll Out Dough
On a lightly floured surface (using more gluten-free flour), roll out the chilled dough to about 1/8-1/4 inch thickness. Use a round cutter, about 4-5 inches in diameter, to cut out circles. These will form the crust of your Mini Apple Pies. Gather any scraps, re-chill, and roll again if needed.
Step 6: Fill Muffin Pan
Grease your muffin tin to prevent sticking, and carefully press each dough circle into the cups, letting some dough hang over the edges. Spoon the apple mixture evenly into each cup, ensuring a generous and delicious filling. Brush the exposed crust edges with the beaten egg to promote a beautiful golden finish.
Step 7: Bake
Place the muffin tin in the preheated oven and bake for 20-24 minutes, or until the crust is golden and the filling is bubbling. Keep an eye on them for the last few minutes to ensure they don’t over-brown. When ready, they’ll be golden and fragrant, like the comforting essence of autumn in every bite!
Step 8: Cool and Serve
Allow the mini apple pies to cool in the pan for about 5 minutes before transferring them to a wire rack. This brief cooling period will make them easier to remove while maintaining their shape. Serve warm, on their own, or with a scoop of vanilla ice cream for a delightful treat, perfect for sharing!
Mini Apple Pies Recipe Variations
Feel free to get creative with these mini apple pies and make them truly your own! Let’s explore some delightful variations that will tantalize your taste buds.
-
Berry Mini Pies: Substitute the apple filling with a mix of your favorite berries for a refreshing twist. Dark, juicy berries paired with a buttery crust create a sweet symphony of flavors.
-
Peach Pie Filling: For a summery vibe, swap in finely diced peaches. Their sweet, juicy essence complements cinnamon perfectly, offering a delightful alternative to the classic apple taste.
-
Caramel Apple Pies: Drizzle your apple mixture with caramel sauce before baking. The added sweetness and gooey texture elevates the pies to new heights of indulgence that everyone will adore.
-
Nuts Addition: Add some crunch! Mixing in chopped pecans or walnuts into the apple filling gives your pies delightful texture and a nutty flavor that contrasts beautifully with the soft apples.
-
Spicy Kick: If you enjoy a little heat, add a dash of cayenne pepper or finely chopped jalapeños into the apple mixture. This unexpected twist will surprise and excite your guests!
-
Maple Flavor Boost: Replace light brown sugar with pure maple syrup in the filling for a wholesome sweetness that brings the flavors of fall right to your plate. It’s a match made in heaven.
-
Chocolate Drizzle: For a decadent touch, once the pies have cooled, drizzle them with melted chocolate. This indulgent addition delights both chocolate lovers and pie aficionados alike.
-
Fruit Medley: Combine apples with pears or cranberries for an exciting, multi-fruit filling. The varying textures and flavors create a harmonious blend that dances in your mouth.
Feel inspired to create your very own mini apple pies? For more delightful twists, check out our amazing Caramel Apple Pie Bombs or consider these scrumptious Berry Mini Christmas Cakes. With so many options, your pie adventures are just beginning!
Make Ahead Options
These Gluten-Free Mini Apple Pies are perfect for meal prep enthusiasts! You can prepare the pie crust and the filling up to 24 hours in advance. Simply follow the instructions to make the crust, wrap it tightly in plastic wrap, and refrigerate it. For the filling, mix the diced apples with sugars and spices, store it in an airtight container in the fridge, and it will stay fresh. When you’re ready to bake, roll out the chilled dough, fill with the prepared apple mixture, and brush with egg wash before baking. This ensures you have freshly baked desserts ready to impress with minimal effort, just as delicious as if made the same day!
Expert Tips for Mini Apple Pies
-
Chill the Dough: Allowing the dough to chill for at least 30 minutes is essential for achieving a flaky gluten-free crust. Don’t skip this step!
-
Use a Butter Knife: When removing the mini pies from the muffin tin, a butter knife can help gently lift them out without compromising their shape.
-
Watch the Baking Time: Keep an eye on the mini apple pies while baking. You want them golden brown and bubbly, so check them a couple of minutes before the timer goes off.
-
Experiment with Fillings: Feel free to customize your pies by adding nuts or trying different fruits for a unique mini apple pies recipe that caters to your taste.
-
Cool Before Storing: Let the pies cool completely before placing them in an airtight container. This will help maintain their delicious texture and flavor.
What to Serve with Gluten-Free Mini Apple Pies
There’s something undeniably special about crafting a cozy meal around delightful mini desserts, enticing everyone to gather at the table.
-
Vanilla Ice Cream: The creamy richness of vanilla ice cream perfectly balances the warm, spiced apple filling, creating a comforting harmony in every bite. Scoop it generously onto the warm pies for a delightful contrast.
-
Whipped Cream: Light and airy, a dollop of freshly whipped cream adds a luscious touch to your mini apple pies, making each mouthful feel indulgent. It’s a classic pairing that enhances the flavors without overwhelming them.
-
Coffee or Hot Chocolate: A steaming cup of coffee or rich hot chocolate beautifully complements the sweetness of the pies, adding a warm note to your dessert experience. The warmth of the drink combined with the deliciousness of the pies is simply heartwarming.
-
Caramel Drizzle: Drizzle a sweet caramel sauce over the mini apple pies for an extra layer of flavor. The gooey sweetness elevates the dessert, making it an even more decadent treat that’ll please any sweet tooth.
-
Nutty Granola: Serve a crunchy maple pecan granola on the side for a textural contrast. The nuttiness adds depth and a lovely crunch, making every generous bite exciting. Sprinkle it over your pies, or enjoy it separately while savoring the sweetness!
-
Cider or Sparkling Juice: Pair your mini apple pies with a glass of warm spiced apple cider or a chilled sparkling juice. This drink adds a delightful zestiness that complements the apple flavor, making each indulgent moment refreshing.
-
Cheese Plate: A small plate of cheeses like sharp cheddar or creamy brie provides a savory counterpoint to the sweetness of the mini apple pies. The richness of the cheese offsets the flavors beautifully, elevating your dessert experience.
-
Fresh Fruit: Brighten your plate with seasonal fresh fruits like pears or berries. Their fresh, juicy taste will contrast elegantly with the warm, spiced pies, making it a balance of flavors and textures everyone will adore!
How to Store and Freeze Mini Apple Pies
Fridge: Keep your mini apple pies in an airtight container in the refrigerator for up to 4-5 days. This preserves their delightful flavor and texture.
Freezer: For longer storage, freeze the baked mini apple pies for up to 2 months. Make sure they are completely cool before wrapping them tightly in plastic wrap and aluminum foil.
Reheating: To enjoy your frozen mini apple pies, bake them directly from the freezer at 350°F (175°C) for about 15-20 minutes or until heated through, giving them a nice crisp crust again.
Cooling Before Storing: Remember to let the pies cool completely before storing them to prevent moisture buildup, which can make them soggy.
Mini Apple Pies Recipe FAQs
How do I know if my apples are ripe enough for baking?
Absolutely! When selecting apples for your mini apple pies, look for firm varieties like Granny Smith or Honeycrisp. Avoid apples with dark spots or soft spots, as they may not hold up during baking. A good rule of thumb is to pick apples that are shiny and feel solid when you press them.
What’s the best way to store leftover mini apple pies?
To keep your mini apple pies fresh, store them in an airtight container in the refrigerator for up to 4-5 days. Make sure they are cooled completely before placing them in the container to avoid moisture buildup.
Can I freeze mini apple pies? If so, how?
Very! To freeze your mini apple pies, first ensure they are completely cool. Wrap each pie tightly in plastic wrap, followed by aluminum foil, to prevent freezer burn. They can be stored in the freezer for up to 2 months. When you’re ready to enjoy them, bake directly from frozen at 350°F (175°C) for about 15-20 minutes until heated through.
What if my dough doesn’t come together?
If your dough seems too crumbly and won’t form a ball, don’t worry! Gradually add more ice water, one tablespoon at a time, until you achieve a firm but pliable texture. Remember, it’s important not to overwork the dough; it should feel cohesive and slightly tacky once it’s ready.
Are these mini apple pies safe for those with allergies?
Be mindful of dietary restrictions! While this mini apple pies recipe is gluten-free, double-check your ingredients to confirm they are certified gluten-free. Additionally, for a dairy-free version, substitute unsalted butter with plant-based butter. Always consult with guests about allergies, especially if incorporating any additional fillings or toppings.

Mini Apple Pies Recipe for Cozy Fall Desserts You'll Love
Ingredients
Equipment
Method
- In a large mixing bowl, combine gluten-free all-purpose baking flour, salt, and granulated sugar. Cut in cold unsalted butter until the mixture resembles coarse crumbs. Gradually add ice water, mixing until the dough forms a ball.
- Cover the prepared dough with plastic wrap and refrigerate for at least 30 minutes.
- In a mixing bowl, combine the finely diced apples, light brown sugar, ground cinnamon, nutmeg, and gluten-free flour. Toss until coated.
- Preheat your oven to 425°F (220°C).
- Roll out the chilled dough to about 1/8-1/4 inch thickness and cut out circles.
- Grease your muffin tin and press each dough circle into the cups. Spoon the apple mixture evenly into each cup and brush the edges with egg.
- Bake for 20-24 minutes, until the crust is golden and the filling is bubbling.
- Allow the mini apple pies to cool for about 5 minutes before transferring to a wire rack.
Leave a Reply