
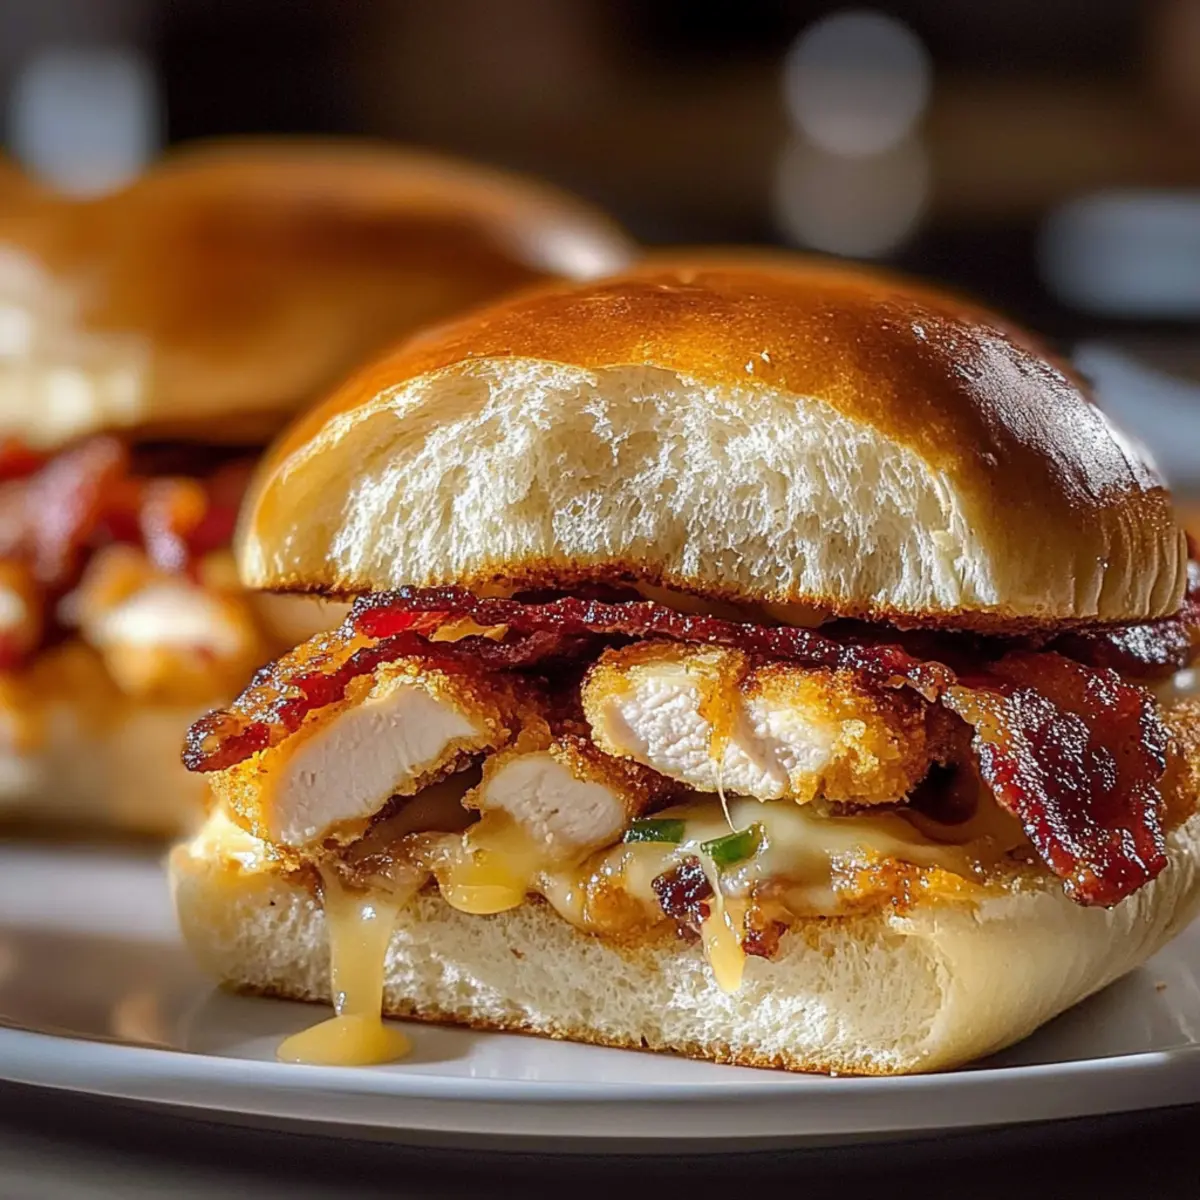
The aroma wafting through my kitchen had me reminiscing about childhood gatherings filled with laughter and delicious bites. Today, I’m excited to share my Maple Chicken Bacon Sliders with Gouda and Maple Butter—a dish that perfectly captures that cozy, comforting spirit. These sliders bring together tender chicken strips, crispy bacon, and rich, creamy Gouda nestled in soft Hawaiian rolls, all enhanced by a touch of maple butter. Not only are they a breeze to prepare, making weeknight dinners feel special, but they’re also versatile enough to cater to various dietary needs—think gluten-free rolls or dairy-free cheese options! Whether you’re hosting friends or enjoying a casual family night, these sliders are sure to be a hit. Intrigued about how to elevate your next meal with this sweet and savory combination? Let’s dive in!
Why Are These Sliders a Must-Try?
Irresistible Flavor: The combination of sweet maple butter and savory bacon gives every bite an unforgettable taste.
Customization Options: With various cheese choices and the ability to use gluten-free rolls, you can tailor these sliders to suit everyone’s preferences.
Quick & Easy: Perfect for weeknight dinners, these sliders are ready in just 15 minutes, making dinner planning a breeze.
Crowd-Pleasing Appeal: Whether for a game day or a family gathering, these sliders are always a hit—just like my Sweet Chili Chicken that your guests will love.
Comfort in Every Bite: Soft, pillowy rolls and gooey cheese ensure that each slider delivers a comforting, satisfying experience.
With so many great features, it’s hard to resist giving these Maple Chicken Bacon Sliders a try!
Maple Chicken Bacon Sliders Ingredients
For the Sliders
- Hawaiian Rolls – The perfect soft base for these sliders; opt for gluten-free rolls if needed.
- Cooked Chicken Breast Strips – Provides juicy protein; leftover cooked chicken works beautifully here.
- Gouda Cheese – Adds a rich creaminess; feel free to substitute with Swiss or cheddar for a different flavor.
- Cooked Bacon – Brings that irresistible crunch; turkey bacon or plant-based alternatives make a great swap.
- Maple Butter – Sweetens and enhances the flavor; if unavailable, blend softened butter with maple syrup.
Embrace the deliciousness of these Maple Chicken Bacon Sliders and elevate your next gathering or weeknight dinner!
Step‑by‑Step Instructions for Maple Chicken Bacon Sliders
Step 1: Preheat Your Oven
Start by preheating your oven to 375°F (190°C). This ensures the perfect environment for our Maple Chicken Bacon Sliders to bake evenly. As the oven heats up, you can gather and prepare the other ingredients, saving time once you start assembling.
Step 2: Prepare the Rolls
Next, take your Hawaiian rolls and carefully slice them horizontally. Make sure to keep the tops connected for a slider that’s easy to assemble and serve. Lay the rolls cut side up on a baking sheet lined with parchment paper for added convenience and easy cleanup.
Step 3: Add Maple Butter
Spread a generous layer of maple butter across the bottom half of the rolls. The sweet richness of the maple will infuse the sliders with delicious flavor. Be sure to cover the entire surface evenly to ensure every bite of the Maple Chicken Bacon Sliders is delightful.
Step 4: Assemble the Filling
Now it’s time to layer the fillings. Evenly distribute the cooked chicken breast strips over the maple buttered rolls. Follow with crispy bacon slices, placing them artfully on top of the chicken to maximize the savory crunch in your sliders.
Step 5: Add Cheese
Take your Gouda cheese and carefully place the slices over the bacon. The melted cheese will create a creamy, indulgent layer, enhancing the overall flavor of the Maple Chicken Bacon Sliders. After positioning the cheese, gently place the tops of the rolls back on.
Step 6: Bake the Sliders
Place your prepared sliders into the preheated oven. Bake for 10-15 minutes or until the cheese is melted and the top of the rolls is beautifully golden brown. Keep an eye on them, as you want that perfect blend of melted cheese and crispy top.
Step 7: Finish and Serve
Once baked, take the sliders out of the oven and brush the tops with a bit more maple butter for extra flavor. Cut the sliders into individual portions and serve them warm. The combination of tender chicken, crispy bacon, and rich Gouda is sure to delight everyone!
What to Serve with Maple Chicken Bacon Sliders
Nothing elevates a cozy gathering like heartfelt pairings to complement your sliders’ sweet and savory flavors.
-
Crispy Sweet Potato Fries: Their crunchy exterior and soft interior offer a delightful contrast to the sliders while adding a hint of sweetness.
-
Leafy Green Salad: A fresh salad with a light vinaigrette balances the richness of the sliders, providing a refreshing bite between each one.
-
Creamy Coleslaw: The tangy crunch of coleslaw adds texture and brightness, perfectly enhancing the flavor profile of your sliders.
-
Baked Mac and Cheese: This cheesy comfort food makes for a hearty side that complements the gooey cheese in your sliders, creating a dreamy meal.
-
Chilled Sparkling Lemonade: A refreshing drink that cuts through the richness, offering a zesty palate cleanse with every sip.
-
Chocolate Chip Cookies: End the meal on a sweet note with warm cookies—their gooey chocolate perfectly echoes the warmth of the sliders!
These pairings ensure an unforgettable experience, turning your meal into a flavorsome feast everyone will love.
How to Store and Freeze Maple Chicken Bacon Sliders
Fridge: Store leftover Maple Chicken Bacon Sliders in an airtight container for up to 2 days to maintain freshness and flavor.
Freezer: If you want to store sliders for a longer period, wrap them tightly in plastic wrap and place them in a freezer-safe bag. They can be frozen for up to 3 months.
Reheating: When ready to enjoy, thaw in the fridge overnight and reheat in the oven at 350°F (175°C) for about 10-15 minutes, or until warmed through and cheese is melty again.
Make-Ahead Option: Assemble sliders in advance and refrigerate uncooked. Bake them fresh just before serving for the best taste and texture.
Maple Chicken Bacon Sliders Variations
Feel free to explore these delicious variations and customize your Maple Chicken Bacon Sliders to fit your taste buds!
-
Dairy-Free Cheese: Swap Gouda for your favorite dairy-free cheese to keep it creamy without the dairy. Many brands now offer great-tasting alternatives that melt beautifully, keeping everyone happy.
-
Gluten-Free Rolls: Use gluten-free Hawaiian rolls to cater to those with dietary restrictions. With this easy swap, everyone can enjoy these sliders without worry.
-
Add Spinach or Arugula: Toss in some fresh baby spinach or arugula before baking for a pop of color and an extra crunch. It’s a simple way to sneak in some greens while enhancing flavor.
-
Spicy Kick: If you love heat, drizzle in some Sriracha or sprinkle red pepper flakes on top of the cheese before baking. It adds an exciting flavor twist that spice enthusiasts will adore.
-
Barbecue Glaze: Brush your sliders with a tangy barbecue sauce instead of maple butter for a smokier flavor profile. This pairs wonderfully with the chicken and bacon while creating a fun barbecue twist.
-
Herb Infusion: Add fresh herbs like rosemary or thyme to the maple butter for an aromatic layer of flavor. The addition of fresh herbs brightens up the dish and makes it more sophisticated.
-
Holiday Flair: For a festive addition, incorporate cranberry sauce alongside the chicken for a delightful sweet-tart flavor reminiscent of Thanksgiving leftovers. It reignites the cozy feelings of seasonal gatherings.
Feel inspired to mix and match these ideas to create the perfect Maple Chicken Bacon Sliders that reflect your taste and the occasion! If you’re looking for more delicious chicken recipes, try my Garlic Butter Chicken or Cranberry Orange Chicken for more inspiration!
Make Ahead Options
These Maple Chicken Bacon Sliders are perfect for busy home cooks looking to save time! You can assemble the sliders up to 24 hours in advance by layering the cooked chicken strips, crispy bacon, and cheese between the Hawaiian rolls, then covering them tightly with plastic wrap. This method helps preserve their freshness and flavor. To maintain the quality, avoid brushing the sliders with maple butter until just before baking; this prevents sogginess. When you’re ready to serve, simply bake them in a preheated oven for 10-15 minutes until golden and melty. With this prep, you’ll enjoy delicious sliders with minimal effort and maximum flavor!
Expert Tips for Making Maple Chicken Bacon Sliders
• Prep Ahead: Assemble the sliders in advance and store them in the fridge. Bake them right before serving for a warm, fresh taste.
• Roll Toasting: Lightly toast the Hawaiian rolls before assembly. This adds a delightful texture and helps prevent sogginess from the filling.
• Maple Butter Timing: If making sliders ahead of time, wait to brush the tops with maple butter until you’re ready to serve to maintain their crispy texture.
• Storage Tricks: Store any leftovers in an airtight container for up to two days. Reheat covered in the oven to keep the texture nice for the Maple Chicken Bacon Sliders.
• Cheese Choices: Feel free to experiment with different cheese options like mozzarella or pepper jack to create unique flavor profiles that cater to everyone’s taste.
Maple Chicken Bacon Sliders Recipe FAQs
What type of Hawaiian rolls should I use?
Absolutely! Hawaiian rolls are perfect for these sliders due to their soft texture and slight sweetness. If you have gluten sensitivities, you can easily substitute regular Hawaiian rolls with gluten-free ones, which work just as wonderfully!
How do I store leftover Maple Chicken Bacon Sliders?
To keep your Maple Chicken Bacon Sliders fresh, store any leftovers in an airtight container in the refrigerator. They’ll stay delicious for up to 2 days. When reheating, I recommend warming them in the oven covered with foil at 350°F (175°C) for about 10-15 minutes, so the bread remains soft and the cheese melts perfectly.
Can I freeze the sliders for later?
Yes, you can freeze the sliders! Wrap them tightly in plastic wrap and place them in a freezer-safe bag. They can be stored in the freezer for up to 3 months. When you’re ready to enjoy them, simply thaw them in the refrigerator overnight before reheating them in the oven.
What can I do if my cheese isn’t melting properly?
If you find that your cheese isn’t melting well, it might be due to a few factors. Make sure your oven is preheated adequately before putting the sliders in, and keep an eye on them while they bake. You might also consider using a cheese that melts easily, like Gouda or Monterey Jack, and thinly slice them for better melting performance.
Are there any dietary considerations for these sliders?
Very! These Maple Chicken Bacon Sliders can easily accommodate various diets. For a dairy-free option, use plant-based cheese alternatives, and for those avoiding gluten, opt for gluten-free rolls. Always check your bacon selection as well; turkey or plant-based bacon can replace regular bacon for a lighter choice.
Can I make the sliders ahead of time?
Absolutely! You can assemble the Maple Chicken Bacon Sliders in advance and refrigerate them uncooked. Cover them tightly until you’re ready to bake. This way, you can pop them in the oven fresh just before serving, which ensures that they’re warm, melty, and delicious!
Irresistible Maple Chicken Bacon Sliders for Cozy Gatherings
Ingredients
Equipment
Method
- Preheat your oven to 375°F (190°C).
- Slice the Hawaiian rolls horizontally while keeping the tops connected.
- Spread maple butter across the bottom half of the rolls.
- Layer the cooked chicken breast strips evenly over the maple buttered rolls.
- Place crispy bacon slices over the chicken.
- Layer Gouda cheese slices over the bacon.
- Bake in the preheated oven for 10-15 minutes until cheese is melted.
- Brush the baked sliders with more maple butter, cut into portions and serve warm.
Leave a Reply