
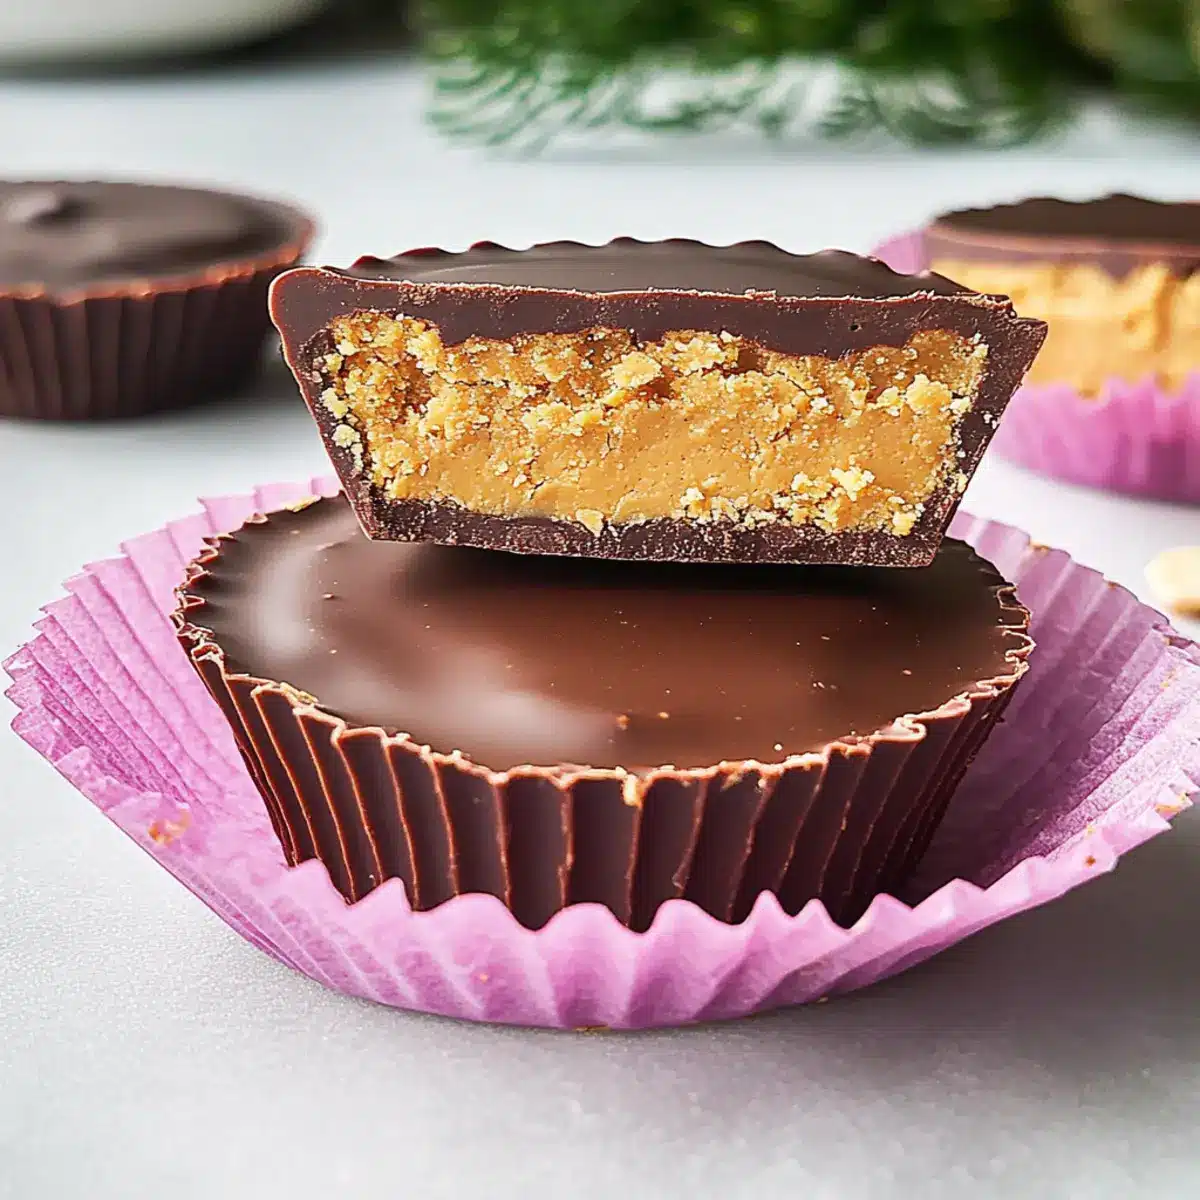
“Can you believe how easy it is to make your own candy?” I overheard a friend exclaim after biting into one of these delightful Homemade Peanut Butter Cups. It’s true—creating these silky, satisfying treats is not only straightforward but also incredibly rewarding. With a rich, creamy filling enhanced by a touch of vanilla and a delightful crunch from graham cracker crumbs, they make for a kid-friendly activity that turns cooking into cherished family moments. Plus, these cups can easily adapt to vegan diets, ensuring everyone can indulge without compromise. Whether you’re gifting them for the holidays or sneaking a sweet treat for yourself, these peanut butter delights are sure to impress. Curious how to whip up this irresistible recipe in your kitchen? Let’s dive in!
How easy is it to make these?
Simplicity at its best: Making these homemade peanut butter cups is a breeze, even for beginner cooks. Irresistible flavor: With a creamy filling enhanced by vanilla and a touch of flaky sea salt, every bite is a delightful treat. Kid-friendly fun: This is a perfect recipe to prepare together with the little ones, sparking joy in the kitchen. Versatile options: Whether you’re vegan or have dietary restrictions, there are numerous variations to explore. Perfect for gifting: These cups are ideal for holiday gifts or sweet surprises, sure to earn you accolades from friends and family! Don’t forget to check out the Garlic Butter Chicken for a savory dish to complement your sweet treats.
Homemade Peanut Butter Cups Ingredients
For the Filling
- Creamy Peanut Butter – Provides the signature flavor and a creamy texture; consider using natural peanut butter for a healthier option.
- Unsalted Butter – Adds richness to the filling; ensure it’s softened for easy mixing.
- Powdered Sugar – Sweetens the filling and helps achieve a smooth texture.
- Graham Cracker Crumbs – Adds structure to the filling, preventing it from oozing out; substitute with crushed cookies for variation.
- Vanilla Extract – Enhances the flavor of the filling; use pure vanilla extract for the best taste.
- Kosher Salt – Balances the sweetness and enhances flavor; flaky sea salt can be sprinkled on top for garnish.
For the Chocolate Coating
- Dark (70% cocoa) Chocolate Bars – Encases the filling; using quality chocolate yields better results. Semi-sweet chocolate can be substituted if necessary.
- Flaky Sea Salt (for garnish) – Adds a finishing touch and crunch to elevate your homemade peanut butter cups.
These delightful homemade peanut butter cups not only make an incredible treat but also serve as a thoughtful gift idea for any occasion!
Step‑by‑Step Instructions for Homemade Peanut Butter Cups
Step 1: Prepare Double Boiler
Begin by setting up a double boiler for melting the dark chocolate. To do this, fill a pot with water and bring it to a gentle simmer. Place a heatproof bowl on top, ensuring it doesn’t touch the water. This method allows the chocolate to melt evenly without burning, setting the stage for your homemade peanut butter cups.
Step 2: Melt Chocolate
Add chopped dark chocolate to the bowl and stir continuously as it melts over the simmering water. Keep a close eye on it, which should take about 5-7 minutes until fully melted and silky smooth. Once melted, remove the bowl from the heat and let it cool slightly before moving on to the filling, ensuring a perfect coating for your homemade peanut butter cups.
Step 3: Mix Filling
In a separate mixing bowl, combine the creamy peanut butter, softened unsalted butter, powdered sugar, graham cracker crumbs, vanilla extract, and kosher salt. Mix with a hand mixer or spatula until the mixture is smooth and well-combined. This flavorful filling should be creamy and slightly thick—just what you’ll need for your homemade peanut butter cups.
Step 4: Assemble Cups
Line a mini muffin tin with paper liners, and begin by spooning a layer of the melted chocolate at the bottom of each liner, just enough to cover the bottom. Use a teaspoon to ensure an even coating, which will set in about 5 minutes. Then, scoop a generous amount of the peanut butter filling on top of the chocolate layer, making sure to leave room for another layer of chocolate.
Step 5: Top with Chocolate
Once you’ve added the peanut butter filling to each cup, drizzle more melted chocolate over the top to completely encase the filling. Use your spatula to smooth the surface, ensuring no filling is exposed. Allow the chocolate to flow over the edges, creating a lovely seal for your homemade peanut butter cups.
Step 6: Chill
Refrigerate the assembled cups for at least 1-2 hours, or until the chocolate is fully set and firm. You’ll know they’re ready when the tops are shiny and firm to the touch. This chilling time will help solidify each layer, turning your delightful mixture into a perfect treat.
Step 7: Garnish
Once the homemade peanut butter cups are set, remove them from the refrigerator. Sprinkle a tiny pinch of flaky sea salt on each cup for a hint of flavor and gourmet appeal. This finishing touch will enhance the sweetness and complement the salty richness of the filling.
Step 8: Serve or Store
Your homemade peanut butter cups are now ready to enjoy! Serve them right away or store in an airtight container in the refrigerator for up to a week. These treats not only make a fantastic dessert but also serve as a delightful gift for friends and family to savor.
Tips for the Best Homemade Peanut Butter Cups
- Chill Wisely: Allow the cups to chill for at least 1-2 hours; under-chilling may lead to melty cups, affecting their shape and enjoyment.
- Quality Chocolate Matters: Always opt for high-quality dark chocolate (70% cocoa or more) to achieve that rich taste and glossy finish in your homemade peanut butter cups.
- Mixing Harmony: Mix your peanut butter filling thoroughly to ensure all ingredients are well blended, preventing any lumps that can disrupt the smooth texture.
- Layer Lovingly: When assembling, make sure each layer is even and fully encased, which prevents any leakage when enjoyed.
- Experiment Freely: Don’t hesitate to try variations like nut butters or flavored extracts; this allows you to create unique homemade peanut butter cups that cater to your taste!
What to Serve with Homemade Peanut Butter Cups
When planning to enjoy these delightful cups, consider pairing them with equally satisfying sides to create a well-rounded experience.
- Savory Cheese Platter: A selection of sharp cheeses will beautifully contrast the sweetness of the peanut butter cups, making each bite memorable.
- Crunchy Apple Slices: Fresh, crisp apples add a refreshing crunch that balances the creamy richness, enhancing the flavor combination.
- Decadent Hot Chocolate: Cozy up with a warm cup of rich hot chocolate, perfect for a sweet pairing during chilly evenings.
- Whipped Cream Topping: A fluffy dollop of whipped cream adds a light and airy component, softening the richness of each peanut butter cup.
- Dark Chocolate Dipped Fruit: Elevate your dessert table with dark chocolate-covered strawberries or bananas, echoing the chocolate theme in an indulgent way.
- Nuts & Trail Mix: A bowl of mixed nuts provides a delightful contrast in texture, adding a satisfying crunch alongside these creamy treats.
- Bourbon Caramel Sauce: Drizzle some homemade caramel over the cups for a luscious twist that elevates the already-rich flavor profile.
Make Ahead Options
These Homemade Peanut Butter Cups are perfect for meal prep enthusiasts looking to save time during busy weeks! You can prepare the peanut butter filling up to 24 hours in advance; simply mix all the filling ingredients, then store it in an airtight container in the refrigerator to keep it fresh and creamy. When you’re ready to assemble, just spoon the filling into the chocolate-coated liners. If you want to make the entire treat ahead of time, you can assemble and chill the cups for up to 3 days in the fridge. To ensure they maintain their delightful texture and flavor, cover them well to prevent any absorption of odors or moisture. Just garnish with a sprinkle of flaky sea salt before serving for that extra touch of deliciousness!
Homemade Peanut Butter Cups Variations
Feel free to explore these delightful twists on the classic recipe and customize it to suit your tastes!
-
Vegan Version: Swap regular butter with vegan butter and opt for dairy-free chocolate for a plant-based treat that everyone can enjoy. It’s just as creamy and scrumptious as the original!
-
Nut Alternatives: Experiment with different nut butters like almond, cashew, or sunflower seed butter for a unique flavor profile. Each nut adds its own charm and twist to these homemade delights.
-
Flavored Extracts: Enhance the filling by adding a splash of almond or coconut extract. This adds depth and an unexpected richness to your peanut butter cups, turning your treats into a flavor festival.
-
Crunchy Touch: Mix crushed pretzels or nuts into the peanut butter filling for an extra crunchy surprise. This texture contrast makes each bite even more delightful.
-
Chocolate Swirls: Use a mix of dark and white chocolate for a visually stunning swirl effect on top. It not only looks beautiful but also adds a sweet contrast that chocolate lovers will relish.
-
Caramel Drizzle: Drizzle melted caramel over the top before the final chocolate layer for an indulgent twist. This adds a rich sweetness that elevates the entire experience of these homemade peanut butter cups.
-
Spicy Kick: Add a pinch of cayenne or cinnamon to the peanut butter filling to bring a hint of heat and warmth. This unexpected spice will surprise and charm anyone who tries them!
-
Holiday Spice: During the festive season, incorporate pumpkin spice into the filling for a seasonal treat that’s perfect for gift-giving. These cups will surely become a holiday favorite!
For more inspiration, you might want to give the delightful Garlic Butter Chicken a try! Cooking with the family can lead to memorable moments and delicious food that everyone loves.
How to Store and Freeze Homemade Peanut Butter Cups
Fridge: Keep your homemade peanut butter cups in an airtight container in the refrigerator for up to one week. This helps maintain their fresh flavor and creamy texture.
Freezer: For longer storage, freeze your peanut butter cups by placing them in a single layer in a freezer-safe container. They can last up to three months, but be sure to wrap each cup in plastic wrap to prevent freezer burn.
Reheating: When ready to enjoy, simply remove from the freezer and let them thaw in the fridge for a few hours. For a quick option, you can keep them at room temperature for about 30 minutes.
Packaging for Gifting: If you’re gifting these treats, store them in a decorative box or tin with some padding to prevent them from moving around. They make a lovely homemade gift!
Homemade Peanut Butter Cups Recipe FAQs
How do I select the best peanut butter for my filling?
Absolutely! For the richest flavor and texture, I recommend using natural creamy peanut butter without any added sugars or oils. Look for brands that list peanuts as the sole ingredient—this will give your homemade peanut butter cups a deep, authentic taste. If you prefer a healthier option, you can even try almond or cashew butter for a delightful twist!
What’s the best way to store uneaten homemade peanut butter cups?
Store your delicious homemade peanut butter cups in an airtight container in the refrigerator for up to one week. This keeps them fresh and maintains that creamy texture. Just be sure to layer them with parchment paper to avoid sticking together; trust me, they’re too good to lose a single cup to the container!
Can I freeze homemade peanut butter cups? How do I do it properly?
Yes, you can freeze your homemade peanut butter cups for up to three months! To do this, place them in a single layer on a baking sheet and freeze until solid. Then, transfer them to a freezer-safe container, ensuring to wrap each cup in plastic wrap or wax paper to prevent freezer burn. When you’re ready to enjoy them, simply take the number you want, place them in the fridge to thaw for a few hours, and savor!
What if I find my chocolate coating is too thick or clumpy?
Very! This is a common issue and can be easily fixed. If your chocolate gets clumpy, it may have overheated. If you notice this happening, add a teaspoon of vegetable oil or coconut oil to the chocolate and stir until it smooths out. If it’s thick, try melting it gently over low heat again, or in short bursts in the microwave, stirring in between. Just be patient; the result will be worth your effort!
Are these peanut butter cups suitable for someone with nut allergies?
For those with nut allergies, I suggest trying sun butter or a seed-based alternative. These options can provide a similar texture and flavor without the allergens. However, be sure to check that any chocolate you use is also allergy-friendly. Making the filling this way can create treats that everyone can enjoy, staying inclusive during celebrations!
Can I add other flavors to the peanut butter filling?
Absolutely! Mix in a teaspoon of almond or coconut extract for a delightful twist to your homemade peanut butter cups. You could also add a dash of cinnamon for a spicy kick or incorporate mini chocolate chips for extra indulgence. The more the merrier—let your creativity shine in the kitchen!
Delicious Homemade Peanut Butter Cups for Gifting & Sharing
Ingredients
Equipment
Method
- Prepare Double Boiler: Fill a pot with water and bring it to a gentle simmer. Place a heatproof bowl on top, ensuring it doesn't touch the water.
- Melt Chocolate: Add chopped dark chocolate to the bowl and stir continuously as it melts over the simmering water (about 5-7 minutes). Remove from heat and let cool slightly.
- Mix Filling: In a separate mixing bowl, combine the creamy peanut butter, softened unsalted butter, powdered sugar, graham cracker crumbs, vanilla extract, and kosher salt. Mix until smooth.
- Assemble Cups: Line a mini muffin tin with paper liners, spoon a layer of melted chocolate at the bottom, then add a layer of peanut butter filling.
- Top with Chocolate: Drizzle more melted chocolate over the top and smooth the surface, ensuring no filling is exposed.
- Chill: Refrigerate for at least 1-2 hours until the chocolate is fully set.
- Garnish: Sprinkle a tiny pinch of flaky sea salt on each cup after they are set.
- Serve or Store: Enjoy immediately or store in an airtight container in the refrigerator for up to a week.
Leave a Reply