
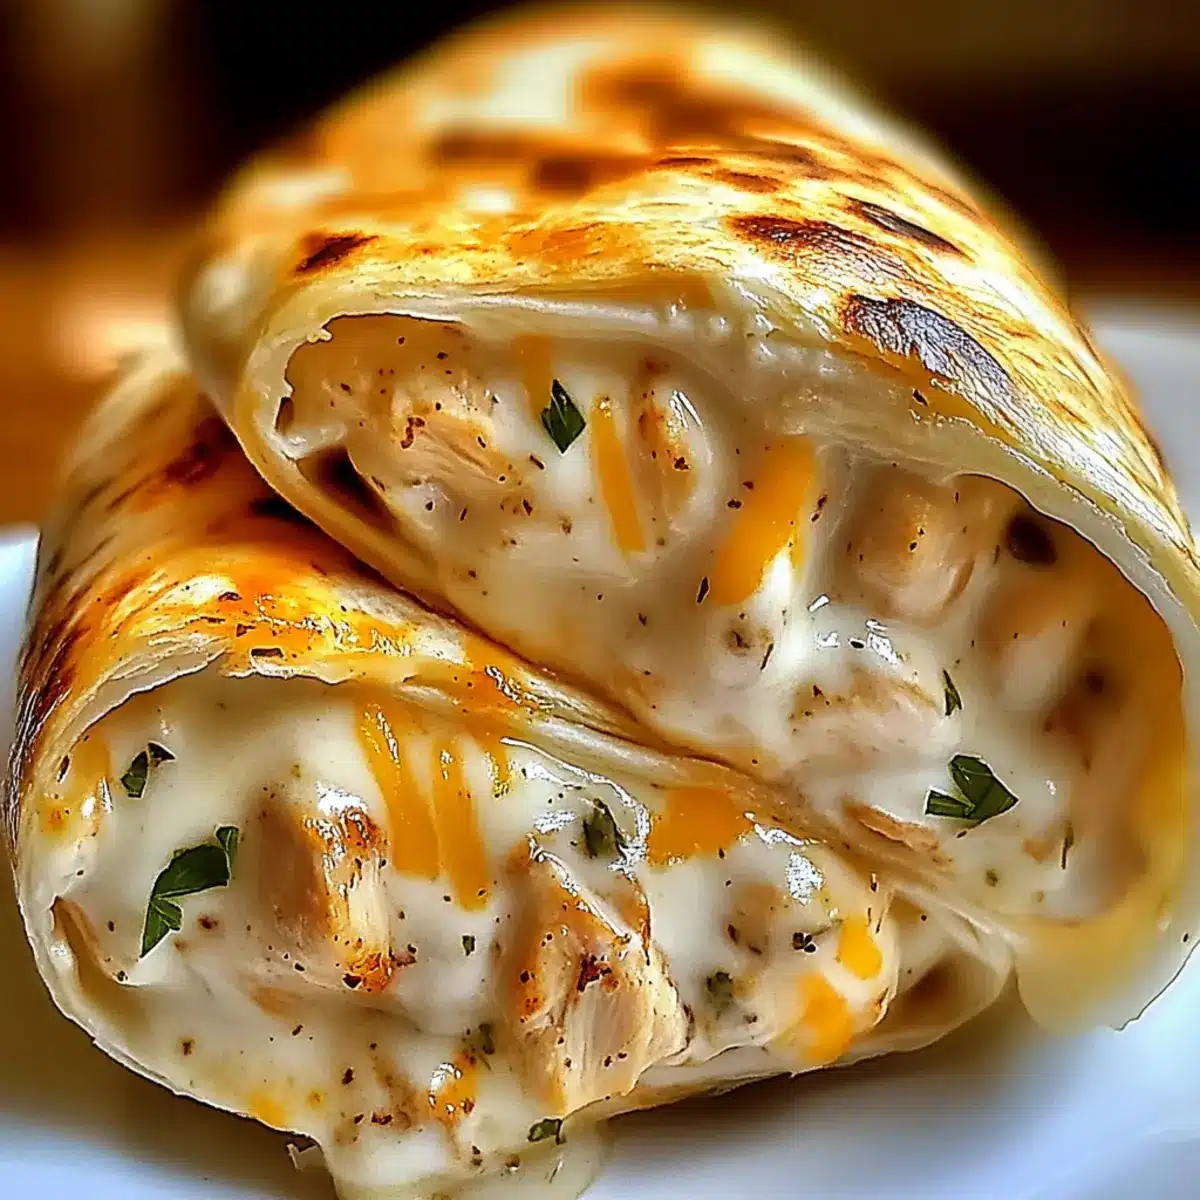
The sizzling sound of garlic dancing in hot butter is enough to make anyone’s mouth water. Today, I’m thrilled to share my recipe for great Cheesy Garlic Chicken Wraps, a flavorful dish that combines tender chicken, rich garlic, and gooey cheese all wrapped snugly in a tortilla. Perfect for busy weeknights, this quick meal takes under thirty minutes to prepare, making it a lifesaver for anyone tired of fast food! Plus, these wraps are completely customizable; whether you prefer whole wheat, spinach, or gluten-free tortillas, everyone can enjoy this delight. So, are you ready to impress your family or dinner guests with a meal that’s both satisfying and adaptable? Dive in, and let’s create some cheesy magic together!
Why are Cheesy Garlic Chicken Wraps a Must-Try?
Deliciously Adaptable: With options for gluten-free or whole wheat tortillas, this recipe meets various dietary needs while delivering big flavor.
Quick and Easy: Ready in under thirty minutes, these wraps save you from the hassle of fast food without sacrificing taste!
Creamy Comfort: The melty combination of cheeses adds a rich, satisfying layer that everyone will love.
Perfect for Meal Prep: Assemble beforehand and refrigerate for an effortless cooking experience on busy evenings!
Crowd-Pleaser: These wraps are great for family dinners or gatherings, ensuring you impress your guests without spending hours in the kitchen.
Pair them with a fresh salad or try alongside my Chili Chicken Wraps for a complete meal that everyone will rave about!
Great Cheesy Garlic Chicken Wraps
For the Chicken Mixture
- Cooked Chicken – Provides protein and substance; use leftover rotisserie chicken for enhanced flavor.
- Garlic (minced) – Infuses a robust flavor into the wraps; sauté until fragrant but not burned.
- Butter – Used for sautéing garlic, enhancing flavor; melt before adding garlic.
- Garlic Powder – Adds depth to the garlic flavor, reinforcing the overall taste.
- Italian Seasoning – Enhances the overall taste and aroma of the chicken filling.
- Salt and Pepper – Elevates seasoning to taste, ensuring the mixture is flavorful.
For the Cheese Mixture
- Cream Cheese – Contributes richness and smooth texture; must be softened for easy mixing.
- Shredded Mozzarella or Cheddar Cheese – Adds creaminess and flavor; feel free to use your favorite cheese or a blend.
- Sour Cream – Provides creaminess and tang; swap with Greek yogurt for a healthier option.
For the Wraps
- Large Tortillas – Acts as the wrap base; substitute with whole wheat, spinach, or gluten-free tortillas as needed.
- Fresh Parsley (optional) – Adds a fresh touch for garnish and visual appeal.
With these ingredients, you’re on your way to creating great Cheesy Garlic Chicken Wraps that will quickly become a family favorite!
Step‑by‑Step Instructions for great Cheesy Garlic Chicken Wraps
Step 1: Sauté Garlic
In a skillet, melt 2 tablespoons of butter over medium heat. Once melted and bubbling, add 2 cloves of minced garlic and sauté for 1-2 minutes until fragrant and lightly golden. Be careful not to burn the garlic, as it can turn bitter, compromising the flavor of your great Cheesy Garlic Chicken Wraps.
Step 2: Heat Chicken
Add 2 cups of cooked chicken to the skillet with the sautéed garlic. Season the mixture with 1 teaspoon each of garlic powder, Italian seasoning, and salt, along with a pinch of pepper. Stir well and let it heat through for about 3-4 minutes until the chicken is thoroughly warm and infused with delicious garlic flavor.
Step 3: Mix Cheeses
In a separate bowl, combine 4 ounces of softened cream cheese, ½ cup of sour cream, and half of your chosen shredded cheese—either mozzarella or cheddar. Mix these together until creamy and smooth. This cheesy mixture will add richness and depth to your great Cheesy Garlic Chicken Wraps, making them irresistible!
Step 4: Combine Mixtures
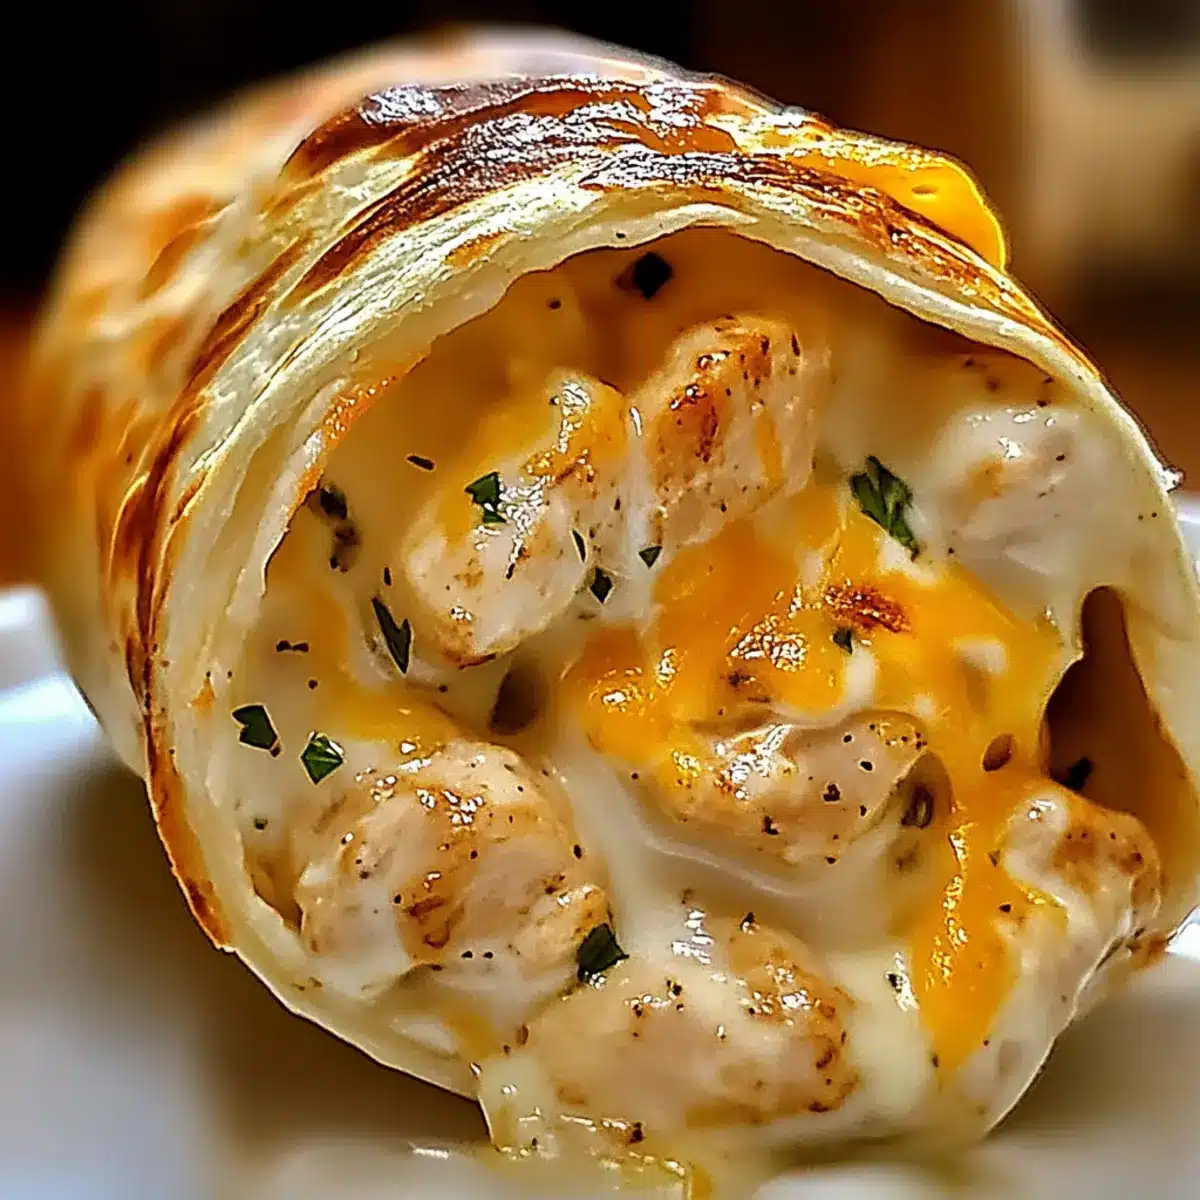
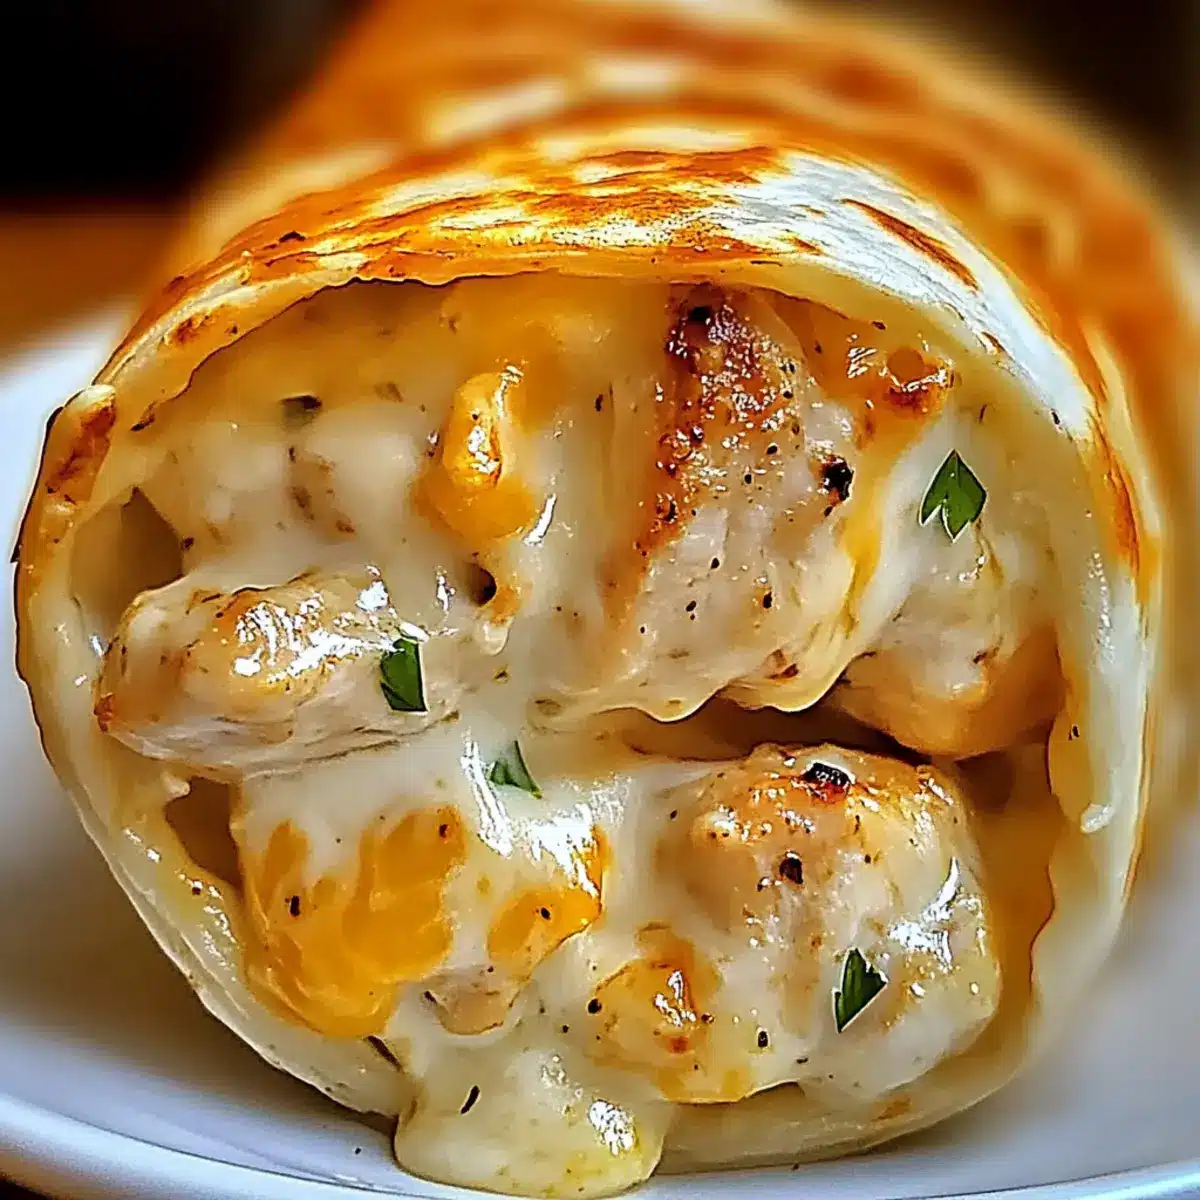
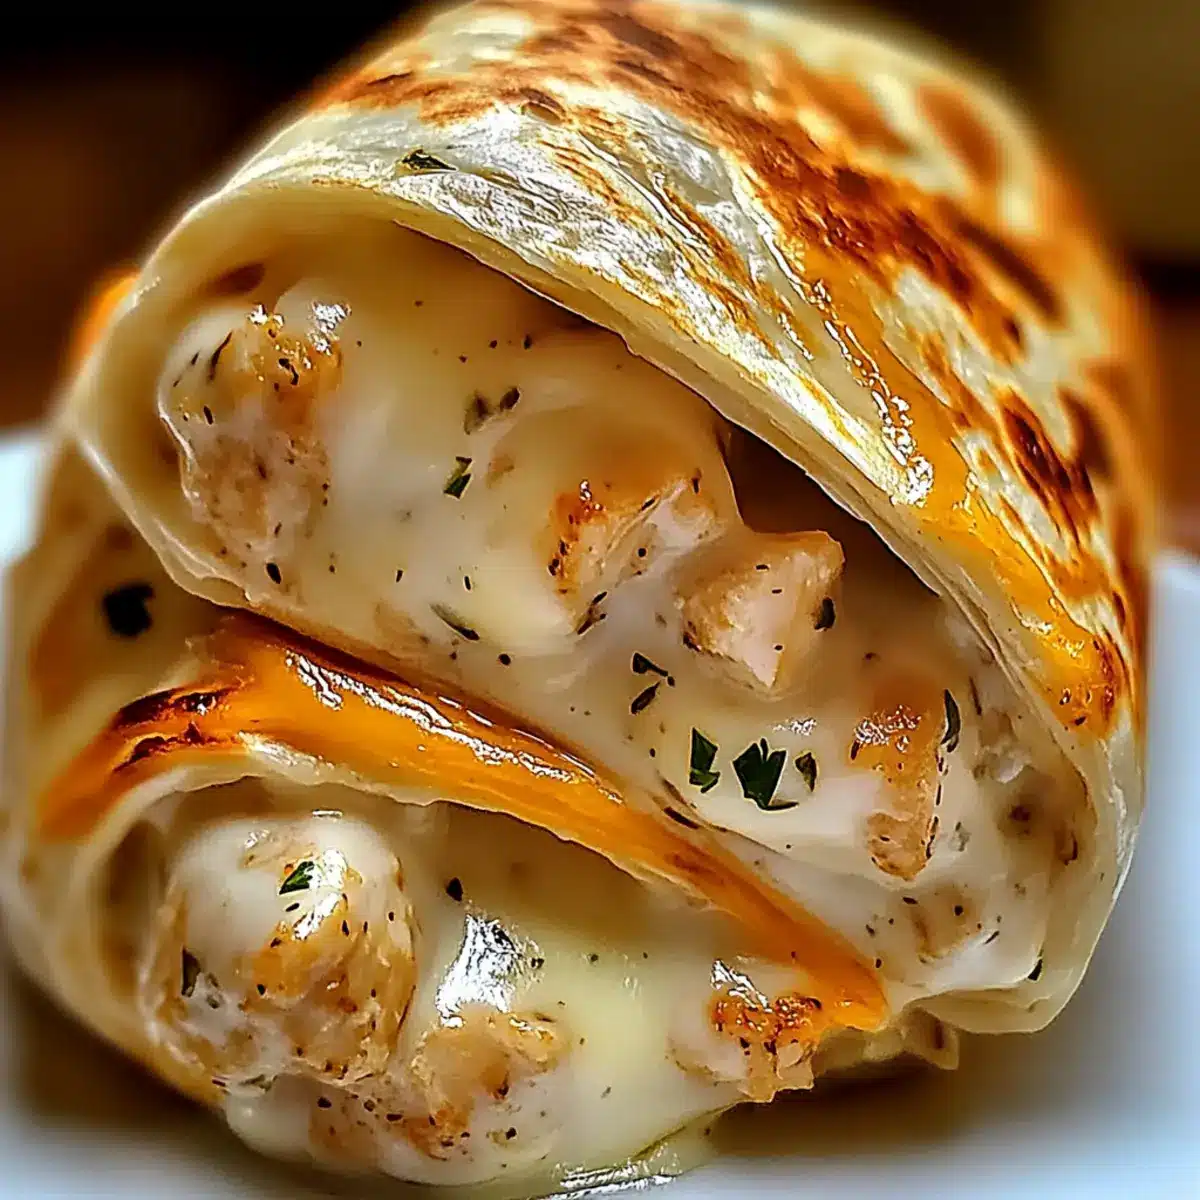
Remove the skillet with the chicken from the heat and stir in the creamy cheese mixture. Mix well until the chicken is completely coated and combined, then set this flavorful filling aside. This step is crucial for achieving that gooey, cheesy goodness in every bite of your wraps.
Step 5: Assemble Wraps
Lay out your large tortillas flat on a clean surface. Spoon the chicken and cheese mixture into the center of each tortilla, leaving space on the edges for folding. Sprinkle with the remaining shredded cheese and then fold the sides over the filling, followed by rolling them up tightly to encapsulate the cheesy goodness within.
Step 6: Cook Wraps
In a preheated skillet or grill pan, place the wraps seam-side down. Cook for 2-3 minutes on each side over medium heat, pressing them gently with a spatula for even browning. They should be golden brown and crispy on the outside, while the cheese inside is melted and gooey, creating the perfect great Cheesy Garlic Chicken Wraps.
Expert Tips for Great Cheesy Garlic Chicken Wraps
- Perfectly Melted Cheese: Ensure your cream cheese is softened before mixing, allowing for a smooth and creamy texture that binds the ingredients beautifully.
- Avoid Burnt Garlic: Keep a close eye while sautéing garlic; it should be fragrant but not browned, as burnt garlic can ruin the flavor of your wraps.
- Customizable Fillings: Don’t hesitate to swap out ingredients! Add colorful veggies or different cheeses to create your perfect version of great Cheesy Garlic Chicken Wraps.
- Seal the Wraps: When rolling, ensure you fold in the sides to prevent the filling from spilling out during cooking, keeping every delicious bite intact.
- Even Cooking: Pressing down gently on the wraps while they’re cooking will help achieve a golden-brown crust, ensuring a crispy exterior and melted inside.
How to Store and Freeze Great Cheesy Garlic Chicken Wraps
Fridge: Store leftovers in an airtight container for up to 3 days. For optimal freshness, place parchment paper between the wraps to prevent sticking before sealing.
Freezer: If you’ve made extra wraps, freeze them wrapped tightly in plastic wrap and then in foil, ensuring they last up to 2 months. Thaw in the fridge before reheating.
Reheating: To reheat, place thawed wraps in a skillet over medium heat for 3-4 minutes per side until heated through and crispy, bringing back that delicious texture of the great Cheesy Garlic Chicken Wraps.
Make-Ahead: Assemble wraps a day in advance and refrigerate them wrapped tightly; they’ll be ready for a quick cook when hunger strikes!
What to Serve with Cheesy Garlic Chicken Wraps
Elevate your meal experience by pairing these indulgent wraps with delicious accompaniments that enhance every bite!
-
Fresh Garden Salad: A crisp mix of greens with a light vinaigrette balances the rich flavors, refreshing your palate.
-
Crispy Potato Wedges: Seasoned and baked to perfection, these wedges offer a satisfying crunch to contrast the softness of the wraps.
-
Tangy Dipping Sauce: Serve with salsa or ranch for a fun and flavorful addition that ignites your taste buds with every bite.
-
Grilled Veggies: Zesty, charred vegetables like bell peppers and zucchini provide a delightful fresh element that complements the cheesy wraps.
-
Creamy Coleslaw: The cool, creamy texture of coleslaw adds a perfect contrast, making it both a smart and tasty pairing for your wraps.
-
Savory Corn on the Cob: Sweet, buttery corn offers a familiar comfort that rounds out this satisfying meal, creating a delightful summer feel.
-
Chilled Sparkling Lemonade: A refreshing drink option, sparkling lemonade adds a bubbly zest that brightens the entire dining experience, perfect for unwinding after a busy day.
Great Cheesy Garlic Chicken Wraps Variations
Feel free to let your creativity shine with these delightful twists on your cheesy wraps!
- Gluten-Free: Use gluten-free tortillas to accommodate dietary needs while still enjoying that cheesy goodness.
- Whole Wheat Upgrade: Swap in whole wheat tortillas for a more wholesome option without sacrificing flavor.
- Spinach Tortillas: Add a pop of color and nutrition by using spinach tortillas as your wrap base.
- Vegetarian Delight: Replace chicken with black beans and sautéed bell peppers for a hearty vegetarian alternative.
- Extra Veggies: Add sautéed onions, bell peppers, or mushrooms to the chicken mixture for added flavor and texture.
- Cheese Blend: Try different cheese combinations like pepper jack for a spicy kick or feta for a tangy twist.
- Heat Level: Add jalapeños or crushed red pepper while cooking for an extra layer of heat and excitement.
- Herb Infusion: Sprinkle fresh herbs like cilantro or basil into the filling to elevate the flavors and freshness.
Looking for more cheesy recipes? Don’t miss out on delightful dishes like my Garlic Butter Chicken or a comforting bowl of Roasted Garlic Soup to warm your soul!
Make Ahead Options
These great Cheesy Garlic Chicken Wraps are perfect for busy cooks looking to save time during the week! You can assemble the wraps up to 24 hours in advance. Simply prepare the chicken and cheese mixture, fill the tortillas, and wrap them tightly in plastic wrap or foil. For optimal freshness, refrigerate them until you’re ready to cook. When it’s time to enjoy your wraps, just heat a skillet, cook the assembled wraps for about 2-3 minutes on each side, and you’ll have delicious, melty wraps that are just as delightful as if they were freshly made! This strategy not only reduces weeknight stress but ensures a satisfying meal in minutes!
Great Cheesy Garlic Chicken Wraps Recipe FAQs
How do I choose the best tortillas for my wraps?
Absolutely! For the best results, look for large tortillas that are soft and pliable to make wrapping easier. Whole wheat or spinach tortillas offer a healthier twist, while gluten-free options are available for those with dietary restrictions. Check for any tears or cracks, which can lead to filling spillage!
How can I store leftovers of the Cheesy Garlic Chicken Wraps?
Certainly! Store your leftovers in an airtight container in the fridge for up to 3 days. To maintain freshness, place parchment paper between the wraps to prevent them from sticking together. This simple step ensures every bite remains delicious!
Can I freeze the Cheesy Garlic Chicken Wraps, and if so, how?
Yes, you can freeze these tasty wraps! To do so, first wrap each one tightly in plastic wrap and then in foil. This extra layer protects them from freezer burn and preserves flavor. They can be frozen for up to 2 months. To enjoy, thaw in the fridge overnight before reheating.
What should I do if the garlic burns while sautéing?
Very important to avoid! If your garlic has burnt, it can impart a bitter taste. If you catch it early, quickly remove the skillet from heat. You can make a fresh batch of garlic by using a new skillet with fresh butter. Remember to keep an eye on your garlic, sautéing until just fragrant—usually 1-2 minutes will do the trick!
Are these wraps safe for pets or people with allergies?
Great question! These wraps include common allergens like dairy. If there’s someone with a dairy allergy, consider alternatives like vegan cream cheese or skipping the sour cream in favor of a dairy-free yogurt. Always be mindful of the ingredients and consult a healthcare professional if you’re unsure about food allergies!
How long does it take to prepare the Cheesy Garlic Chicken Wraps?
These delightful wraps are a quick solution for a busy night! From start to finish, the preparation and cooking take under thirty minutes. It’s perfect for when time is short but you still want a flavorful home-cooked meal. The more the merrier—get your loved ones involved in the assembly for a fun family activity!
Irresistible Cheesy Garlic Chicken Wraps for Easy Weeknight Meals
Ingredients
Equipment
Method
- In a skillet, melt 2 tablespoons of butter over medium heat. Add 2 cloves of minced garlic and sauté for 1-2 minutes until fragrant.
- Add 2 cups of cooked chicken to the skillet. Season with 1 teaspoon each of garlic powder, Italian seasoning, and salt, along with a pinch of pepper. Stir well and heat for 3-4 minutes.
- In a separate bowl, combine 4 ounces of softened cream cheese, ½ cup of sour cream, and half of the chosen shredded cheese. Mix until creamy and smooth.
- Remove the skillet from heat and stir in the creamy cheese mixture. Mix until the chicken is completely coated.
- Lay out large tortillas and spoon the chicken and cheese mixture into the center. Fold the edges and roll tightly.
- In a preheated skillet or grill pan, place the wraps seam-side down. Cook for 2-3 minutes on each side until golden brown and crispy.
Leave a Reply