
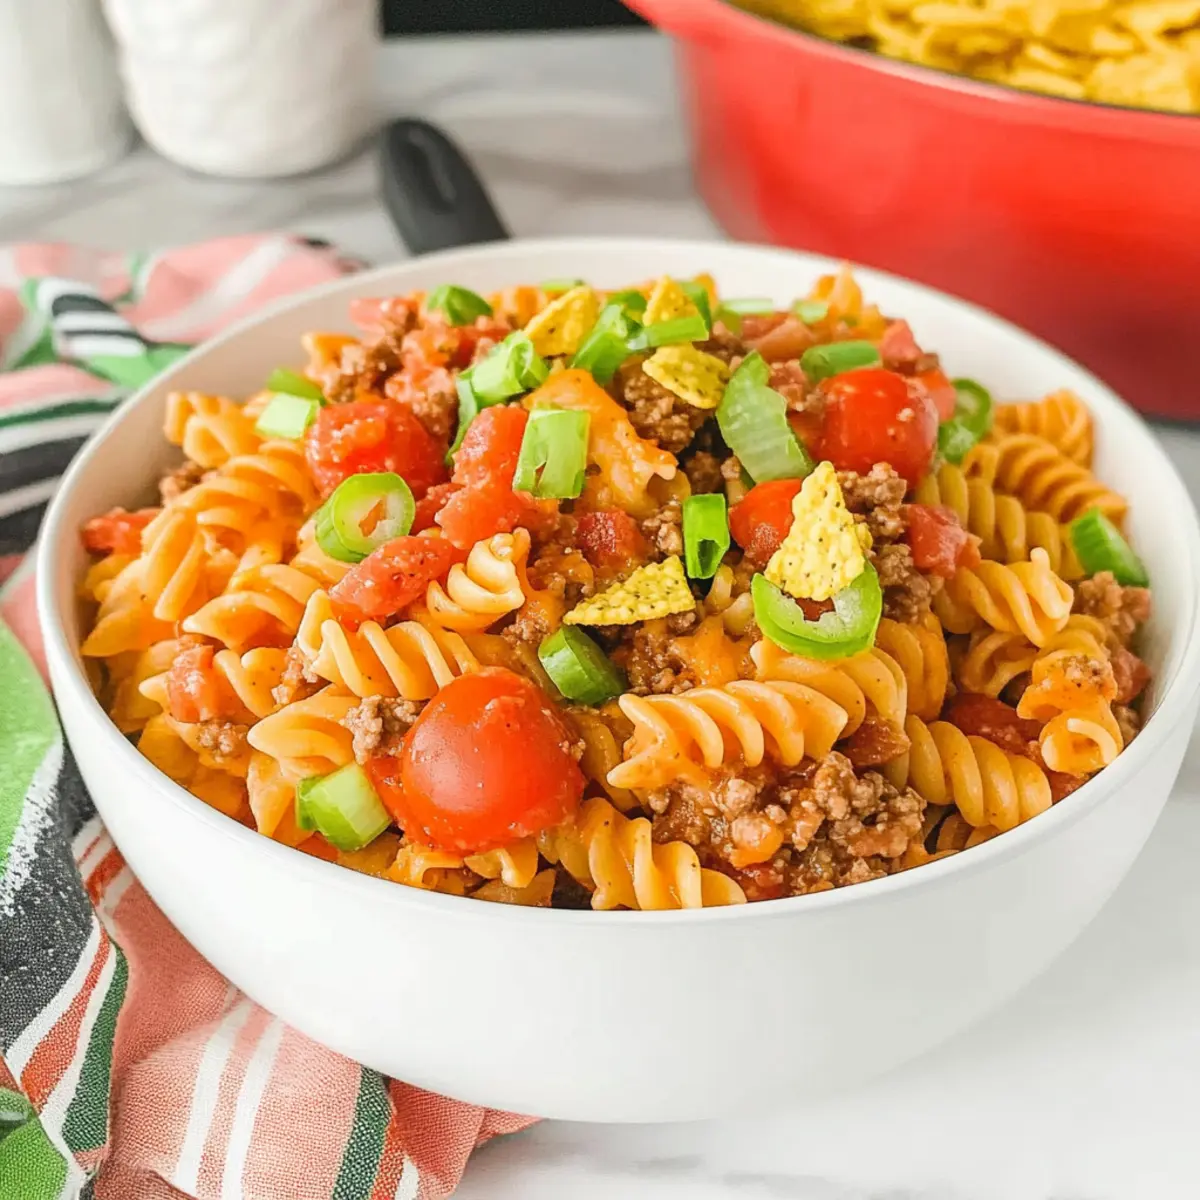
As I stood in my kitchen, the scent of sizzling ground beef filled the air, mingling with the promise of zesty flavors to come. That’s when I decided to whip up this Easy Cheesy Taco Pasta Salad, a dish that’s not only a family favorite but also a perfect solution for last-minute get-togethers. In just 20 minutes, you’ll have a hearty, flavorful side dish that combines creamy cheese, crisp veggies, and a delightful crunch from crushed Doritos. It’s an ideal companion for busy weeknights or potlucks where everyone’s taste buds can be satisfied. Ready to bring some excitement to your dinner table? Let’s dive into making this vibrant salad together!
Why is this Taco Pasta Salad a must-try?
Quick and Easy: Whipping up this Cheesy Taco Pasta Salad takes just 20 minutes, making it a go-to for busy weeknights. Flavor Explosion: The combination of taco-seasoned beef and zesty Catalina dressing creates a flavor profile that’s hard to resist. Crowd-Pleasing Appeal: Perfect for potlucks or family gatherings, this salad guarantees smiles all around! Plus, you can customize it easily—try pairing it with my Garlic Butter Pasta for a fun meal combo. Textural Delight: From the creamy cheese to the crunch of Doritos, every bite offers a delightful contrast you won’t forget. Perfectly Make-Ahead: Prep it a day in advance to save time, ensuring your salad is fresh and tasty when it’s time to serve!
Cheesy Taco Pasta Salad Ingredients
• Get ready to make this flavorful dish!
For the Salad
- Rotini Pasta – A sturdy base that holds up beautifully to all the toppings; cook until al dente for the best texture.
- Ground Beef – Adds hearty protein and flavor; season it with taco seasoning to give the salad its signature taste.
- Taco Seasoning – Infuses classic taco flavors; feel free to use homemade seasoning for a personalized spice level.
- Cherry Tomatoes – Provide a burst of freshness; swap them for diced bell peppers for an extra crunch.
- Green Onions – Bring a mild onion flavor and gorgeous green color; chives can work as a great alternative.
- Shredded Cheese (Cheddar + Monterey Jack) – Adds creamy richness; you can select any cheese blend you love for variety.
- Catalina Dressing – Ties all the ingredients together with its tanginess; ranch dressing can be another tasty option if you prefer.
- Doritos (Crushed) – Introduces a fun crunch; any crisp tortilla chips can serve as a satisfying substitute in this Cheesy Taco Pasta Salad.
Optional Add-ins
- Black Beans – Add for extra protein and fiber; rinse and drain them before stirring into the salad.
- Corn – Provides sweetness and crunch; frozen corn works perfectly when thawed and mixed in.
Step‑by‑Step Instructions for Cheesy Taco Pasta Salad
Step 1: Cook Pasta
Begin by bringing a large pot of salted water to a boil over high heat. Once boiling, add the rotini pasta and cook according to package instructions until al dente, usually about 8-10 minutes. Stir occasionally to prevent sticking. Once cooked, drain the pasta in a colander and rinse under cold water to stop the cooking process.
Step 2: Brown the Beef
In a large skillet over medium-high heat, add the ground beef. Cook for about 5-7 minutes, using a spatula to break it apart until browned and fully cooked, with no pink remaining. Drain any excess grease, then sprinkle the taco seasoning over the beef and add a splash of water. Stir well and cook according to package instructions, typically another 2-3 minutes until flavorful.
Step 3: Combine Ingredients
In a large bowl, combine the drained rotini pasta, seasoned ground beef, halved cherry tomatoes, sliced green onions, and the mixture of shredded cheddar and Monterey Jack cheese. Gently toss all the ingredients together until evenly mixed, ensuring every piece is coated in the vibrant flavors of the Cheesy Taco Pasta Salad.
Step 4: Dress the Salad
Pour the zesty Catalina dressing over the combined salad ingredients. Using a large spatula, fold the dressing into the salad until every ingredient is well-coated and the colors blend beautifully. This step is crucial as it brings all the flavors together and enhances the overall taste of the Cheesy Taco Pasta Salad.
Step 5: Chill and Serve
For optimal flavor, cover the salad and refrigerate for about 15-20 minutes to allow the ingredients to meld together. Just before serving, fold in the crushed Doritos to maintain their delightful crunch. Serve this colorful, hearty Cheesy Taco Pasta Salad at your next gathering, and watch it disappear!
Make Ahead Options
These Cheesy Taco Pasta Salad preparations are perfect for busy home cooks! You can prepare the pasta and the seasoned ground beef up to 24 hours in advance; just store them separately in airtight containers to maintain their texture and flavor. The chopped tomatoes, green onions, and shredded cheese can also be prepped ahead, stored in the fridge, and added just before serving. Once you’re ready to enjoy this delightful salad, simply combine all the ingredients, add the Catalina dressing, and mix well. Don’t forget to fold in the crushed Doritos at the last minute to keep that crucial crunch intact. This way, you can have a fresh, delicious meal with minimal effort!
Expert Tips for Cheesy Taco Pasta Salad
- Perfect Pasta: Cook rotini until al dente to prevent a mushy texture. Overcooked pasta can detract from the overall salad experience.
- Timing is Key: Fold in crushed Doritos just before serving to maintain their delightful crunch; adding them too early can lead to sogginess.
- Customize Your Spice: For a spicier twist on the Cheesy Taco Pasta Salad, consider adding diced jalapeños or a splash of hot sauce to the beef mixture for extra heat.
- Dress Smartly: Ensure you coat all ingredients with Catalina dressing evenly; this step brings all flavors together beautifully for maximum taste.
- Prep Ahead: This salad holds up well in the fridge; prepare it a day in advance for busy nights, but always add crunchy toppings last for freshness!
What to Serve with Cheesy Taco Pasta Salad
Gathering around a table filled with dishes that compliment each other creates a delightful dining experience. Here are some fantastic ideas to elevate your meal!
- Grilled Chicken Skewers: Juicy and tender, these serve as a perfect protein counterpart, adding a smoky flavor that enhances the salad’s zest.
- Mexican Street Corn: This festive side, with its creamy, cheesy topping, pairs beautifully with the savory notes of the taco salad.
- Guacamole and Tortilla Chips: Creamy avocados and crunchy chips offer a fresh texture contrast, while bolstering that delightful Mexican flair—perfect for dipping!
- Black Bean Salsa: A vibrant and tangy salsa adds a fresh kick, with crunchy veggies and hearty beans that complement the salad’s flavors.
- Fruit Salad: A sweet and refreshing fruit medley balances the richness of the salad. Consider using seasonal fruits for an extra pop of color and flavor.
- Limeade or Horchata: These refreshing drinks not only quench your thirst but also bring a delightful sweetness that pairs well with the zesty flavors of the Cheesy Taco Pasta Salad.
- Churros: For a sweet ending, these crispy, sugar-coated treats are a family favorite and cap off your meal with a satisfying crunch!
How to Store and Freeze Cheesy Taco Pasta Salad
Fridge: Store the salad in an airtight container for up to 3 days. This helps preserve the flavors while keeping the ingredients fresh.
Freezer: It’s best to avoid freezing this Cheesy Taco Pasta Salad, as the pasta and vegetables may become mushy upon thawing.
Reheating: If serving leftovers, enjoy them cold or at room temperature to maintain the salad’s delightful crunch.
Crunch Preservation: Always add crushed Doritos just before serving to keep them crispy and flavorful!
Cheesy Taco Pasta Salad Variations
Feel free to tweak this Cheesy Taco Pasta Salad to suit your taste preferences and dietary needs!
-
Ground Turkey: Substitute ground beef for ground turkey for a leaner option that still packs flavor. It’s a favorite in our house for those lighter meals!
-
Taco Seasoning Swap: Use your own homemade taco seasoning mix to control flavor intensity and spice level. It’s a great way to make this salad your own!
-
Dressing Alternatives: Replace Catalina dressing with creamy ranch for a different taste, or try a vinaigrette if you’re looking for a lighter touch. The options are endless!
-
Veggie Boost: Add black beans or corn to enhance nutrition and color. These ingredients not only elevate the dish but also bring in an extra crunch that makes every bite special.
-
Crunchy Variations: Swap regular Doritos for spicy flavored chips for an exciting kick or try using baked tortilla chips for a healthier, yet still satisfying crunch.
-
Cheese Choices: Experiment with different cheese blends, like Pepper Jack for a spicy twist or a mixed cheese to cater to your family’s favorites. Mix it up!
-
Heat It Up: If you’re an adventurous eater, throw in diced jalapeños or a few dashes of hot sauce to the beef mixture for a fiery update to this salad. Spice lovers will rejoice!
No matter how you choose to personalize your Cheesy Taco Pasta Salad, these variations ensure that there’s something for everyone at the table. Plus, it pairs beautifully with dishes like Cheesy Christmas Tree Bread or my Feta Avocado Salad. Enjoy experimenting!

Cheesy Taco Pasta Salad Recipe FAQs
How do I choose the right pasta for my Cheesy Taco Pasta Salad?
When selecting pasta, I recommend using rotini because its spiral shape holds onto the dressing and ingredients beautifully. Look for pasta that feels firm to the bite, or “al dente,” as this will help the salad maintain its structure and texture in the final dish. Alternatively, you could use other types like penne or farfalle if you prefer!
How should I store the Cheesy Taco Pasta Salad?
After making this delightful salad, transfer it to an airtight container and refrigerate. It will stay fresh for up to 3 days. I often store it in a glass container to keep it visible and tempting. Remember, if you plan to take it to a gathering, add crushed Doritos just before serving to keep that fun crunch intact!
Can I freeze the Cheesy Taco Pasta Salad?
Freezing is not recommended for this salad, as the pasta and fresh veggies can turn mushy when thawed. Instead, I suggest preparing it a day ahead and keeping it chilled in the refrigerator. If you find leftovers, enjoy them cold to appreciate the crunchy textures.
What if I have leftover ingredients?
Absolutely! If you have extra ingredients like taco seasoning or cheese, consider making a quick quesadilla or a topping for nachos. You can also throw in any additional veggies or beans into a soup or a stir-fry for another tasty dish.
Are there any dietary considerations for this recipe?
Definitely! If you’re cooking for someone with dietary restrictions, you can easily customize the Cheesy Taco Pasta Salad. Use ground turkey or chicken for leaner meat or a plant-based ground option to make it vegetarian. For a dairy-free version, a vegan cheese alternative can be used, and for gluten-free, simply swap in gluten-free pasta. Always remember to check for food allergies related to the ingredients you choose!
How do I keep the Doritos crunchy in my salad?
To maintain the delightful crunch of the Doritos, add them just before serving the salad. This way, they won’t soften and remind you of those good old days of cheesy movie nights! The more the merrier when it comes to those crunchy bits, after all!
Cheesy Taco Pasta Salad: A Fun and Flavorful Family Favorite
Ingredients
Equipment
Method
- Bring a large pot of salted water to a boil. Cook rotini pasta in boiling water for 8-10 minutes until al dente. Drain and rinse under cold water.
- In a large skillet over medium-high heat, brown the ground beef, breaking it apart, for about 5-7 minutes. Drain excess grease, then add taco seasoning and a splash of water. Cook for another 2-3 minutes.
- In a large bowl, combine drained rotini pasta, seasoned ground beef, cherry tomatoes, green onions, and shredded cheese. Toss gently until mixed.
- Pour Catalina dressing over the salad and fold gently until well-coated.
- Cover and refrigerate for 15-20 minutes to meld flavors. Fold in crushed Doritos just before serving.
Leave a Reply