
Stepping into a kitchen with the vibrant aroma of peanut butter and the promise of something sweet is like an invitation to a delicious adventure. That’s how I felt when I first whipped up this no-bake Butterfinger Dip, and let me tell you, it’s nothing short of magical. In just 10 minutes, you can create a creamy and satisfying dessert that’s perfect for tailgates, barbecues, or simply indulging at home. This crowd-pleasing treat not only saves you time but also leaves your taste buds dancing with joy as crunchy Butterfinger bits meld into a fluffy, rich base. Whether you’re dipping in fresh fruits or classic cookies, this easy dessert is bound to become your new go-to. Curious about how to make this delectable dip? Let’s dive in!
Why is Butterfinger Dip so irresistible?
Creamy, Dreamy Delight: This no-bake dip is the perfect blend of smooth peanut butter and fluffy whipped cream, creating a rich texture that’s hard to resist.
Quick Crafting: In just 10 minutes, this recipe pulls together effortlessly, making it a last-minute lifesaver for gatherings.
Crowd-Pleasing Flavor: The crunchy Butterfinger bits add a sweet, nostalgic twist that’s sure to impress family and friends, making it ideal for tailgates and parties.
Versatile Dipping: Pair it with anything from vanilla wafers to apple slices for maximum enjoyment—everyone can find their favorite way to indulge!
Make-Ahead Magic: Prepare this tasty treat a day in advance for stress-free entertaining; just pop it in the fridge and serve when ready.
Enhance your gatherings with this delightful Pretzel Bites pairing that can elevate your butterfinger experience to new heights!
Butterfinger Dip Ingredients
For the Dip
• Heavy Whipping Cream – Adds fluffiness and richness to the dip; ensure it’s cold for the best results.
• Brown Sugar – Provides sweetness and enhances the caramel notes; can substitute with granulated sugar for a milder taste.
• Cream Cheese (8 oz) – Gives structure and a creamy texture; use full-fat for the ultimate flavor and consistency.
• Peanut Butter (1 cup) – Adds a deep, nutty flavor and creaminess; opt for smooth or crunchy based on your preference.
• Butterfinger Bits (1 bag, about 1 1/2 cups) – Delivers unique sweetness and crunchy texture; other candy bars can be substituted for varied flavors.
For Serving
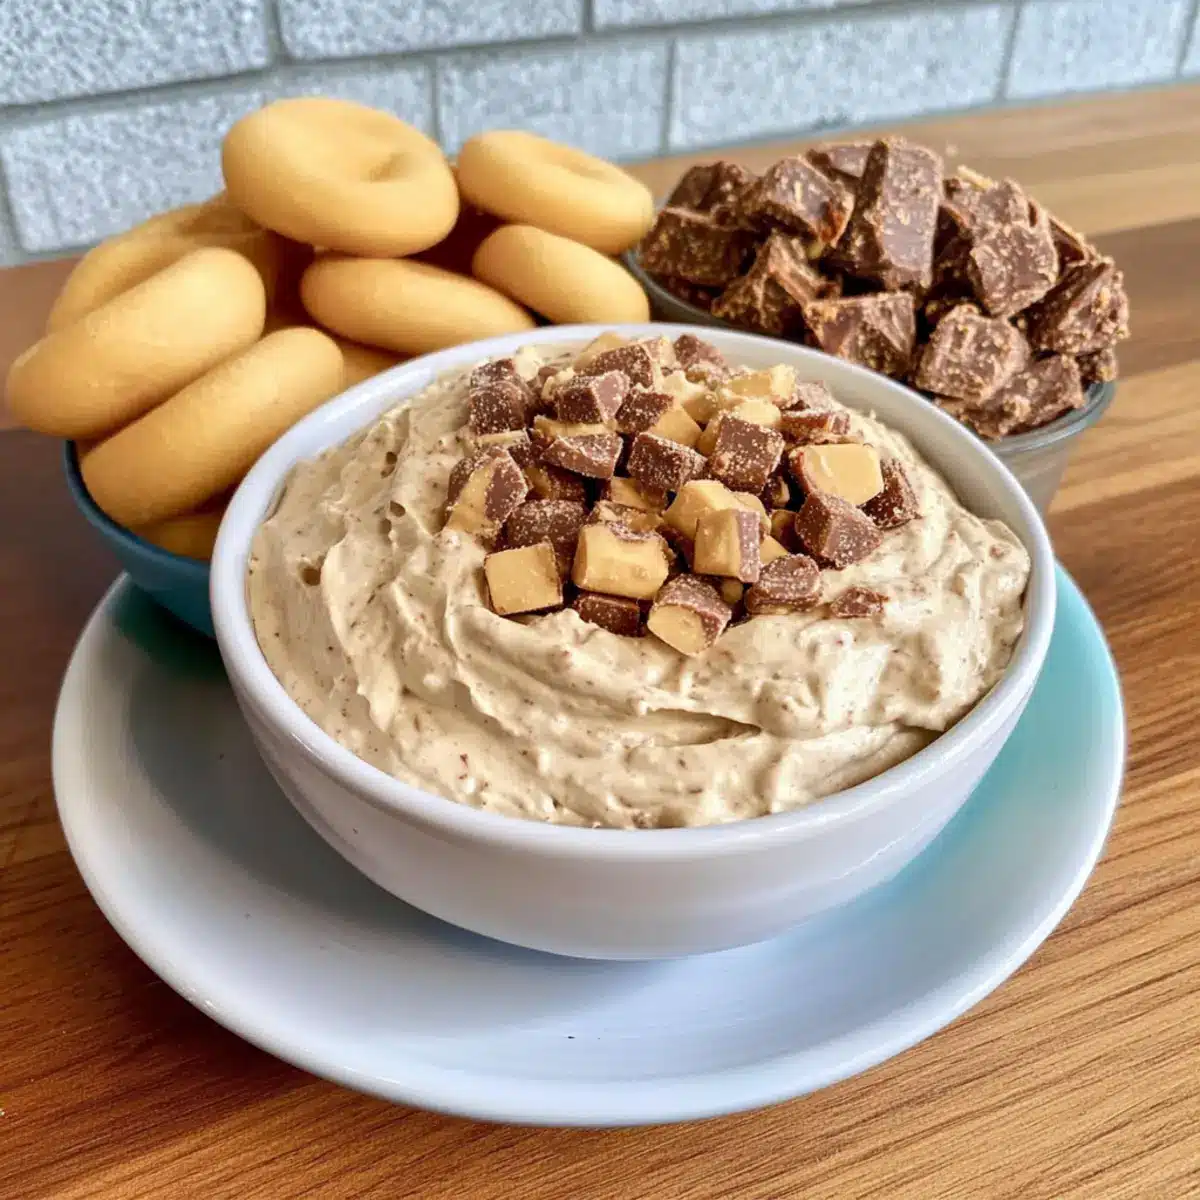
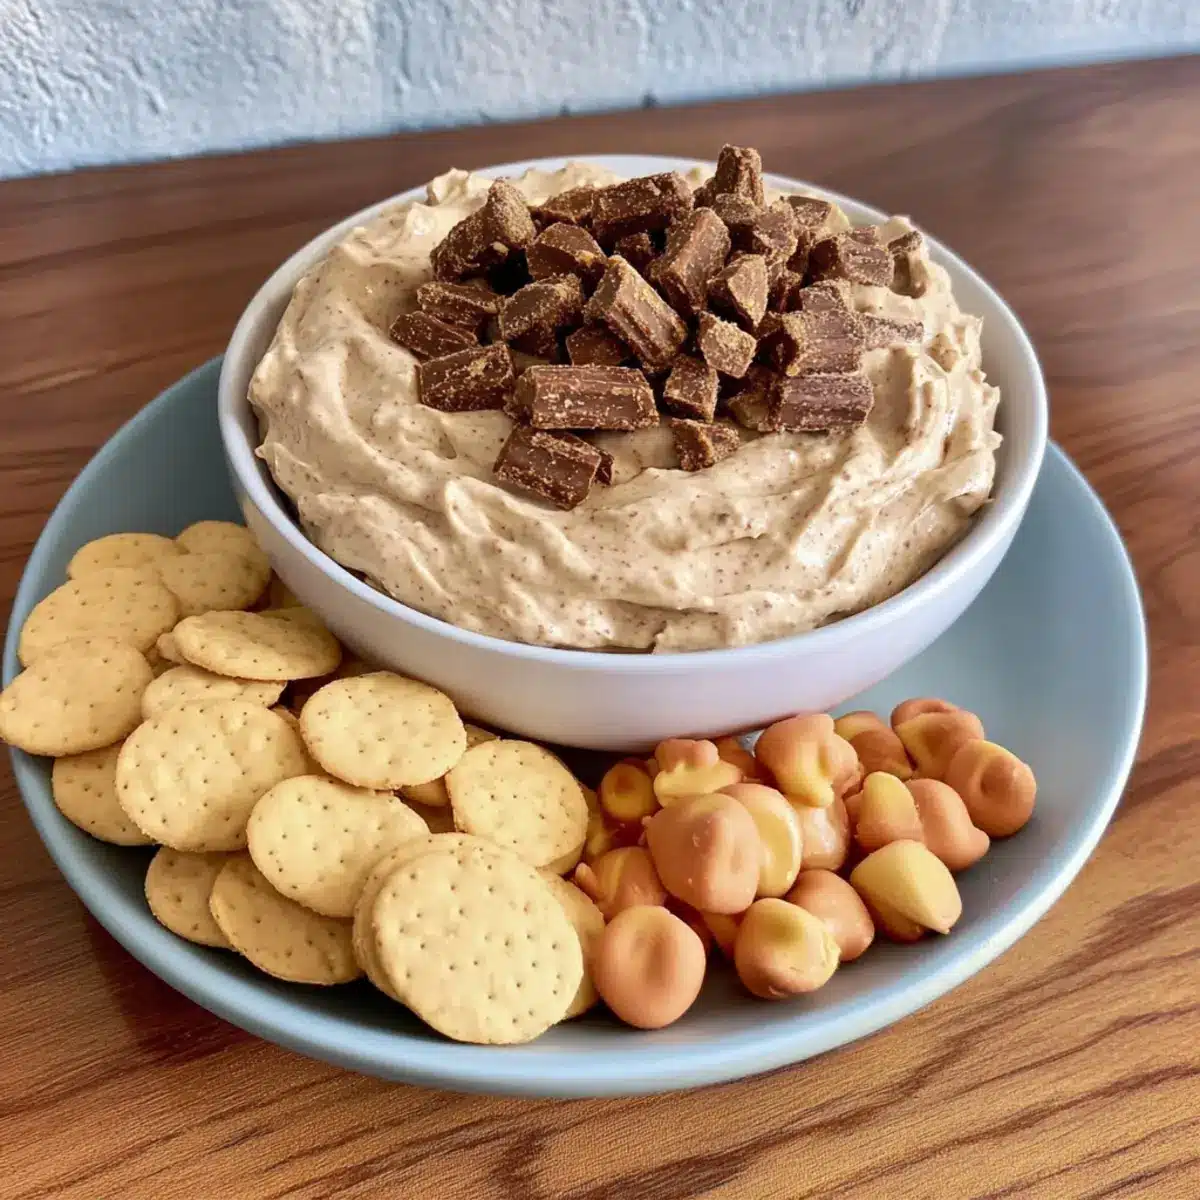
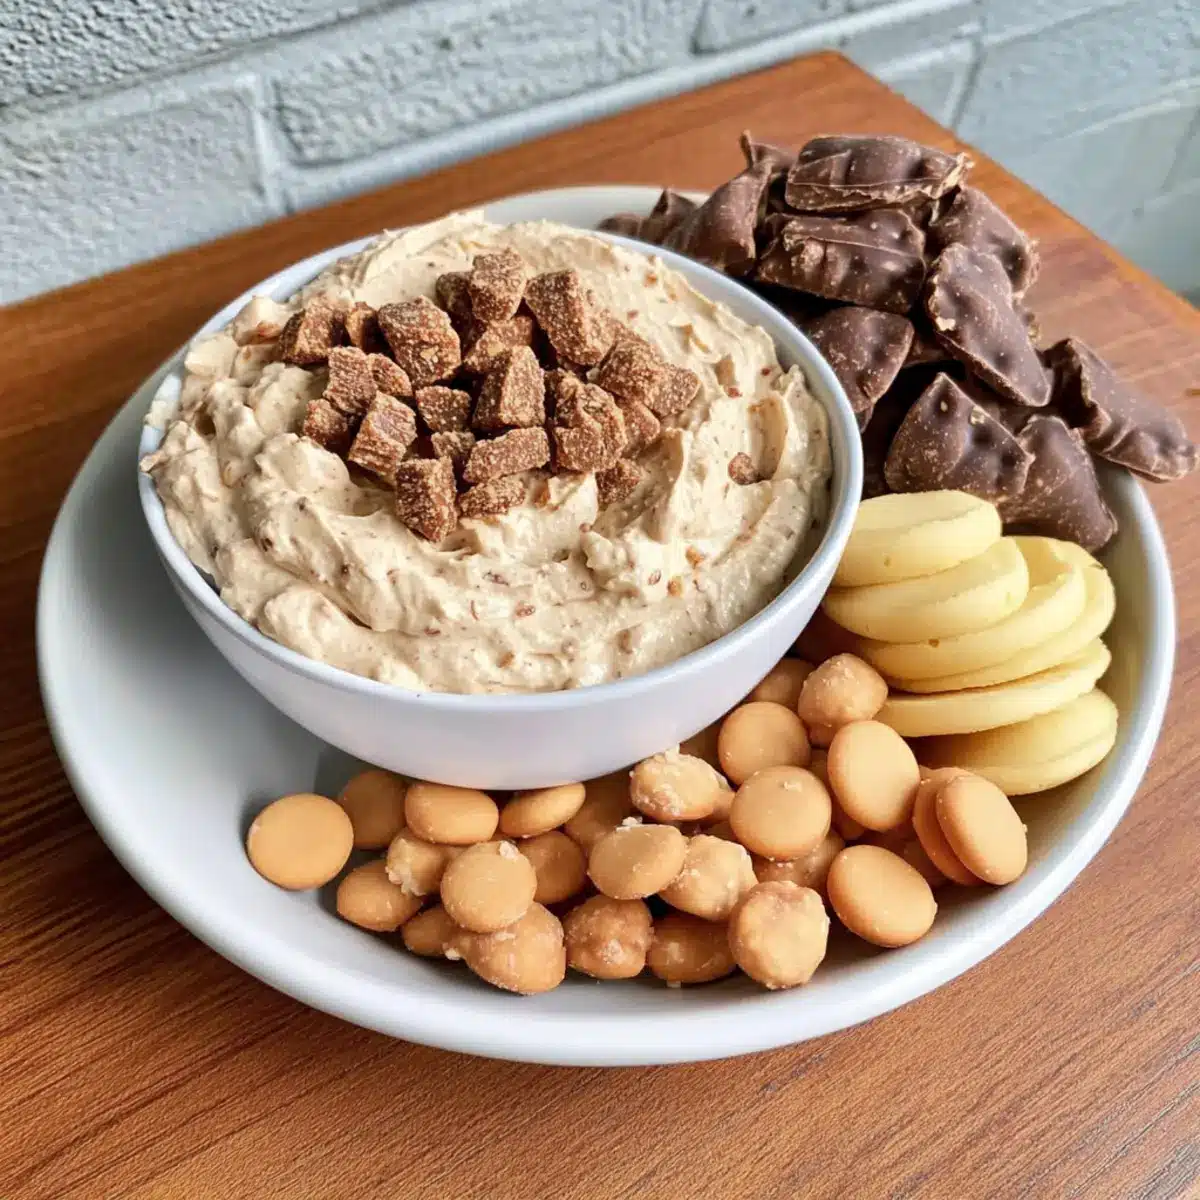
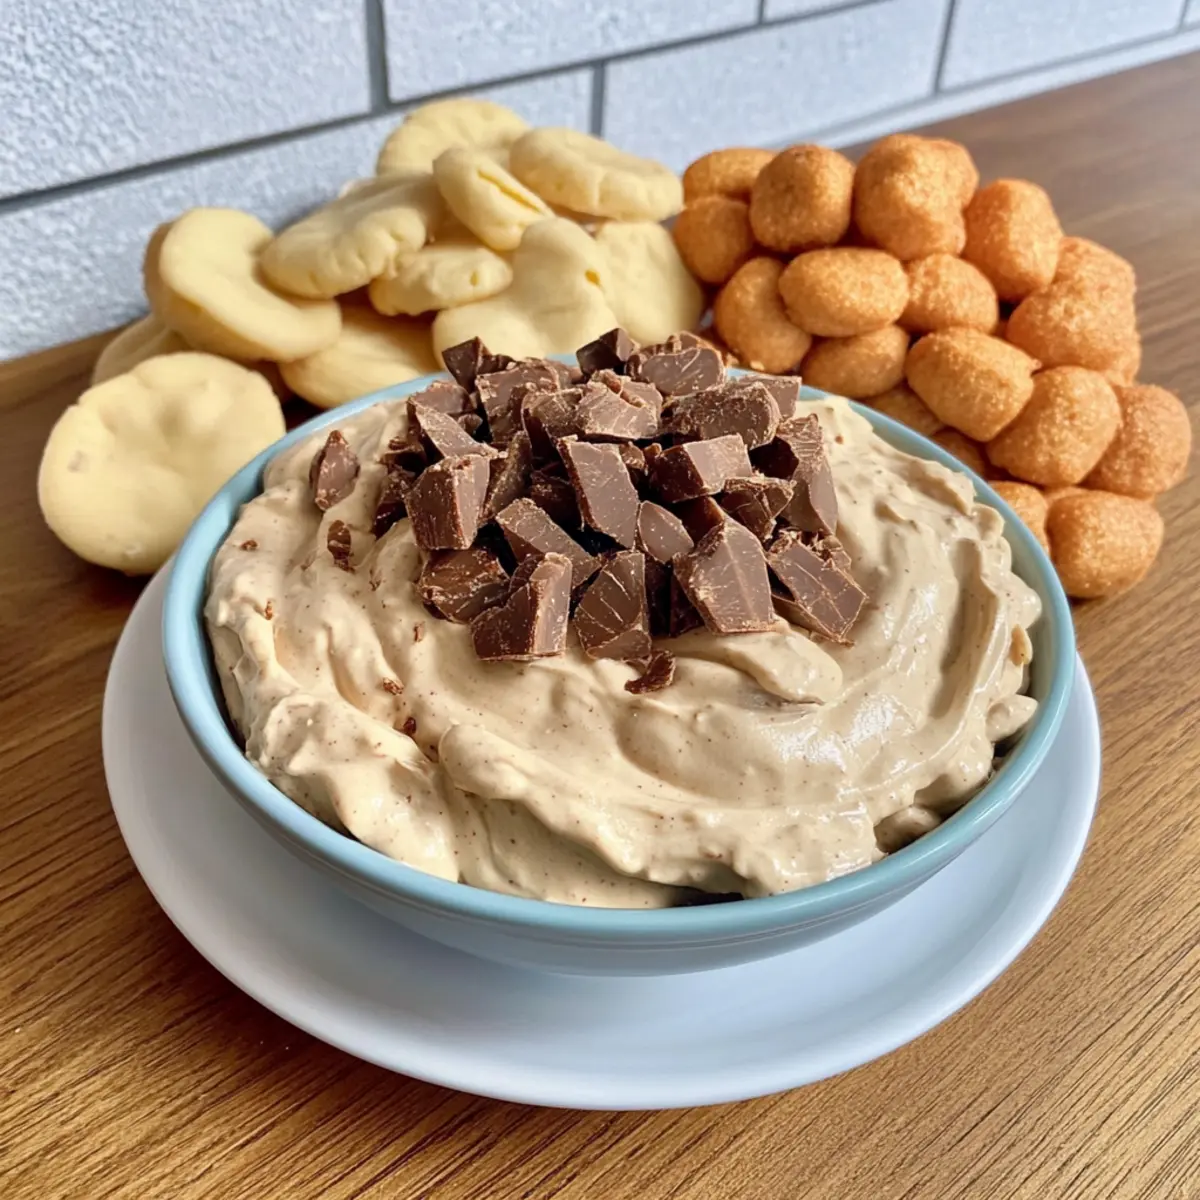
• Vanilla Wafers – Perfect for dipping and complements the sweet flavors of the dip.
• Apple Slices – A fresh, fruity option that balances the rich dip nicely.
• Pretzels – Add a salty crunch for a delightful contrast to the sweetness.
• Graham Crackers – Classic and crunchy, they’re a fantastic match for this Butterfinger dip.
With these simple Butterfinger Dip ingredients, you’re on your way to making a dessert that’s undeniably delightful and sure to be a hit at any gathering!
Step‑by‑Step Instructions for Butterfinger Dip
Step 1: Whip the Cream
In a large mixing bowl, combine 1 cup of heavy whipping cream and 1/2 cup of brown sugar. Using an electric mixer, whip the mixture on medium-high speed until stiff peaks form, which should take about 3 to 5 minutes. The cream will become fluffy and increase in volume, creating a light base for your delicious Butterfinger dip.
Step 2: Combine the Base
Next, add 8 oz of softened cream cheese and 1 cup of peanut butter to the whipped cream. Using the mixer on low speed, blend everything together until smooth and fluffy, taking care to scrape down the sides of the bowl to incorporate all ingredients evenly. This creamy mixture will serve as the heart of your Butterfinger dip.
Step 3: Fold in the Butterfinger Bits
Once your base is fully combined, gently fold in 3/4 of the Butterfinger bits using a spatula. Be careful not to overmix, as you want to maintain the crunch of the candy pieces. The colorful specks of Butterfinger will start to peek through your creamy dip, creating an inviting texture that promises delightful bites.
Step 4: Transfer and Garnish
Scoop the Butterfinger dip into a serving bowl, ensuring it’s nested comfortably. Sprinkle the reserved 1/4 of the Butterfinger bits on top for a decorative and tasty garnish, enhancing the visual appeal of your dessert. This final touch adds a fun crunch that guests will love to see.
Step 5: Serve or Chill
You can serve the Butterfinger dip immediately for a fresh, creamy delight, or cover it and refrigerate until you’re ready to enjoy it. Chilling for at least 30 minutes allows the flavors to meld beautifully. Whether served right away or after a short rest, this treat will be a hit at any gathering.
What to Serve with Butterfinger Dip
Satisfy your sweet tooth with a delightful spread that complements the creaminess of this irresistible dip.
- Vanilla Wafers: These delightful cookies provide a sweet crunch that pairs perfectly with the rich dip, making every bite a treat.
- Apple Slices: Fresh and tart, the brightness of apple slices balances the sweetness of the Butterfinger dip, offering a refreshing contrast.
- Pretzels: The salty crunch adds a fun twist to the dip, elevating the flavors and bringing a delightful texture to your snacking experience.
- Graham Crackers: A classic choice, their crunchy texture and mild sweetness meld beautifully with the rich, creamy dip for a nostalgic delight.
For drinks, try serving it with Milkshakes or Coffee. The creamy flavors harmonize, enhancing both the dip and your beverage choice.
And don’t forget a Chocolate Mousse for dessert! The combination of rich chocolate and sweet Butterfinger flavors creates an unforgettable end to your meal.
Expert Tips for Butterfinger Dip
-
Chill Your Cream:
Ensure the heavy whipping cream is ice-cold before whipping; this guarantees better volume and a light, airy texture for your dip. -
Be Gentle:
When folding in the Butterfinger bits, mix gently to preserve their crunch. Overmixing can create a mushy texture that may not be as enjoyable. -
Make Ahead:
This Butterfinger dip can be prepared a day in advance. Store it in an airtight container in the fridge to save time and enhance flavors before serving. -
Sugar Swap:
If you prefer a less intense sweetness, don’t hesitate to substitute brown sugar with granulated sugar. This can cater to different taste preferences. -
Flavors Galore:
Experiment with substituting Butterfinger bits for other candy pieces like Snickers or Twix. This simple change can give your dip a brand new twist.
How to Store and Freeze Butterfinger Dip
Fridge: Store Butterfinger dip in an airtight container for up to 3 days. This keeps it fresh and ready for indulging whenever cravings hit!
Freezer: While not typically recommended, if you must freeze it, do so for up to 1 month in a tightly sealed container. Thaw in the fridge overnight before serving, though the texture may change slightly.
Reheating: There’s no need to heat this dip; it’s best enjoyed chilled or at room temperature. Give it a good stir before serving if it’s been in the fridge to reconcile the texture.
Make-Ahead: Perfect for prepping in advance! Simply prepare the Butterfinger dip a day ahead and keep it in the fridge until you’re ready to serve.
Butterfinger Dip: Fun Variations
Feel free to get creative with this delightful dip and make it your own with these exciting twists!
-
Nut-Free: Use sunflower seed butter instead of peanut butter for a delicious alternative that keeps the creamy texture without allergens.
-
Chocolate Lover: Stir in a spoonful of cocoa powder or melted chocolate to deepen the chocolatey flavor in the dip. It’s a divine twist!
-
Healthier Option: Swap out the cream cheese for Greek yogurt for a lighter, tangy alternative that maintains a creamy base.
-
For a Crunchy Kick: Mix in a handful of crushed pretzels along with the Butterfinger bits to add an extra layer of texture and a salty contrast.
-
Seasonal Spice: Add a dash of pumpkin spice or cinnamon to warm up the flavors, making this dip perfect for fall gatherings or holiday parties.
-
Flavor Fusion: Try incorporating caramel sauce into the mix for a sweet surprise that complements the Butterfinger bits beautifully.
-
Sweet Heat: Sprinkle in a little cayenne pepper or chipotle powder for an unexpected spicy twist that can elevate the sweetness to new heights!
-
Perfect Pairings: Serve this dip with pretzels and graham crackers for dipping, or perhaps some refreshing apple slices for a delightful crunch—just like with these Pretzel Bites! Each option offers a unique taste experience that everyone will enjoy.
Make Ahead Options
These creamy no-bake Butterfinger Dip preparations are perfect for meal prep, allowing you to save valuable time before your gathering! You can make the dip up to 24 hours in advance; simply whip it up, transfer it to an airtight container, and refrigerate. The rich flavors will develop beautifully as it chills, ensuring it’s just as delicious when you’re ready to serve. When it’s time to enjoy, just give it a gentle stir and top with the reserved Butterfinger bits for that delightful crunch. This way, you’ll have a stress-free dessert that’s guaranteed to impress with minimal effort on the big day!
Butterfinger Dip Recipe FAQs
What type of Heavy Whipping Cream should I use?
Absolutely! For the best results, opt for heavy whipping cream that’s high in fat content, ideally around 36% or more. This type will whip up beautifully into stiff peaks, providing the rich and fluffy texture that makes your Butterfinger Dip so delightful. Make sure it’s ice-cold before whipping for maximum volume!
How long can I store Butterfinger dip in the fridge?
Very! You can keep your Butterfinger dip stored in an airtight container in the fridge for up to 3 days. This will help maintain its creamy consistency, making it perfect for snacking on throughout the week. Just give it a good stir before serving to bring back its fluffy texture!
Can I freeze Butterfinger dip?
Yes, you can! To freeze your Butterfinger dip, place it in a tightly sealed container and store it for up to 1 month. When you’re ready to enjoy it, just transfer it to the fridge to thaw overnight. Keep in mind that while it will still taste delicious, the texture may be slightly different upon thawing.
What if my whipped cream doesn’t reach stiff peaks?
If your whipped cream isn’t forming stiff peaks, it could be due to not using cream that’s cold enough or overmixing. Make sure your heavy cream is very cold from the fridge. Beat it on medium-high speed until the peaks form. If it starts to look grainy, you’ve overmixed, so start over with fresh cream.
Are there any dietary concerns with the ingredients?
Absolutely! If you or anyone you’re serving has allergies, be cautious with the ingredients. The Butterfinger dip contains allergens like dairy, peanuts, and gluten from candy bars. For a nut-free option, you could use sun butter instead of peanut butter. Always check ingredient labels for any specific dietary needs!
Can I customize the flavors in this dip?
Yes, the more the merrier! Feel free to switch up the Butterfinger bits for other candy bars like Snickers or Twix for a different flavor profile. You could also experiment with adding a pinch of sea salt or a splash of vanilla extract to enhance the overall taste. The options are endless!
Deliciously Creamy Butterfinger Dip You'll Love in Minutes
Ingredients
Equipment
Method
- In a large mixing bowl, combine 1 cup of heavy whipping cream and 1/2 cup of brown sugar. Whip on medium-high speed until stiff peaks form, about 3 to 5 minutes.
- Add 8 oz of softened cream cheese and 1 cup of peanut butter to the whipped cream. Mix on low speed until smooth and fluffy.
- Gently fold in 3/4 of the Butterfinger bits using a spatula.
- Scoop the Butterfinger dip into a serving bowl and sprinkle the reserved 1/4 of the Butterfinger bits on top.
- Serve immediately or chill in the fridge for at least 30 minutes before serving.
Leave a Reply