
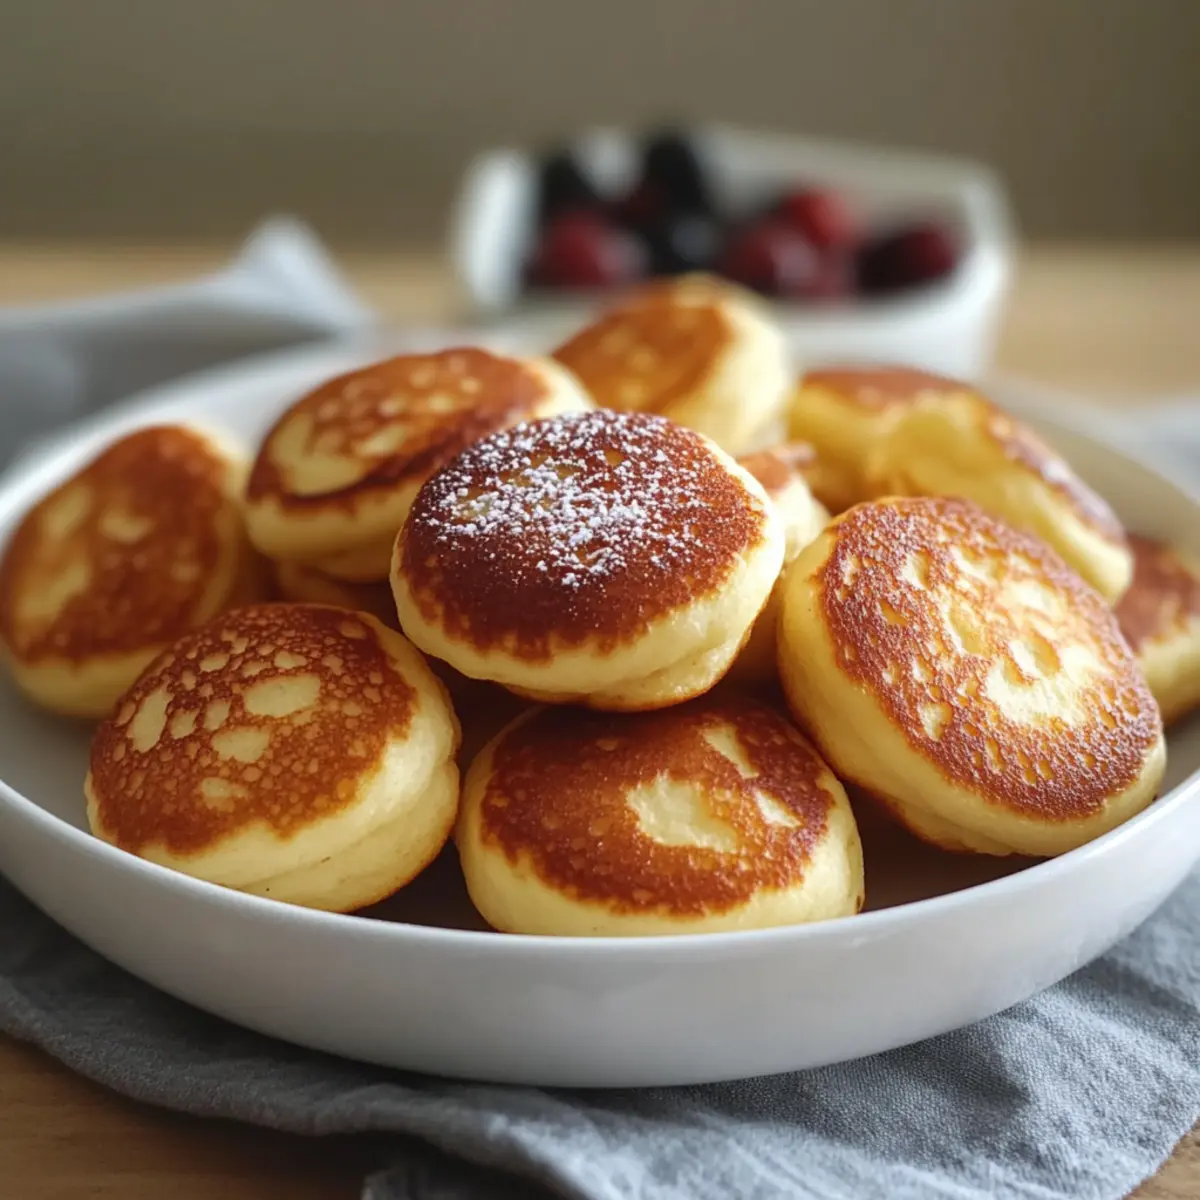
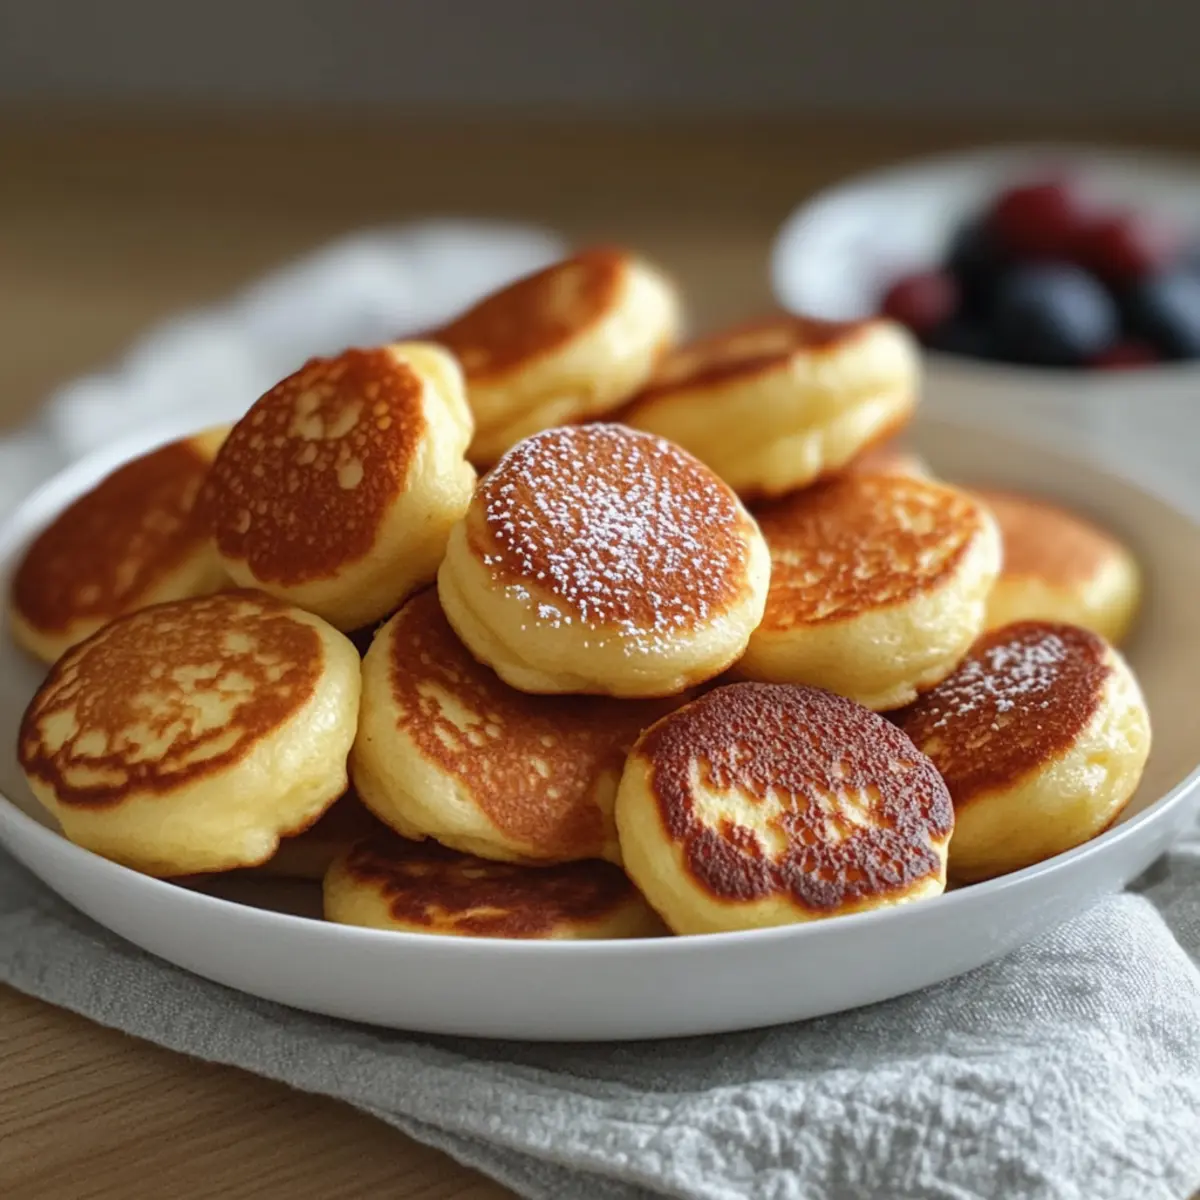
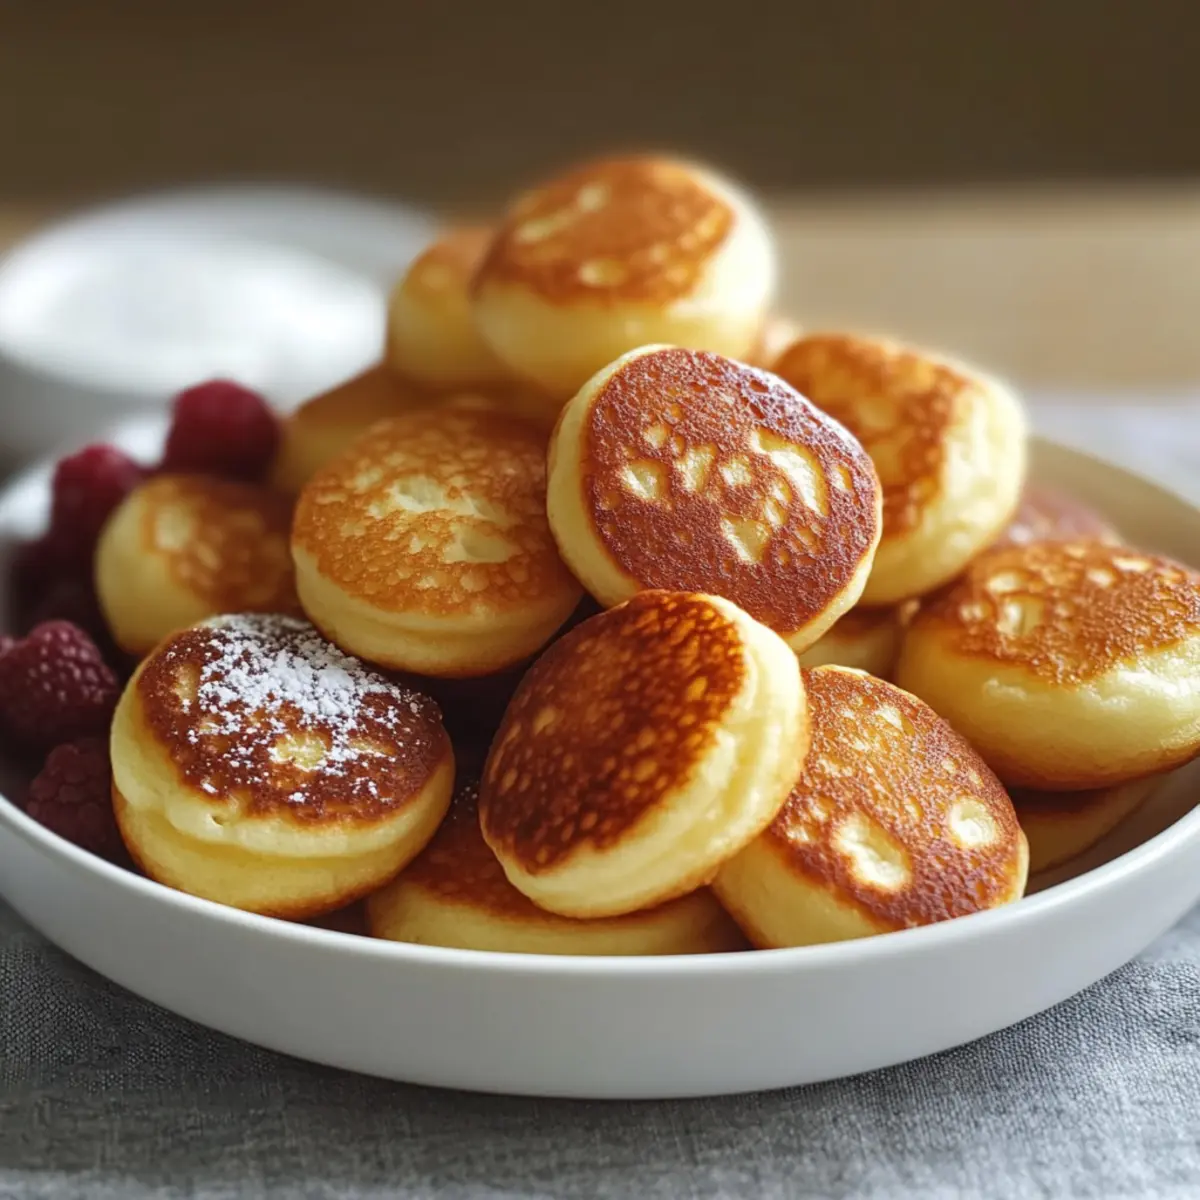
The aroma of freshly baked treats wafted through my kitchen one sunny morning, leading me to create something new: Breakfast Pancake Poppers. These delightful little bites are a playful twist on classic pancakes, perfectly sized for busy mornings or leisurely brunches. Each popper is a wholesome 50 calories, allowing you and your loved ones to indulge guilt-free. Not only are they quick to whip up, but they can also be customized with your favorite mix-ins for a personalized touch. Whether you prefer a classic maple syrup drizzle or a sprinkle of fresh berries, these fluffy poppers are bound to become a morning staple. Curious to see how you can make breakfast truly pop? Let’s dive into this delicious adventure!
Why Are Breakfast Pancake Poppers So Popular?
Irresistible, bite-sized goodness: These fluffy morsels are perfect for the family, making breakfast fun and easy.
Customize with ease: Feel free to mix in mini chocolate chips or blueberries for a unique twist!
Meal prep friendly: Make a big batch and freeze them for a quick breakfast throughout the week.
Light and healthy: Each popper is only 50 calories—savor the flavor without the guilt!
Versatile serving options: Pair with maple syrup or fresh fruit for a delightful brunch treat, just like our delicious Mini German Pancakes.
Grab those ingredients and let’s make breakfast a joyous occasion!
Breakfast Pancake Poppers Ingredients
For the Batter
- 1 cup flour – Provides structure and base for the batter; can be substituted with a 1:1 gluten-free flour blend.
- 1 tbsp sugar – Adds sweetness to balance flavors beautifully.
- 1 tsp baking powder – Acts as a leavening agent to create that fluffy texture we adore.
- 1/4 tsp salt – Enhances the flavors in the overall mix for a more delicious bite.
- 3/4 cup milk – Adds moisture and richness; use any type (dairy or non-dairy) that you prefer.
- 1 egg – Binds ingredients together and contributes to the richness of the poppers.
- 2 tbsp melted butter – Contributes to flavor and moisture; can be replaced with vegetable oil for a lighter option.
- 1 tsp vanilla extract – Infuses a warm, inviting flavor; optional and can be swapped with almond extract if desired.
Optional Add-Ins
- Mini chocolate chips – Add for a delightful burst of sweetness in every popper!
- Blueberries – Incorporate these for a fruity twist that adds color and flavor.
- Cinnamon – Experiment with this spice for a warm undertone that will make your poppers even more irresistible.
These Breakfast Pancake Poppers are not only a fun way to start your day, but they also offer potential for personalization that’ll delight your family and guests alike!
Step‑by‑Step Instructions for Breakfast Pancake Poppers
Step 1: Preheat and Prepare
Start by preheating your oven to 375°F (190°C) to create the perfect baking environment for your Breakfast Pancake Poppers. While it heats up, grease a mini muffin pan with cooking spray or softened butter, ensuring that each cup is well coated to prevent sticking. This preparation will help your little poppers pop right out when they’re done!
Step 2: Mix Dry Ingredients
In a medium-sized mixing bowl, combine 1 cup of flour, 1 tablespoon of sugar, 1 teaspoon of baking powder, and 1/4 teaspoon of salt. Whisk these dry ingredients together until well blended, allowing the baking powder to distribute evenly throughout. This step is crucial for achieving those fluffy textures that make your Breakfast Pancake Poppers irresistible.
Step 3: Combine Wet Ingredients
In a separate mixing bowl, whisk together 3/4 cup of milk, 1 egg, 2 tablespoons of melted butter, and 1 teaspoon of vanilla extract until combined and slightly frothy. Choosing your preferred type of milk, whether dairy or non-dairy, adds a personal touch while ensuring a rich batter. This mixture will create a moist and flavorful base for your breakfast treats.
Step 4: Combine Mixtures
Gently pour the wet mixture into the bowl of dry ingredients, using a spatula to fold them together until just combined. Be cautious not to overmix; a few lumps are perfectly fine and essential for maintaining the fluffiness of your Breakfast Pancake Poppers. Set aside the batter for a moment as we prepare the muffin pan.
Step 5: Fill the Muffin Cups
Spoon the batter into each prepared muffin cup, filling them about two-thirds full. This will allow space for the poppers to rise beautifully without overflowing. For extra fun, consider mixing in mini chocolate chips or blueberries at this stage for a delicious twist!
Step 6: Bake to Perfection
Place the muffin pan in the preheated oven and bake for 10–12 minutes. You’ll know they’re ready when the tops appear golden brown and a toothpick inserted into the center comes out clean. The delightful aroma of your Breakfast Pancake Poppers will fill your kitchen, creating anticipation for your delicious breakfast.
Step 7: Cool and Serve
Once baked, remove the mini muffin pan from the oven and allow the poppers to cool for about 5 minutes. This cooling time will make them easier to handle. Then, gently pop each Breakfast Pancake Popper out of the pan, and serve warm with a drizzle of maple syrup, fresh fruit, or a dusting of powdered sugar for a lovely finishing touch.

Expert Tips for Breakfast Pancake Poppers
-
Avoid Overmixing: Gently combine wet and dry ingredients to keep your poppers fluffy. A few lumps are okay; they help maintain texture.
-
Choose the Right Flour: If going gluten-free, use a 1:1 gluten-free flour blend. This keeps your Breakfast Pancake Poppers light and delicious without compromise.
-
Cool Before Serving: Allow the poppers to cool for about 5 minutes after baking. This makes them easier to remove from the pan without breaking.
-
Experiment with Mix-Ins: Amp up flavor by adding mini chocolate chips, blueberries, or even nuts. Customize your poppers for a delightful surprise!
-
Perfect Storage: Store leftovers in an airtight container for up to three days, or freeze them for a quick breakfast option on busy mornings. Just reheat in the microwave!
Make Ahead Options
These Breakfast Pancake Poppers are perfect for busy mornings and can be prepped in advance! You can prepare the batter up to 24 hours ahead of time; simply cover the mixing bowl with plastic wrap and refrigerate it. For ultimate convenience, bake the pancake poppers and store them in an airtight container in the refrigerator for up to 3 days. Alternatively, freeze them for up to one month—just make sure to cool them completely before freezing to maintain their fluffy texture. When you’re ready to enjoy, reheat the poppers in the microwave for about 15 seconds or in the oven at 350°F (175°C) for a few minutes until warm, ensuring they’ll taste just as delicious as when you first made them!
How to Store and Freeze Breakfast Pancake Poppers
Fridge: Keep leftover Breakfast Pancake Poppers in an airtight container for up to 3 days to maintain their freshness and flavor.
Freezer: For longer storage, freeze the poppers in a single layer on a baking sheet. Once frozen, transfer them to a zip-top bag or airtight container for up to 1 month.
Reheating: To enjoy, simply reheat in the microwave for about 15 seconds or until warm. This method keeps them fluffy, making them taste freshly made!
Serving Tip: Drizzle with syrup or pair with fresh fruit when reheating for a delightful breakfast experience.
Breakfast Pancake Poppers: Customization Ideas
Feel free to unleash your creativity and make this recipe your own with delightful twists and turns!
- Gluten-Free: Substitute regular flour with a 1:1 gluten-free flour blend for a diet-friendly option.
- Dairy-Free: Use almond milk or coconut milk instead of regular milk for a lactose-free treat. The flavors remain wonderfully rich!
- Nutty Addition: Stir in a tablespoon of almond or peanut butter for a protein-packed popper that’s irresistibly satisfying.
- Berry Bliss: Add fresh or frozen blueberries to the batter for bursts of fruity flavor in every bite. You won’t be able to stop at just one!
- Chocolate Heaven: Mix in mini chocolate chips for sweet surprises that kids (and adults) will love. Who can resist chocolate for breakfast?
- Spicy Twist: Incorporate a dash of cinnamon or nutmeg into the batter for cozy warmth on chillier mornings. It’s like a hug in every popper!
- Savory Option: Swap sweet ingredients for savory ones, like shredded cheese and diced ham, to create a delightful breakfast snack.
- Breakfast on the Go: Prepare mini Breakfast Egg Muffins alongside these poppers for a complete, portable breakfast meal!
These fun variations create endless meal possibilities! For more breakfast inspiration, check out our Breakfast Protein Biscuits and Pancake Breakfast Treat recipes. Enjoy your delicious adventures in the kitchen!
What to Serve with Breakfast Pancake Poppers?
Elevate your breakfast experience with delightful pairings that complement the fluffy poppers perfectly.
- Maple Syrup: Drizzle this classic sweet syrup to enhance the flavor of your poppers with a touch of indulgence.
- Fresh Berries: A medley of strawberries, blueberries, and raspberries adds a burst of freshness and vibrant color to your plate.
- Whipped Cream: Light and airy, a dollop of whipped cream on top creates a celebratory finish for your morning treat.
- Scrambled Eggs: Lightly seasoned scrambled eggs provide a savory contrast, balancing the sweetness of the pancake poppers beautifully.
- Crispy Bacon: The salty crunch of crispy bacon offers a delightful texture and a hearty element to your breakfast spread.
- Fruit Smoothie: Blend up your favorite fruits with yogurt for a refreshing, healthy drink that pairs wonderfully with every bite.
- Cinnamon Sugar Sprinkle: Give a sweet twist by dusting each popper with a cinnamon-sugar mix for added flavor and warmth.
- Yogurt Parfait: Layer yogurt with granola and fruits for a creamy, crunchy addition that complements the pancake poppers perfectly.
Breakfast Pancake Poppers Recipe FAQs
How do I select the best flour for my Breakfast Pancake Poppers?
Absolutely! For optimal results, choose a versatile flour that suits your dietary needs. If you’re going gluten-free, I recommend a 1:1 gluten-free flour blend, which works beautifully and keeps your poppers just as fluffy. For a classic taste, all-purpose flour will also do the trick. Remember, the key is to ensure the flour is fresh, avoiding any packages with a strong or stale aroma.
What’s the best way to store leftover pancake poppers?
Very! To maintain their delightful texture, store leftover Breakfast Pancake Poppers in an airtight container in the refrigerator for up to 3 days. If you want to keep them for longer, freeze them. Lay the poppers out in a single layer on a baking sheet until frozen, then transfer them to a zip-top bag or airtight container. They can be frozen for up to 1 month, making them perfect for quick breakfasts.
Can I freeze my pancake poppers for later use? What’s the process?
Of course! Freezing is a fantastic option for Breakfast Pancake Poppers. Here’s how to do it in just a few steps:
- Allow the baked poppers to cool completely.
- Arrange them in a single layer on a baking sheet and place them in the freezer.
- Once frozen solid, transfer the poppers into a zip-top bag or an airtight container.
- Label with the date and enjoy within 1 month for the best taste!
What if my pancake poppers don’t rise as much as expected?
Oh no, but don’t worry! If your Breakfast Pancake Poppers aren’t as fluffy as you’d like, it’s often due to overmixing the batter or using expired baking powder. To avoid this, mix just until combined and check the expiration date on your baking powder before using it. This ensures those delightful poppers rise perfectly in the oven.
Are there any dietary considerations I should keep in mind?
Absolutely! If you’re cooking for someone with allergies, it’s crucial to check all ingredient labels. Egg and dairy are common allergens, so consider using a flax egg (1 tablespoon ground flaxseed mixed with 2.5 tablespoons water) as a substitute for egg, and almond milk or oat milk as non-dairy alternatives. Always tailor your ingredients to suit the needs of your family or guests!
Breakfast Pancake Poppers: Fun, Fluffy Bites of Joy
Ingredients
Equipment
Method
- Preheat your oven to 375°F (190°C) and grease a mini muffin pan.
- In a bowl, combine flour, sugar, baking powder, and salt; whisk until blended.
- In a separate bowl, whisk milk, egg, melted butter, and vanilla until slightly frothy.
- Gently pour wet mixture into dry ingredients, folding until just combined.
- Spoon batter into muffin cups, filling them about two-thirds full.
- Bake for 10–12 minutes until golden brown and a toothpick comes out clean.
- Allow to cool for 5 minutes, then remove from pan and serve warm with syrup or fruit.
Leave a Reply