
As the aroma of roasted chickpeas fills the kitchen, I can’t help but feel a wave of nostalgia wash over me—this dish reminds me of cozy family dinners where laughter is the main ingredient. My Quick Roasted Chickpea Gyros perfectly capture that essence, transforming simple pantry staples into a satisfying, vegetarian delight. In under 30 minutes, you can create a hearty meal that’s not only budget-friendly but also packed with high protein, making it a hit with everyone in the family. Each gyro is a warm hug wrapped in fluffy pita bread, brimming with tender chickpeas and vibrant veggies, all enhanced by creamy tzatziki. It’s a culinary adventure that turns busy weeknights into something special. Curious about how to bring this Mediterranean gem to your table? Let’s dive into the recipe!
Why Are Roasted Chickpea Gyros So Special?
Simplicity at its Best: This recipe is incredibly easy to prepare, allowing even novice cooks to make a delicious meal in under 30 minutes.
Flavorful Awesomeness: Featuring roasted chickpeas, fresh veggies, and creamy tzatziki, each bite bursts with savory goodness that will have everyone asking for seconds.
Versatile Meal Option: These gyros can adapt to whatever ingredients you have on hand, making it perfect for a quick family dinner or meal prep throughout the week. Try adding avocado or a sprinkle of feta for a unique twist!
Nutritious Comfort: High in protein and fiber, Roasted Chickpea Gyros are not just satisfying but contribute to a balanced diet without losing that comforting appeal.
For an added treat, serve them with a side of Chickpea Feta Avocado salad to complement the flavors beautifully!
Roasted Chickpea Gyros Ingredients
For the Roasted Chickpeas
• Chickpeas – canned chickpeas work well for convenience, but soaked dried chickpeas offer even more flavor and texture.
• Olive Oil – enriches the chickpeas and aids in achieving the perfect crispy texture when roasted.
• Paprika – adds a smoky depth; adjust to your taste for less heat.
• Ground Black Pepper – enhances the flavor profile with its mild heat.
• Cayenne Pepper – adjust to personal preference for added spice.
• Salt – accentuates all flavors; feel free to modify to taste.
For the Gyros
• Pita Flatbreads – use whole wheat options for a healthier twist and as the perfect vessel for your fillings.
• Tzatziki – a creamy and tangy necessity; homemade tzatziki is delightful, but store-bought is a convenient option.
• Red Onion – introduces a sharp crunch; can be omitted if you prefer milder flavors.
• Lettuce – adds freshness; substitute with spinach or mixed greens as desired.
• Tomato – brings juiciness; pick any variety depending on what’s fresh or available.
Transform your weeknight dinners with these Roasted Chickpea Gyros that are not only delicious but also mindful of your budget and time!
Step‑by‑Step Instructions for Roasted Chickpea Gyros
Step 1: Preheat the Oven
Begin by preheating your oven to 400°F (204°C). This temperature is perfect for roasting, as it allows the chickpeas to crisp up beautifully. While the oven warms up, drain a can of chickpeas and pat them dry with paper towels, making sure to remove any loose skins. This will help them achieve that perfect crunch when roasted.
Step 2: Season the Chickpeas
In a mixing bowl, toss the dried chickpeas with a drizzle of olive oil, making sure each one is well-coated. Add paprika, ground black pepper, cayenne pepper, and salt, adjusting the spices to match your taste. Stir until the chickpeas are evenly seasoned. This step ensures that each bite of your Roasted Chickpea Gyros will be packed with flavor.
Step 3: Roast the Chickpeas
Spread the seasoned chickpeas in a single layer on a greased baking sheet. Pop them into the preheated oven and roast for about 20 minutes, shaking the pan halfway through for even cooking. You’ll know they’re ready when they turn a golden-brown color and have a slight crunch, but still maintain a tender interior to complement your gyros.
Step 4: Prepare the Pitas
While the chickpeas are roasting, take your pita flatbreads and warm them up. You can do this in a dry skillet over medium heat for just a minute or two, or wrap them in a damp paper towel and microwave for 15-20 seconds. Warm pitas are more pliable and will hold your Roasted Chickpea Gyros fillings without tearing.
Step 5: Assemble the Gyros
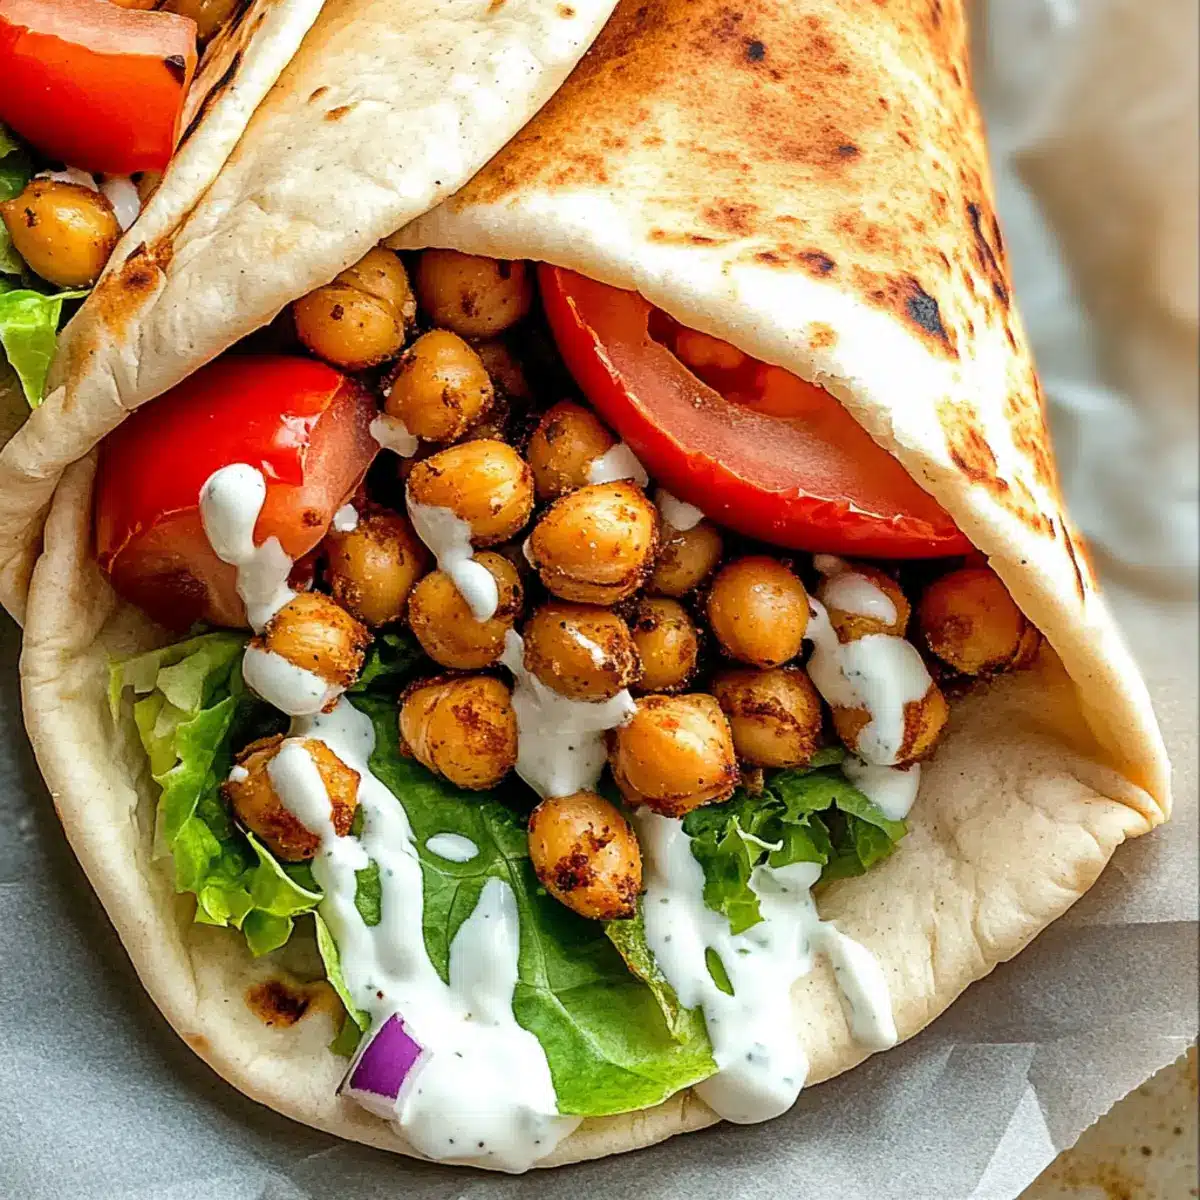
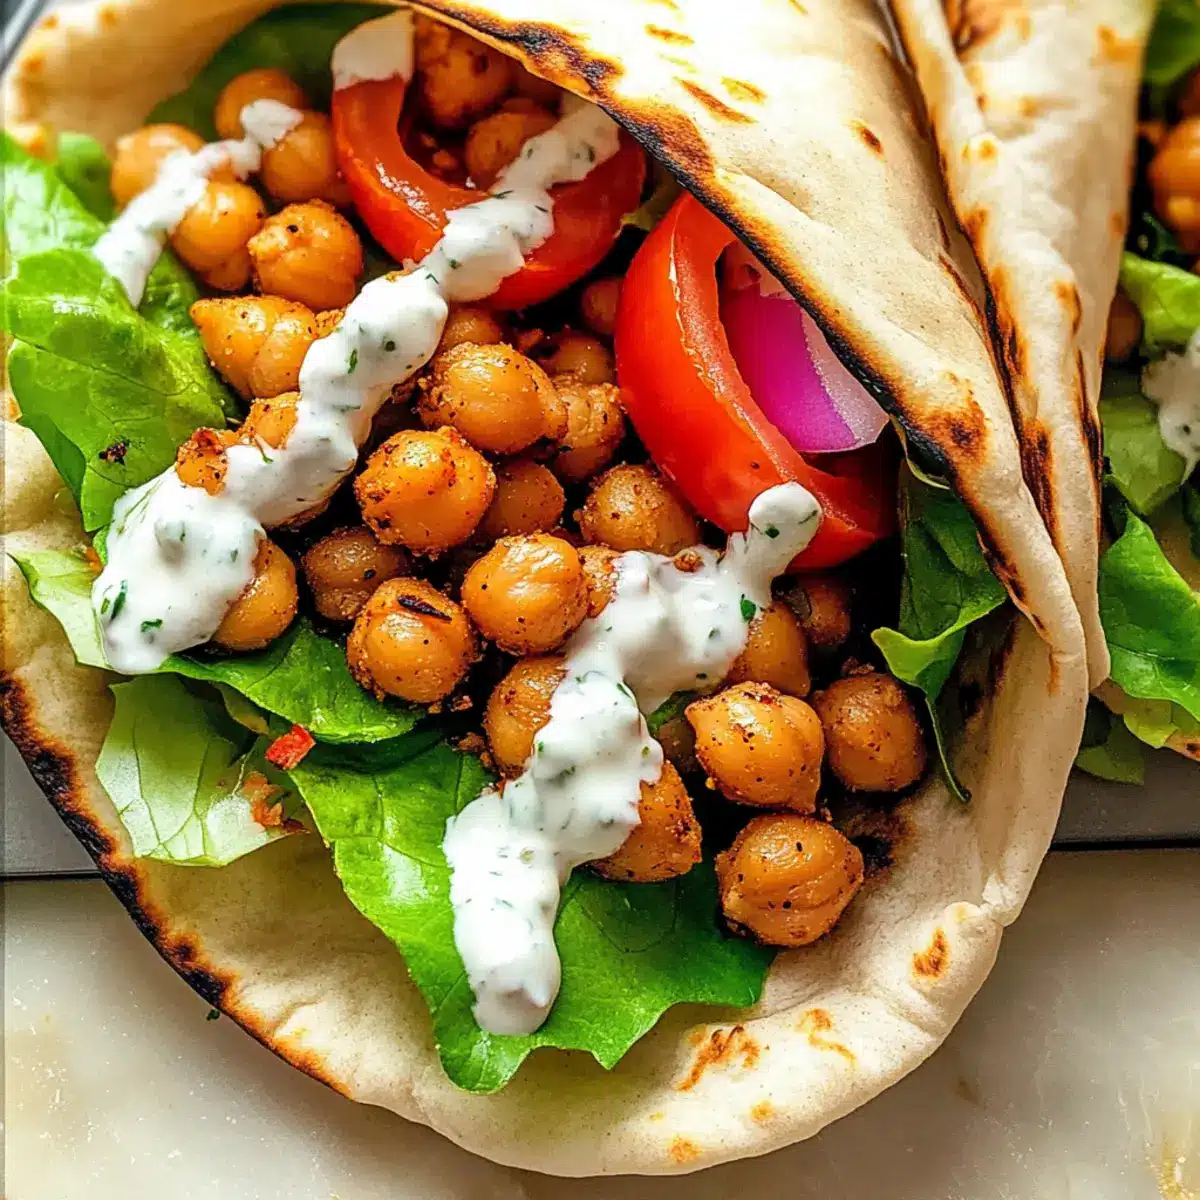
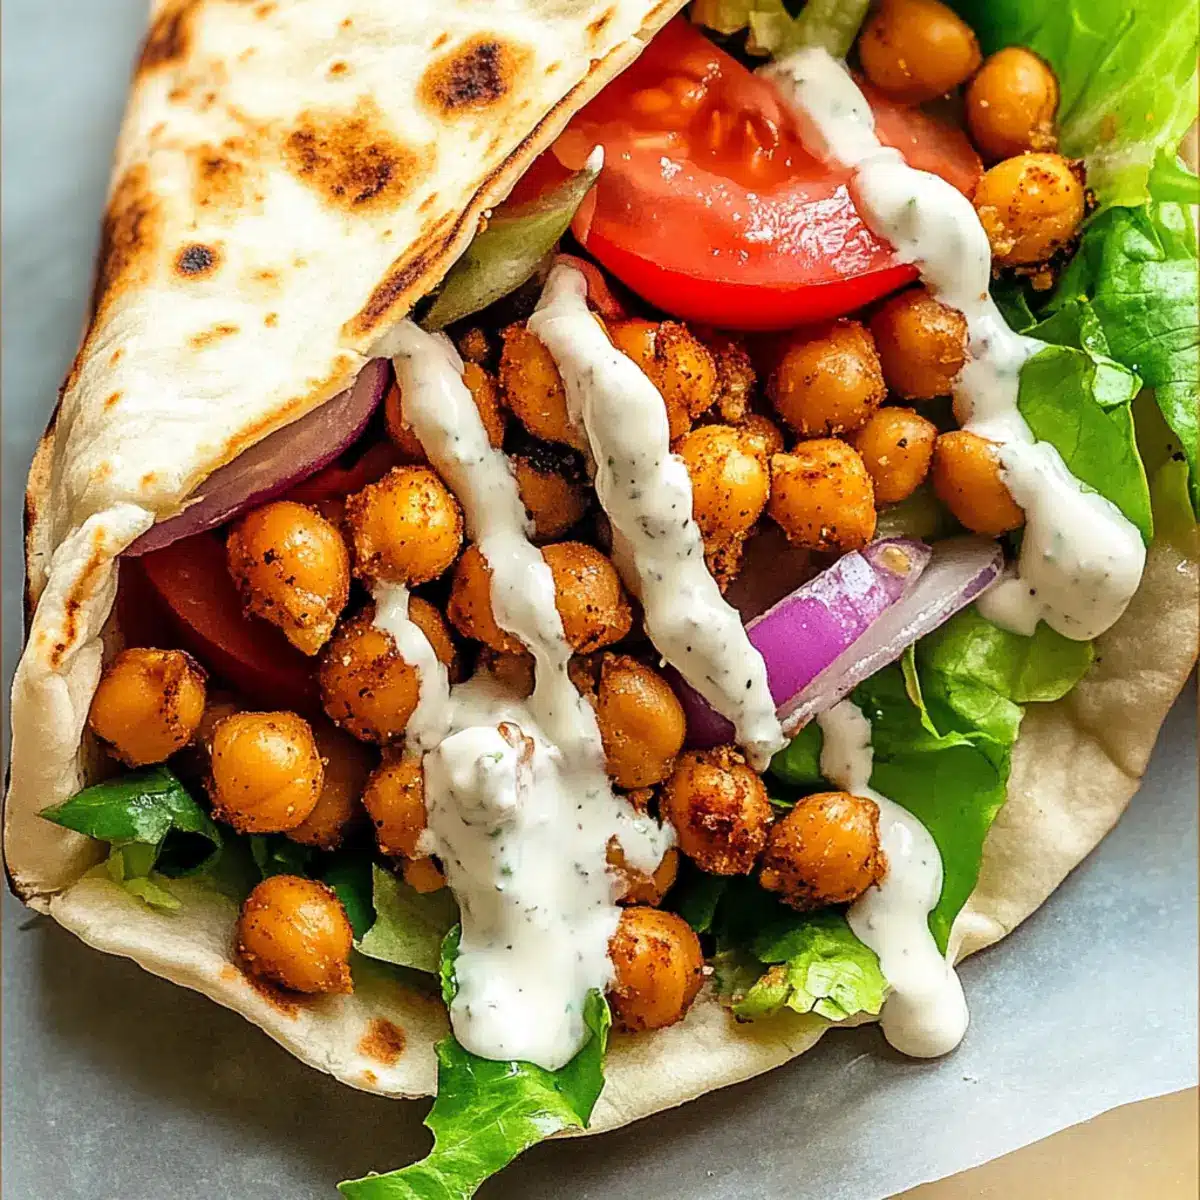
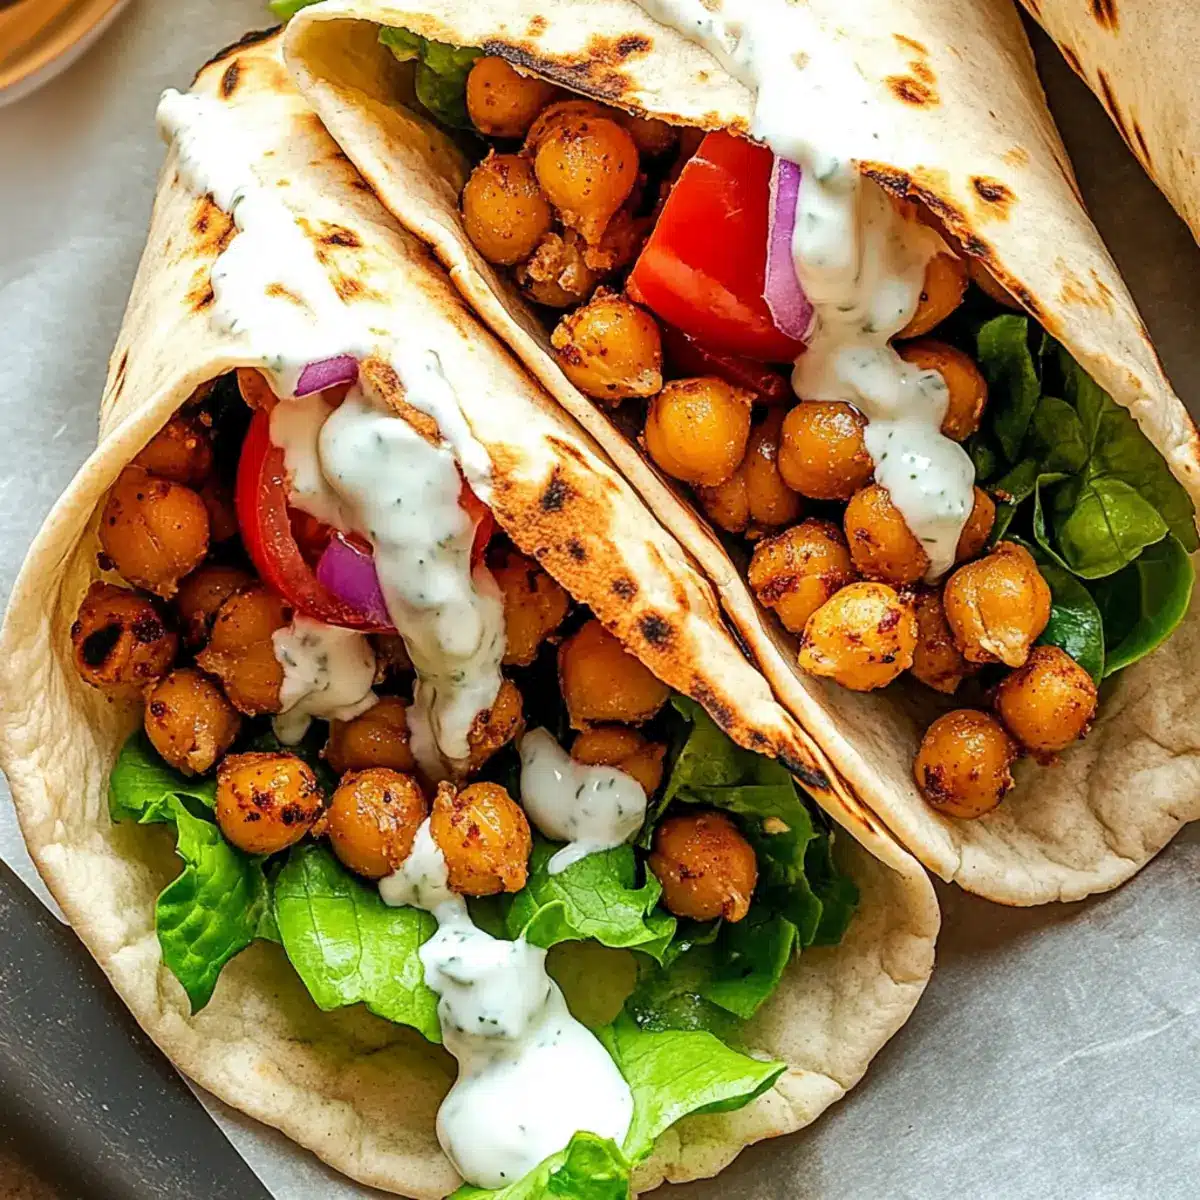
Once the chickpeas are done roasting, it’s time to assemble your Roasted Chickpea Gyros. Start by spreading a generous layer of creamy tzatziki on one side of the warmed pita. Add a hearty scoop of roasted chickpeas, followed by fresh veggies like sliced red onion, crisp lettuce, and juicy tomato. The combination brings vibrant color and flavor to your meal.
Step 6: Serve and Enjoy
Carefully fold the pita in half, enclosing the delicious filling. Your Roasted Chickpea Gyros are now ready to be enjoyed! Serve them immediately while warm for the best taste. Consider pairing them with a side of Mediterranean quinoa or a refreshing salad to round out your healthy, satisfying meal.
What to Serve with Roasted Chickpea Gyros?
Elevate your meal with delightful sides that complement the bold flavors of this vegetarian favourite.
- Mediterranean Quinoa: A light, fluffy mix of quinoa with herbs, offering a perfect contrast to the hearty gyros.
- Tahini Cucumber Salad: Crisp cucumbers drizzled with creamy tahini dressing refresh the palate between bites, enhancing your dining experience.
- Sweet Potato Fries: Crispy, sweet potato fries add a lovely crunch and a sweet contrast to the savory chickpeas, making every bite exciting.
- Zaatar Roasted Vegetables: A medley of roasted root vegetables seasoned with zaatar spices brings earthy flavors that pair beautifully with the gyros.
- Hummus Platter: A vibrant assortment of hummus varieties with fresh veggies and pita chips makes for a fun, shareable appetizer that complement the gyros wonderfully.
- Sparkling Lemonade: A zesty, refreshing drink that balances the flavors of the meal, making every bite even more enjoyable.
- Baklava Bites: Light, flaky bites filled with nuts and honey offer a sweet ending, rounding out your Mediterranean feast with added richness.
- Greek Yogurt Dip: Creamy and tangy, this dip matches the flavors of the tzatziki while adding another layer of indulgence to your meal.
Make Ahead Options
These Roasted Chickpea Gyros are perfect for meal prep enthusiasts looking to save time during the week! You can roast the chickpeas up to 3 days in advance; simply store them in an airtight container at room temperature to maintain their crunch. Additionally, the tzatziki can be prepared up to 24 hours ahead—just refrigerate it to keep it fresh. When you’re ready to serve, warm the pita in a skillet or microwave, fill it with the chickpeas and fresh veggies, and enjoy your delicious gyros without the last-minute hustle. This way, you’ll have restaurant-quality results with minimal effort, making busy weeknights a breeze!
Expert Tips for Roasted Chickpea Gyros
Taste Testing: Before roasting, sample your seasoned chickpeas to ensure the spice levels are just right—it’s easier to adjust flavors beforehand!
Crispy Chickpeas: Make sure to dry the chickpeas thoroughly before tossing them in oil to achieve that delightful crunch in your Roasted Chickpea Gyros.
Pita Prep: If your pita bread cracks while folding, gently warm it in the microwave with a damp paper towel to restore flexibility.
Customize Wisely: Feel free to experiment with veggies, but avoid using overly watery options, like cucumber, to maintain the gyros’ texture.
Make Ahead: Roast chickpeas in advance and store them in an airtight container for up to 5 days. Assemble your gyros just before serving for the best texture.
How to Store and Freeze Roasted Chickpea Gyros
Fridge: Store any leftover Roasted Chickpea Gyros in an airtight container for up to 3 days, ensuring the chickpeas remain crispy by keeping them separate until ready to eat.
Freezer: If you need to freeze components, individually freeze roasted chickpeas in a sealed bag for up to 2 months. Reheat in the oven to restore crunch.
Reheating: To enjoy the flavors again, reheat the chickpeas in a preheated oven at 375°F (190°C) for about 10 minutes. This will help them regain their texture while you prepare fresh pita and toppings.
Roasted Chickpea Gyros Variations
Feel free to customize your roasted chickpea gyros and elevate their deliciousness with these tempting twists!
-
Legume Swap: Replace chickpeas with black beans or lentils for a unique flavor and texture, offering an exciting variation for your taste buds.
-
Creamy Addition: Enhance richness by adding slices of avocado for extra creaminess, perfectly complementing the roasted flavors of the chickpeas.
-
Cheesy Twist: For an added salty bite, sprinkle feta cheese on your gyros; it beautifully balances the freshness of veggies and tzatziki.
-
Spicy Kick: If you crave some heat, incorporate hot sauce into the tzatziki or add spicy peppers to the filling for an extra zing!
-
Herbal Infusion: Toss in some fresh herbs like cilantro or parsley for a burst of freshness that elevates your gyros to a new level.
-
Veggie Variation: Experiment by including sautéed bell peppers or zucchini for added color, flavor, and textures that surprise the palate.
-
Tzatziki Alteration: Try a yogurt alternative like cashew or coconut yogurt to create a dairy-free tzatziki that still packs a flavorful punch.
-
Add a Side: For a complete meal, serve your gyros with a refreshing Chickpea Feta Avocado salad or a side of Roasted Garlic Soup for a comforting touch.
Let these variations inspire you to create your perfect roasted chickpea gyros experience!
Roasted Chickpea Gyros Recipe FAQs
How do I choose the best chickpeas?
Absolutely! If you’re using canned chickpeas, look for options packed in water without added preservatives. Make sure to rinse and drain them thoroughly before using. If you prefer dried chickpeas, soak them overnight in water to plump them up and reduce cooking time—this will enhance their texture and flavor.
How should I store leftover Roasted Chickpea Gyros?
To store your leftovers, keep any uneaten Roasted Chickpea Gyros in an airtight container in the fridge for up to 3 days. To maintain that delightful crunch, I recommend storing the roasted chickpeas separately and assembling the gyros just before eating. This way, everything will stay fresh and tasty!
Can I freeze roasted chickpeas?
Yes, you can! To freeze the roasted chickpeas, allow them to cool completely and then transfer them to a freezer-safe zip-top bag. They can be frozen for up to 2 months. When you’re ready to enjoy them again, simply reheat in a preheated oven at 375°F (190°C) for about 10 minutes until crispy again. Feel free to prepare fresh pita and toppings to complete your gyros!
What if my roasted chickpeas turn out soggy?
Very! If you find that your roasted chickpeas aren’t as crispy as you’d like, it could stem from not drying them thoroughly enough before roasting. Make sure to pat them completely dry to remove excess moisture. Additionally, shaking the pan halfway through roasting ensures even cooking and firmness. Sometimes a longer roasting time can help achieve that perfect crunch, just keep an eye on them to prevent burning.
Are Roasted Chickpea Gyros suitable for gluten-free diets?
Absolutely! You can substitute the pita flatbreads with gluten-free wraps or lettuce leaves for a lighter option. This will allow those with gluten sensitivities to enjoy this delicious dish without compromising taste. Just be cautious with the tzatziki, as some store-bought versions contain gluten. Consider making your own to ensure it’s gluten-free!
Can I make Roasted Chickpea Gyros ahead of time?
Definitely! You can prep the roasted chickpeas a day in advance and store them in an airtight container for up to 5 days. Just remember to keep them separated from the fresh veggies and pita bread to maintain the best texture. Assemble the gyros just before serving for that perfect blend of flavors with a freshly crispy experience.
Savory Roasted Chickpea Gyros: Quick, Healthy, and Delicious!
Ingredients
Equipment
Method
- Preheat the oven to 400°F (204°C). Drain and pat dry the canned chickpeas.
- In a mixing bowl, toss chickpeas with olive oil, paprika, ground black pepper, cayenne pepper, and salt.
- Spread seasoned chickpeas on a baking sheet and roast for about 20 minutes, shaking halfway through.
- While the chickpeas roast, warm the pita flatbreads on a skillet or in the microwave.
- Assemble the gyros by spreading tzatziki on the pita and adding roasted chickpeas and fresh veggies.
- Fold the pita in half and serve immediately while warm.
Leave a Reply