
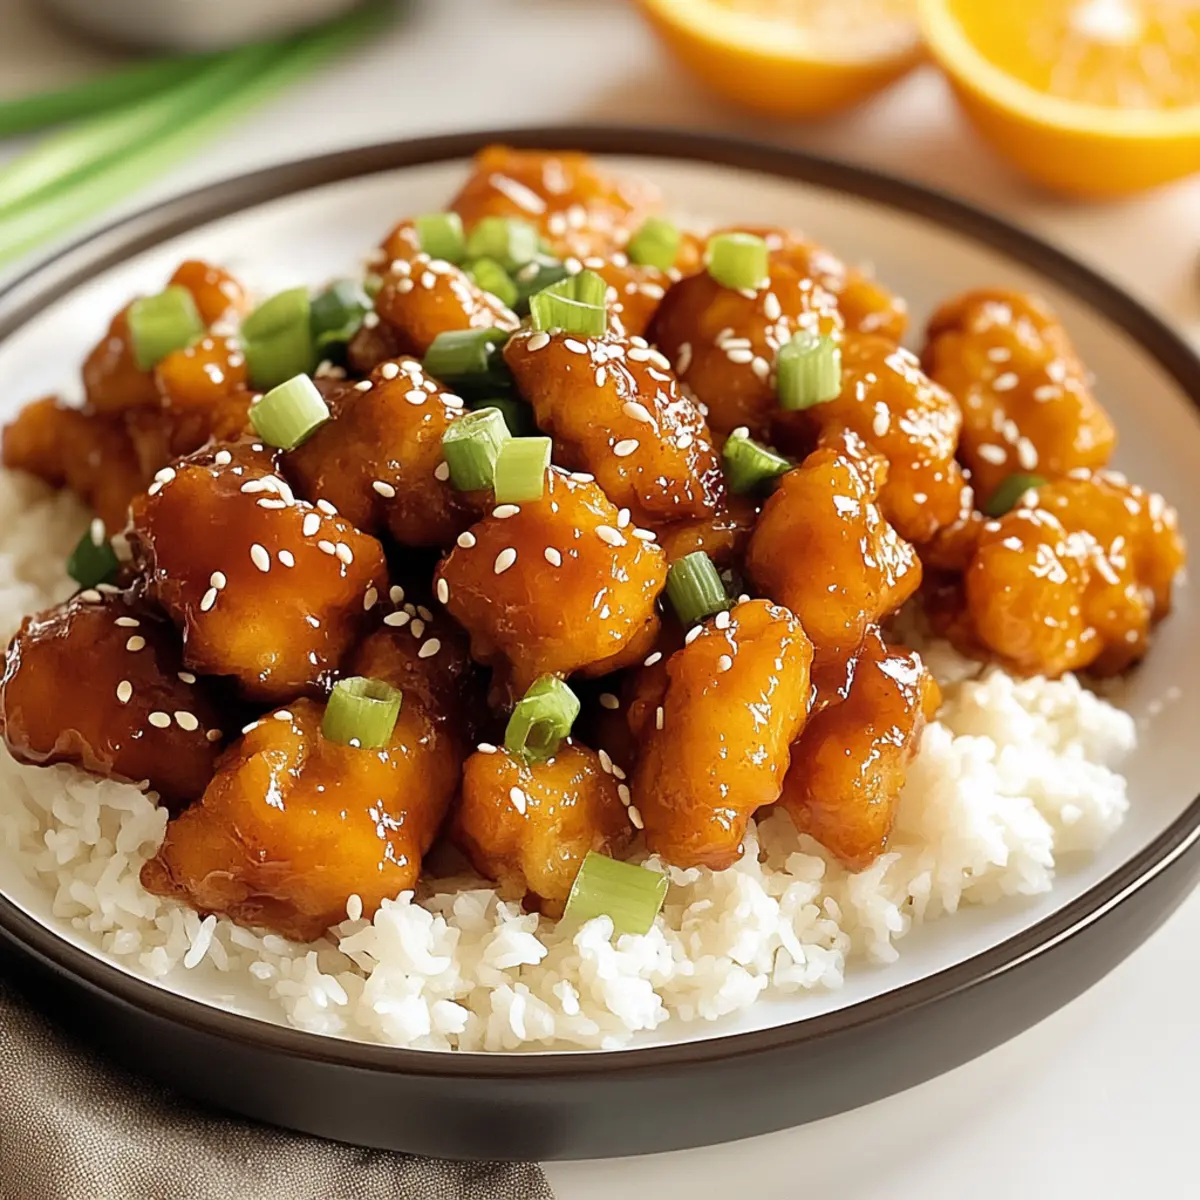
As I scrolled through my favorite recipe blog, a craving for something both delicious and comforting struck me like a bolt of lightning—Crispy Gluten-Free Orange Chicken. This dish brings an irresistible crunch paired with a sweet and tangy sauce that dances on your taste buds, making it an instant favorite for any occasion. Best of all, it whips up in less than 30 minutes, fitting seamlessly into busy weeknights or leisurely dinner parties. Plus, with its gluten-free and dairy-free ingredients, it’s a crowd-pleaser that everyone can enjoy without sacrificing flavor or fun. Just imagine the joy of sinking your teeth into those crispy chicken bites, coated in a vibrant sauce that practically begs for a side of steamed rice or stir-fried vegetables. Ready to transform your dinner routine? Let’s dive into making this delightful dish together!
Why is This Orange Chicken a Must-Try?
Crispy Texture: Each bite offers a perfectly crunchy exterior that contrasts beautifully with the juicy chicken inside.
Flavor Explosion: Infused with fresh orange juice and zest, the sweet and tangy sauce will awaken your taste buds.
Quick & Easy: This dish comes together in under 30 minutes, making it ideal for those busy weeknights or impromptu gatherings.
Diet-Friendly: With gluten-free and dairy-free ingredients, it’s a perfect choice for various dietary preferences. Serve it alongside options like Sweet Chili Chicken or Warm Cinnamon Orange to elevate your meal!
Endless Variations: Customize your dish further with tofu or shrimp, or even serve it in lettuce wraps for a fresh twist!
Gluten-Free Orange Chicken Ingredients
Here’s everything you need to create this mouthwatering dish!
For the Chicken
- Boneless, skinless chicken breasts – The main protein that remains tender after frying; can use chicken thighs for juiciness.
- Gluten-free flour blend – This coating guarantees a crispy texture; almond or rice flour work as alternatives but may change texture.
- Eggs – Help bind the flour to the chicken, ensuring a perfect crunch.
For the Sauce
- Fresh orange juice – The base of the sauce, providing natural sweetness and a bright flavor.
- Orange zest – Enhances the citrus notes, making the dish even more aromatic.
- Gluten-free soy sauce – Essential for that authentic umami flavor, integral for the Japanese-inspired taste.
- Honey – Adds a natural sweetness to balance the sauce’s tanginess.
- Minced garlic – Infuses a savory depth into the sauce, combining beautifully with ginger.
- Minced ginger – Complements the garlic while adding a lovely warmth to the dish.
- Cornstarch – Used to thicken the sauce, resulting in a luscious, glossy finish.
For Frying
- Vegetable oil – Needed for frying to achieve that delicious crispiness; ensure it’s heated to medium-high.
Optional Toppings
- Green onions – For a fresh crunch and pop of color.
- Sesame seeds – Add texture and a hint of nuttiness.
- Cilantro – Its vibrant flavor brings added freshness to your dish.
With these ingredients, you’re just moments away from whipping up the ultimate Gluten-Free Orange Chicken that everyone will love!
Step‑by‑Step Instructions for Gluten Free Orange Chicken
Step 1: Prepare the Chicken
Begin by cutting boneless, skinless chicken breasts into bite-sized pieces, ensuring they are uniform for even cooking. Pat each piece dry with paper towels to remove excess moisture, which promotes perfect crispiness when frying. Set aside as you prepare the coating for this delicious Gluten Free Orange Chicken.
Step 2: Set Up the Coating Stations
In two separate bowls, crack and beat a few eggs in one bowl until smooth, then pour the gluten-free flour blend into the other. This dual setup will help you easily coat each piece of chicken. Make sure your workstation is organized to streamline the process as you prepare your tasty, crispy chicken bites!
Step 3: Coat the Chicken
Take a chicken piece, dip it first into the beaten eggs, ensuring it’s fully coated, then transfer it to the bowl of gluten-free flour. Coat the chicken thoroughly, pressing lightly to help the flour adhere. Repeat this step for all chicken pieces, ensuring your hands remain clean to maintain a tidy working area for this scrumptious Gluten Free Orange Chicken.
Step 4: Heat the Oil
In a large skillet, heat vegetable oil over medium-high heat until it shimmers, which usually takes about 3-5 minutes. To test the oil, drop a small amount of the flour coating into the pan; if it sizzles, the oil is ready. Achieving the right temperature is vital for ensuring that your chicken pieces fry up crispy and golden!
Step 5: Fry the Chicken
Carefully add the coated chicken pieces to the hot oil in batches, ensuring not to overcrowd the skillet. Fry for about 4-5 minutes, flipping halfway through, until each piece is golden brown and crispy. Once cooked, use a slotted spoon to transfer the chicken to a plate lined with paper towels to absorb excess oil as you finish frying the remaining pieces.
Step 6: Create the Sauce
In a separate saucepan, combine fresh orange juice, orange zest, gluten-free soy sauce, honey, minced garlic, and minced ginger. Heat the mixture over medium heat, stirring occasionally, until warmed through and fragrant, about 3-4 minutes. This vibrant sauce will bring the sweet and tangy flavors needed to elevate your Gluten Free Orange Chicken!
Step 7: Thicken the Sauce
Mix a tablespoon of cornstarch with a little cold water to create a slurry, then slowly add this to the saucepan. Continue stirring as the sauce simmers for another 2-3 minutes or until it thickens and becomes glossy. This rich consistency will coat the chicken beautifully, enhancing every bite of your delightful orange chicken dish.
Step 8: Toss the Chicken in the Sauce
Once the sauce has thickened, add the crispy fried chicken pieces to the saucepan. Gently toss them in the sauce using a spatula until evenly coated with the sweet and tangy glaze. Be careful not to break the chicken pieces, ensuring they remain crispy and delightful as they soak up the delicious sauce.
Step 9: Serve with Garnishes
Transfer the coated Gluten Free Orange Chicken to a serving platter. Garnish with optional toppings such as chopped green onions, sesame seeds, or fresh cilantro for a pop of color and flavor. Serve immediately, allowing the enticing aroma to entice everyone around the dinner table, making this dish a true highlight of your meal!
Gluten-Free Orange Chicken Variations
Feel free to make this dish your own with these fun, customizable ideas!
-
Dairy-Free: Substitute honey with maple syrup for a vegan-friendly sweetness. The flavors will still dance beautifully in your sauce!
-
Crispy Tofu: Swap chicken for firm tofu. Drain, press, and cut into cubes, then follow the same coating and frying method for a delightful vegetarian version.
-
Zesty Twist: Add a splash of lime juice to the sauce for an exciting citrus kick! This brightens the dish and adds another layer of flavor.
-
Spicy Kick: Toss in a pinch of red pepper flakes or a dash of sriracha to the sauce for those who crave a little heat. This spice will give your Orange Chicken a delightful zing!
-
Shrimp Version: Substitute chicken with shrimp for a seafood twist. Sauté briefly before adding the sauce to get that perfect tender bite.
-
Flavor Variety: Experiment with different gluten-free flours such as chickpea or coconut flour. Each brings unique flavors and textures to your dish.
-
Lettuce Wraps: For a lighter dish, serve the Orange Chicken in crisp lettuce leaves instead of rice. This fresh presentation feels both light and indulgent!
-
Add Vegetables: Stir-fry vegetables like bell peppers, broccoli, or snap peas in the pan after frying the chicken. They add color, nutrition, and a more complete meal to your table.
These variations can inspire new dinners in your kitchen or complement your favorite sides like Garlic Butter Chicken Bites with Parmesan Pasta or a refreshing Cranberry Orange Chicken! Explore and enjoy!
How to Store and Freeze Gluten-Free Orange Chicken
Fridge: Store leftovers in an airtight container for up to 3 days. This will help maintain the flavors and textures of your delicious Gluten-Free Orange Chicken.
Freezer: For longer storage, freeze the cooked chicken and sauce separately in airtight containers or freezer bags for up to 2 months. Thaw in the fridge before reheating.
Reheating: When ready to enjoy your leftovers, reheat the chicken in a skillet over medium heat, adding a splash of water to keep it moist, or for convenience, use the microwave with a loose cover.
Serving Tip: Always toss the chicken in the sauce just before serving to keep it crispy and flavorful!
Expert Tips for Gluten-Free Orange Chicken
-
Pat Dry First: Ensure your chicken is thoroughly patted dry before coating to achieve that perfect crispy texture when frying.
-
Avoid Overcrowding: Fry chicken in batches to prevent steaming instead of crisping, allowing the pieces adequate space to cook evenly.
-
Toss Just Before Serving: To maintain crispiness, toss the chicken in the sauce only right before serving. Soaking can lead to sogginess.
-
Adjust Flour Types: Experiment with different gluten-free flours to find your favorite texture, but remember that each may alter the result slightly.
-
Reheating Best Practices: When reheating leftovers, sauté them in a skillet over medium heat with a splash of water to restore some crispiness.
Make Ahead Options
These Crispy Gluten-Free Orange Chicken bites are perfect for meal prep enthusiasts! You can prepare the chicken by cutting it into bite-sized pieces and coating it with gluten-free flour up to 24 hours in advance. Simply store the coated chicken in an airtight container in the refrigerator to maintain its crispiness when cooked. Additionally, you can mix the sauce ingredients and refrigerate them for up to 3 days. When you’re ready to serve, fry the prepared chicken pieces until golden brown, heat the sauce, and then toss them together for a quick and delicious meal that tastes just as delightful as if you made it from scratch that day!
What to Serve with Gluten-Free Orange Chicken
Nothing completes a vibrant dish like crisp and fresh sides that complement the bold flavors of your meal!
- Steamed Jasmine Rice: The fluffy grains soak up the sweet and tangy sauce beautifully, making each bite a burst of flavor.
- Stir-Fried Vegetables: A mix of vibrant veggies adds crunch and color, balancing the dish with nutrition and freshness. Carrots, bell peppers, and snow peas stir-fried together create a symphony of flavors.
- Coconut Quinoa: Nutty and slightly sweet, quinoa is a gluten-free alternative to rice that enhances the dish while providing extra protein. It’s like a pillow for the crispy chicken!
- Asian Slaw: Crisp cabbage, carrots, and a tangy dressing offer a refreshing contrast to the fried chicken. It adds color and texture, making your dinner plate pop!
- Garlic Bok Choy: Lightly sautéed with garlic, bok choy brings an earthy depth that pairs perfectly with the chicken’s zesty profile.
- Sweet and Sour Cucumber Salad: This cool, crunchy salad provides a refreshing contrast to the warm, savory dish, enhancing the overall dining experience.
- Chilled Sake or Green Tea: A light beverage like sake or green tea refreshes your palate between bites, enhancing the overall meal experience with its subtle flavors.
- Fresh Fruit Salad: A light and sweet finish to the meal, a medley of seasonal fruits cleanses your palate while echoing the dish’s citrus notes.
Gluten-Free Orange Chicken Recipe FAQs
How do I choose the best chicken for this recipe?
Absolutely! For the best results, use boneless, skinless chicken breasts, as they provide a tender, juicy base for the dish. If you prefer a slightly more flavorful option, chicken thighs are a fantastic alternative, though they may need an extra couple of minutes to cook through. Always look for chicken that is pink and moist without any dark spots—this is the key to freshness!
What’s the best way to store leftovers?
Very! Store any leftover Gluten-Free Orange Chicken in an airtight container in the refrigerator for up to 3 days. This will help preserve both the texture and taste. For best results, reheat the chicken in a skillet on medium heat or with a bit of water in the microwave, just to keep them from drying out.
Can I freeze the cooked chicken?
Of course! To freeze, place your cooked Gluten-Free Orange Chicken and the sauce in separate airtight containers or freezer bags. This method preserves freshness and prevents sogginess. It can be frozen for up to 2 months. When you’re ready to enjoy, simply thaw it in the fridge overnight two before reheating.
What should I do if my fried chicken isn’t crisping up?
If your chicken isn’t achieving that desired crispiness, don’t worry! The first step is to ensure you pat the pieces dry before coating them with flour; excess moisture can lead to steaming rather than frying. Additionally, make sure your oil is hot enough—let it shimmer before adding the chicken, as the right temperature is critical for achieving an irresistible crunch.
Is this recipe safe for people with allergies?
Absolutely! This Gluten-Free Orange Chicken is designed to be both gluten and dairy-free, making it suitable for a variety of dietary needs. However, always double-check the labels on your gluten-free soy sauce and any additional ingredients to ensure they meet your specific allergy requirements. If you’re cooking for others, make sure to ask about any other allergies they might have!
Crispy Gluten Free Orange Chicken That Everyone Will Love
Ingredients
Equipment
Method
- Cut boneless chicken breasts into bite-sized pieces and pat them dry with paper towels.
- In two bowls, beat eggs in one and pour gluten-free flour blend in the other.
- Dip chicken pieces in beaten eggs, then thoroughly coat in gluten-free flour.
- Heat vegetable oil in a large skillet over medium-high heat until shimmers.
- Fry coated chicken pieces in batches for 4-5 minutes until golden brown.
- In a saucepan, combine orange juice, orange zest, soy sauce, honey, garlic, and ginger. Heat until fragrant.
- Mix cornstarch with cold water, then add to the sauce, stirring until thickened.
- Add fried chicken pieces to the sauce and gently toss until evenly coated.
- Transfer to a serving platter and garnish with optional toppings before serving.
Leave a Reply