
Scrolling through my phone after an intense workout, I stumbled upon a tempting treat that struck a perfect balance between indulgence and nourishment: Oreo Protein Balls. This easy no-bake recipe is not just a delightful mix of crushed Oreos and creamy goodness, but it’s also packed with protein to fuel your recovery. In just a few simple steps, you can whip together these customizable snacks, perfect for satisfying cravings without guilt. Whether you’re rushing to refuel after the gym or need a quick pick-me-up for a busy afternoon, these tasty bites fit the bill. Plus, with options to cater to different diets, including dairy-free and gluten-free variations, these Oreo Protein Balls promise to please everyone. Ready to discover how to make these satisfying little treats? Let’s dive into the recipe!
Why Are These Oreo Protein Balls a Must-Try?
Guilt-Free Indulgence: These Oreo Protein Balls satisfy your sweet tooth without compromising your health goals.
Quick and Easy: With just a few simple ingredients, you can whip these up in no time—perfect for busy individuals!
Customizable Options: Feel free to switch up the protein powder and add your favorite nuts or seeds.
No-Bake Goodness: Skip the oven and enjoy these delicious bites straight from the fridge or freezer.
Perfect Post-Workout Snack: Packed with protein, they’re ideal for fueling your body after a hard workout. Pair them with a dollop of Greek yogurt from my Breakfast Protein Biscuits for even more satisfaction!
These delightful treats are an irresistible way to indulge while nourishing your body.
Tasty Oreo Protein Balls Ingredients
For the Base
- Oreo Cookies – The star ingredient that brings a classic cookie flavor; you can opt for gluten-free Oreos to keep it friendly for all diets.
- Cream Cheese – Adds a rich and creamy texture, serving as the binder; Neufchâtel cheese is a lighter option if you’re looking to cut calories.
- Protein Powder – Infuses the balls with protein and flavor; you can experiment with different types, but ensure it complements the rich taste of Oreos.
For the Moisture
- Almond Milk – Helps bind the ingredients together while keeping it moist; feel free to substitute with dairy or any plant-based milk based on your preference.
For Coating
- Chocolate (for coating) – Drizzle this over the protein balls for a decadent finish; white chocolate or dairy-free options are great substitutes if desired.
For Sweetness
- Sweetener – Optional, depending on your taste; be sure to check your protein powder’s sweetness beforehand so you don’t overdo it.
These tasty Oreo Protein Balls are not only easy to prepare but also support various dietary needs, making them a guilt-free indulgence you can enjoy anytime!
Step‑by‑Step Instructions for Tasty Oreo Protein Balls Recipe
Step 1: Prepare Your Work Surface
Begin by lining a baking sheet with wax paper, ensuring it’s ready for your Tasty Oreo Protein Balls. This will prevent sticking and easy cleanup once the balls are formed. Make sure you have all your ingredients at hand, including crushed Oreos, protein powder, cream cheese, and almond milk, so you can work efficiently.
Step 2: Combine Dry Ingredients
In a large mixing bowl, add the crushed Oreo cookies and your chosen protein powder. If you’d like, you can include any additional dry ingredients at this stage. Use a fork or whisk to mix them thoroughly, ensuring an even distribution of the Oreo flavor. The mixture should become slightly crumbly as you combine the flavors.
Step 3: Add Wet Ingredients
Next, add the softened cream cheese and almond milk into the dry mixture. Using a spatula or your hands, mix everything together until it forms a cohesive dough. You want a slightly sticky consistency that holds together well, perfect for rolling into balls. If needed, adjust with a splash more almond milk if the mixture seems too dry.
Step 4: Form the Protein Balls
Once your mixture is ready, take small portions and roll them into 1-inch balls. Place them on the prepared baking sheet, leaving a little space between each ball. The Tasty Oreo Protein Balls should look smooth and round. Continue this process until all the mixture is shaped into delightful bites.
Step 5: Melt the Chocolate
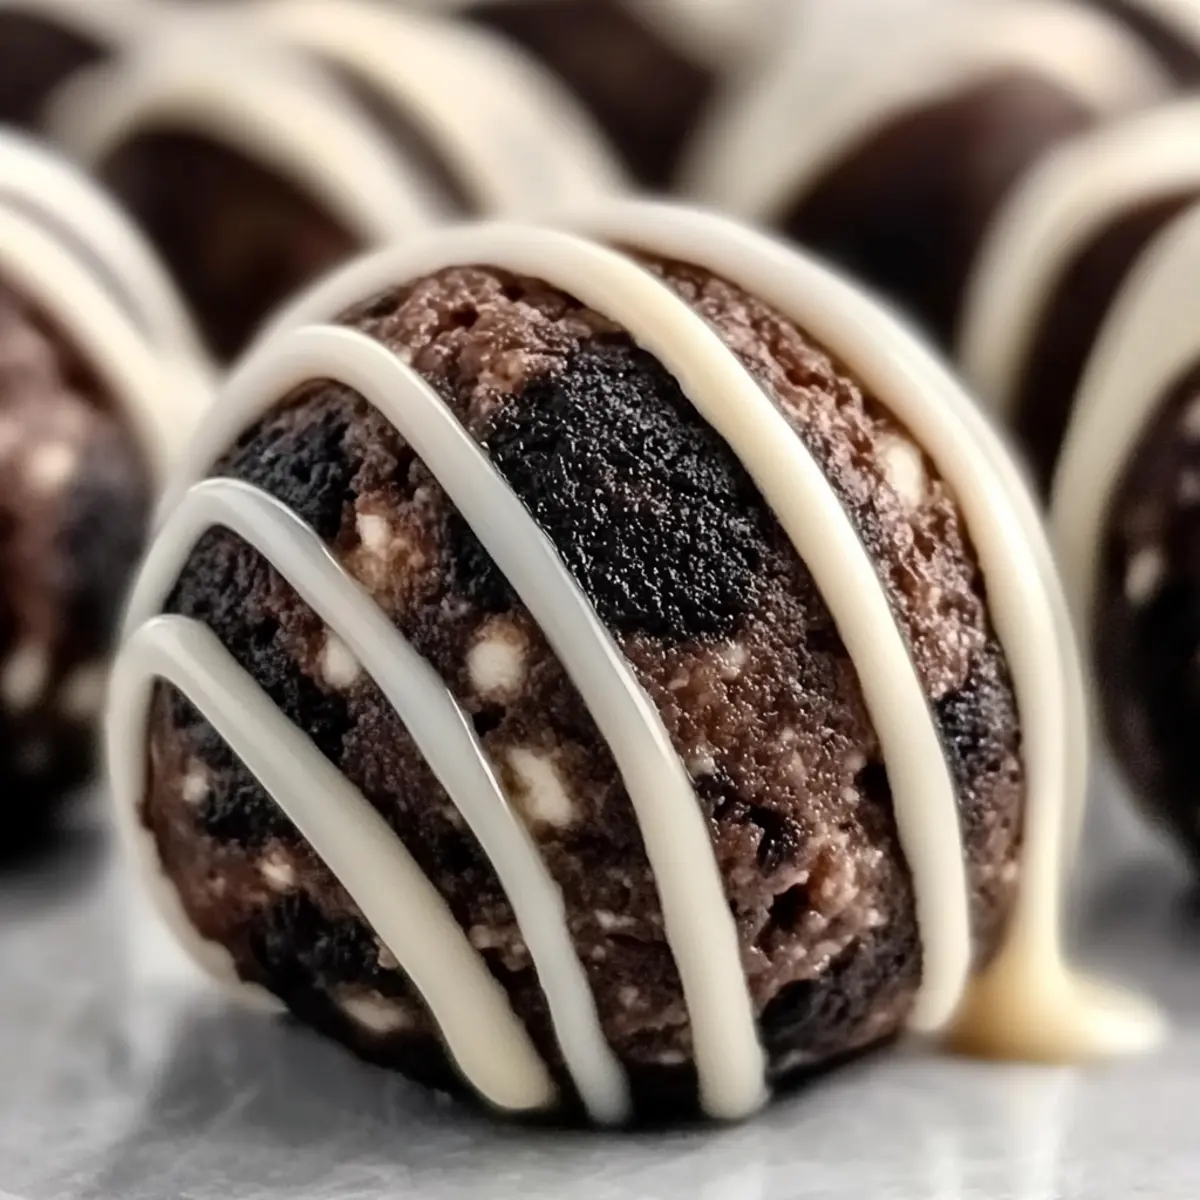
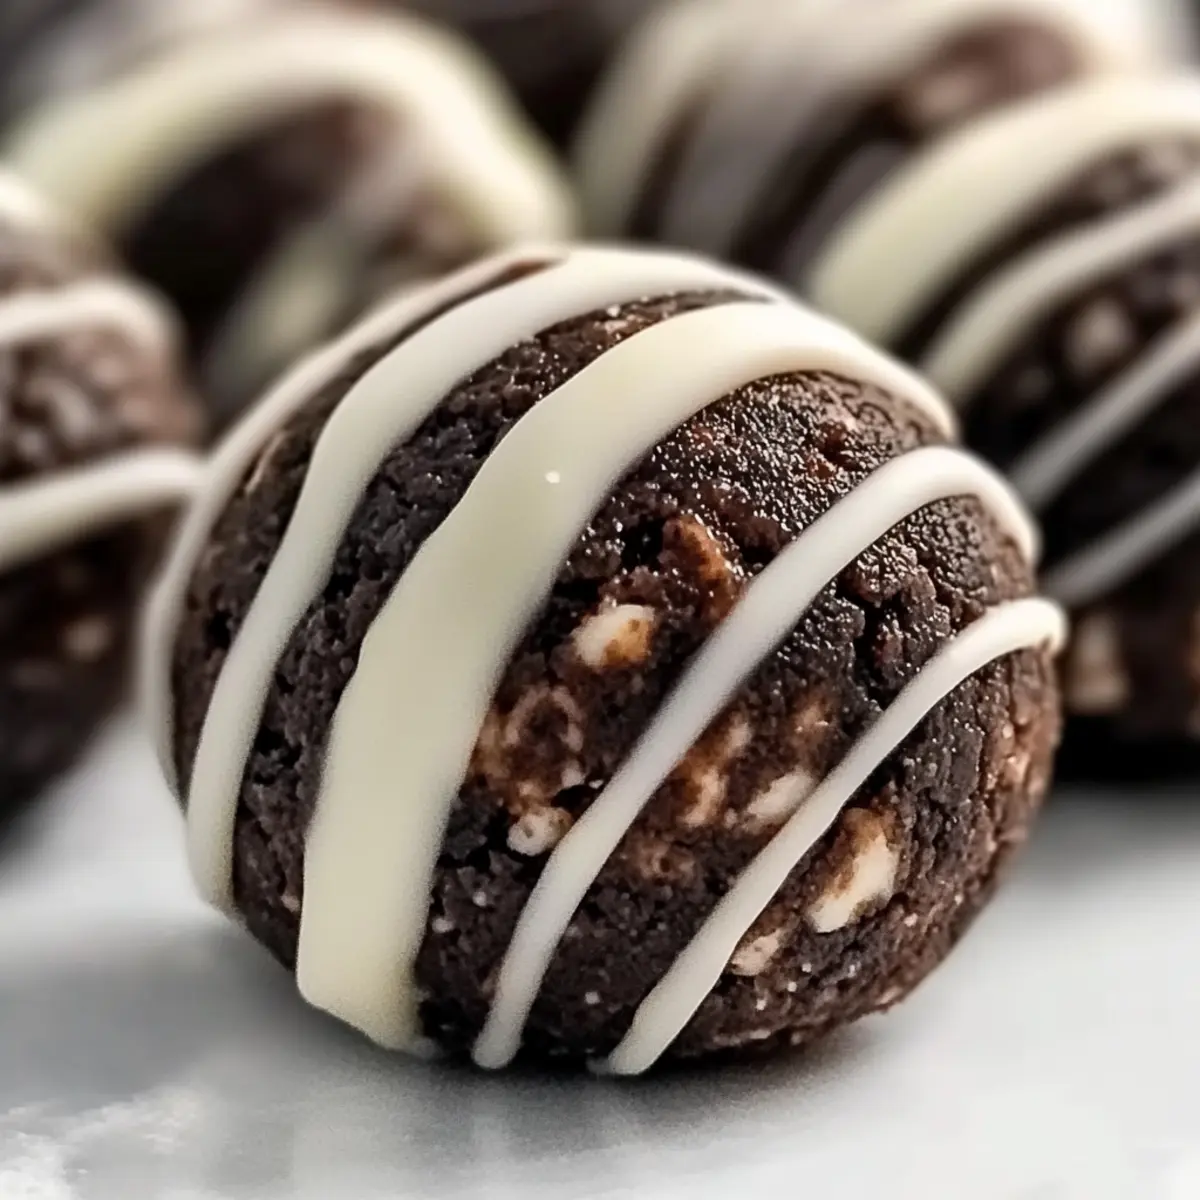
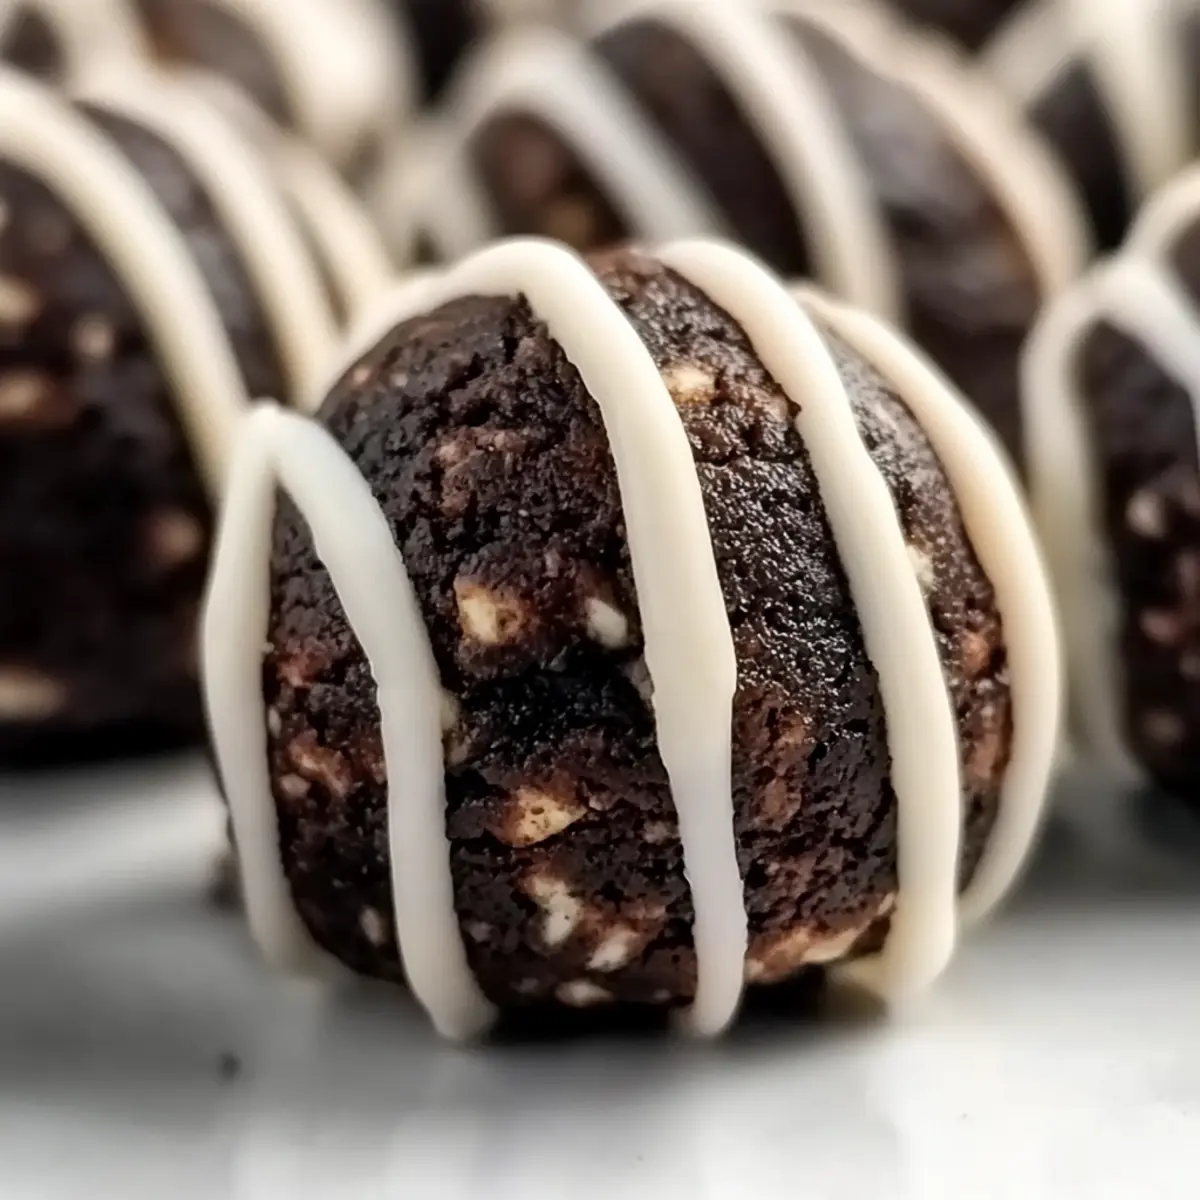
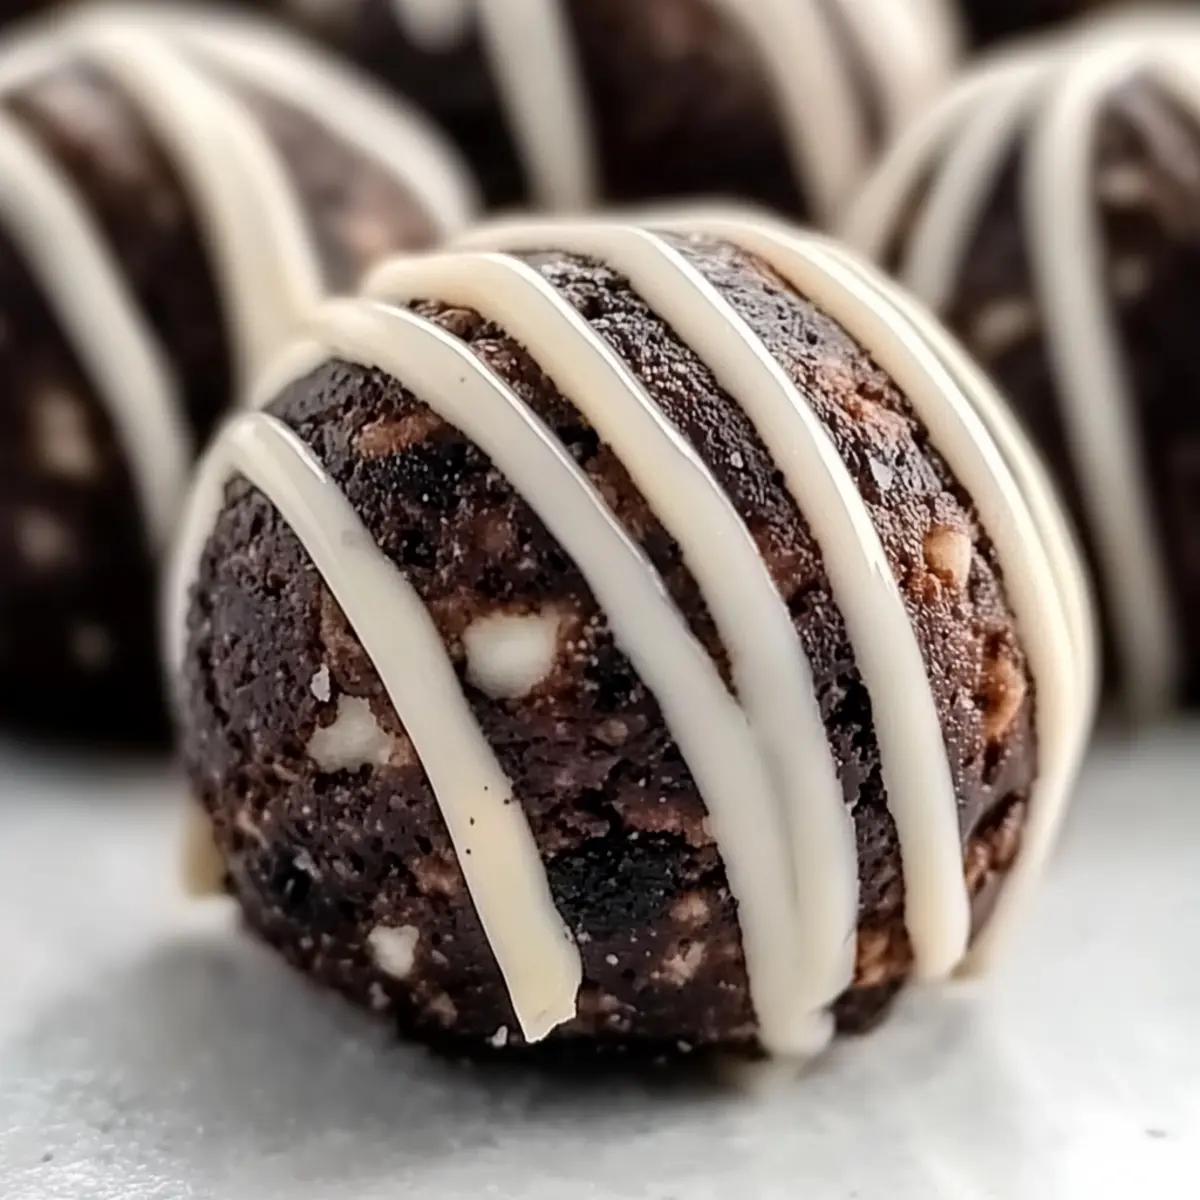
In a microwave-safe bowl, melt your chosen chocolate (or white chocolate) in 15-20 second intervals, stirring in between to achieve a smooth consistency. Once melted, the chocolate should be glossy and pourable. This coating will add an extra layer of indulgence to your Tasty Oreo Protein Balls.
Step 6: Drizzle Chocolate Over Balls
Using a spoon or a fork, drizzle the melted chocolate over each protein ball, ensuring they are generously coated. You can create a decorative pattern or simply coat them until they are covered. Let the chocolate set slightly as it firms up, giving your treats a beautiful, shiny finish.
Step 7: Chill to Set
Pop the baking sheet with the coated Oreo Protein Balls into the freezer for about 10 minutes. This will allow the chocolate to harden and the flavors to meld together. When done, the protein balls should be firm yet still soft enough to enjoy easily.
Step 8: Store Your Treats
Once chilled, transfer your Tasty Oreo Protein Balls to an airtight container. You can keep them in the fridge for up to a week or freeze them for up to three months. These little delights are now ready to be snacked on whenever you need a quick protein boost or a sweet treat!
Tasty Oreo Protein Balls Variations
Feel free to get creative with these tasty Oreo Protein Balls and make them your own!
- Gluten-Free: Use gluten-free Oreos for a guilt-free, dietary-friendly version. Everyone deserves to indulge!
- Nutty Crunch: Add chopped almonds or walnuts for added texture and healthy fats. The nutty crunch elevates each bite.
- Dairy-Free: Swap cream cheese with a dairy-free alternative, like cashew cream or coconut yogurt, for a vegan treat.
- Flavor Boost: Experiment with flavored protein powders, like cookies and cream or vanilla, to enhance the taste.
- Coconut Twist: Replace almond milk with coconut milk for a tropical flair that complements the chocolate.
- Sweeten to Taste: If your protein powder isn’t sweet enough, add maple syrup or honey for extra indulgence. Adjusting sweetness is always a delightful surprise!
- Chocolate Lovers: Coat the protein balls in dark chocolate for an intense chocolate flavor that complements the Oreos beautifully.
- Spiced Up: Sprinkle in some cinnamon or nutmeg for a warm, spiced flavor profile that warms the heart.
These variations not only provide delicious twists but also ensure your Oreo Protein Balls cater to various palates and preferences. Why not enjoy them with a side of fresh fruit, like berries, or a dollop of Greek yogurt from my Fluffy Pancake Recipe for an extra delicious experience?
Make Ahead Options
These Tasty Oreo Protein Balls are ideal for meal prep, saving you time during a busy week! You can prep the mixture up to 24 hours in advance—simply combine the crushed Oreos, protein powder, cream cheese, and almond milk, then store it in an airtight container in the fridge. To maintain quality, ensure the mixture is well-sealed to prevent drying out. When you’re ready to enjoy, just roll the protein balls, drizzle with melted chocolate, and chill in the freezer for about 10 minutes to set. Alternatively, you can shape, coat, and freeze the finished balls for quick snacking anytime, keeping them fresh for up to three months!
Expert Tips for Tasty Oreo Protein Balls
-
Use Room Temperature Ingredients: Ensure your cream cheese is at room temperature for easier mixing, resulting in a smoother dough.
-
Chill for Easier Handling: Pop the mixture in the fridge for a bit before rolling; this helps prevent stickiness and makes forming the balls a breeze.
-
Adjust Liquid Wisely: Each protein powder has different absorbency; start with less almond milk and add gradually to achieve the right consistency for your Tasty Oreo Protein Balls.
-
Taste Before Rolling: Always taste the mixture before shaping the balls; adjust sweetness if needed to avoid overly sweet snacks.
-
Batch Variations: Don’t hesitate to experiment! Substitute Oreos with other cookie varieties for unique flavors or add nuts for an extra crunch.
What to Serve with Easy No-Bake Oreo Protein Balls
These delightful treats shine even brighter when paired with complementary snacks and drinks that enhance their flavors and textures.
- Fresh Berries: Juicy strawberries and blueberries add a burst of freshness, balancing the sweetness of the protein balls. Their natural acidity cuts through the richness, making for a harmonious bite.
- Greek Yogurt: Creamy and tangy, a dollop of Greek yogurt paired with the Oreo Protein Balls elevates your snack game. It’s a protein-packed option that adds a luscious texture, perfect for dipping!
- Nut Butter: A drizzle of almond or peanut butter provides a nutty depth of flavor that contrasts beautifully with the decadent chocolate. This combination enhances protein intake for a satisfying, filling snack.
- Sliced Bananas: Sweet slices of banana not only add a lovely creaminess but also offer potassium, making it a healthy pairing after a workout. They complement the chocolatey goodness wonderfully!
- Dark Chocolate Shake: Blend some almond milk with cocoa powder and a sweetener for a delightful shake that mirrors the flavors of the protein balls while keeping the indulgence at bay.
- Chia Seed Pudding: Creamy and packed with nutrients, chia seed pudding can be flavored with vanilla for a complementary texture and flavor that pairs well with the rich Oreo flavor.
- Coconut Water: A light, refreshing drink option, coconut water hydrates while adding a hint of sweetness, making it a perfect palate cleanser alongside your tasty Oreo Protein Balls.
- Coffee: A warm cup of coffee or an iced coffee enhances the chocolatey profile of the protein balls, providing a delightful contrast while giving you the energy boost you need.
Storage Tips for Tasty Oreo Protein Balls
-
Fridge: Store your Tasty Oreo Protein Balls in an airtight container in the fridge for up to 1 week. This keeps them fresh and prevents them from drying out.
-
Freezer: For longer preservation, freeze them in a single layer on a baking sheet for a few hours, then transfer to a sealed bag or container for up to 3 months.
-
Thawing: When you’re ready to enjoy, simply take out a portion and let them thaw in the fridge for about an hour, or enjoy them frozen for a cool treat!
-
Reheating: These protein balls are best enjoyed chilled or at room temperature—there’s no need to heat them, as they maintain their delightful texture that way.
Tasty Oreo Protein Balls Recipe FAQs
What type of Oreos should I use?
You can use regular Oreos, but for a gluten-free version, opt for gluten-free Oreos. They still deliver that classic Oreo flavor while accommodating dietary considerations.
How should I store the protein balls?
Store your Tasty Oreo Protein Balls in an airtight container in the fridge for up to 1 week. They stay fresh and flavorful this way! For longer storage, freeze them for up to 3 months. Just remember to thaw them in the fridge when you want to enjoy one.
Can I freeze these protein balls?
Absolutely! To freeze, place the formed protein balls on a baking sheet lined with wax paper and freeze until solid, about 1-2 hours. Then, transfer them to a sealed bag or container. This way, you can enjoy them on a whim without compromising freshness.
What if my mixture is too dry?
If you find your mixture is a bit dry and not holding together, don’t worry! Gradually add a splash more almond milk until it reaches a sticky yet cohesive consistency. The right texture is key for easy rolling into those delicious balls!
Are these protein balls safe for pets?
While they are scrumptious for humans, they contain ingredients like chocolate and cream cheese that are not safe for pets. Keep them away from furry friends, and enjoy them yourself!
Can I customize the protein powder?
Absolutely! Mix it up with chocolate, vanilla, or any other flavored protein powder that suits your taste. Just ensure it complements the Oreo flavor to maintain that delightful experience. Enjoy the flexibility!
Tasty Oreo Protein Balls Recipe for Guilt-Free Indulgence
Ingredients
Equipment
Method
- Line a baking sheet with wax paper to prevent sticking.
- In a large bowl, mix crushed Oreo cookies and protein powder until evenly distributed.
- Add softened cream cheese and almond milk. Mix until a cohesive dough forms.
- Roll small portions into 1-inch balls and place on the baking sheet.
- Melt chocolate in a microwave-safe bowl in intervals until smooth.
- Drizzle melted chocolate over the balls, ensuring even coverage.
- Place baking sheet in the freezer for about 10 minutes to set.
- Transfer to an airtight container for storage.
Leave a Reply