
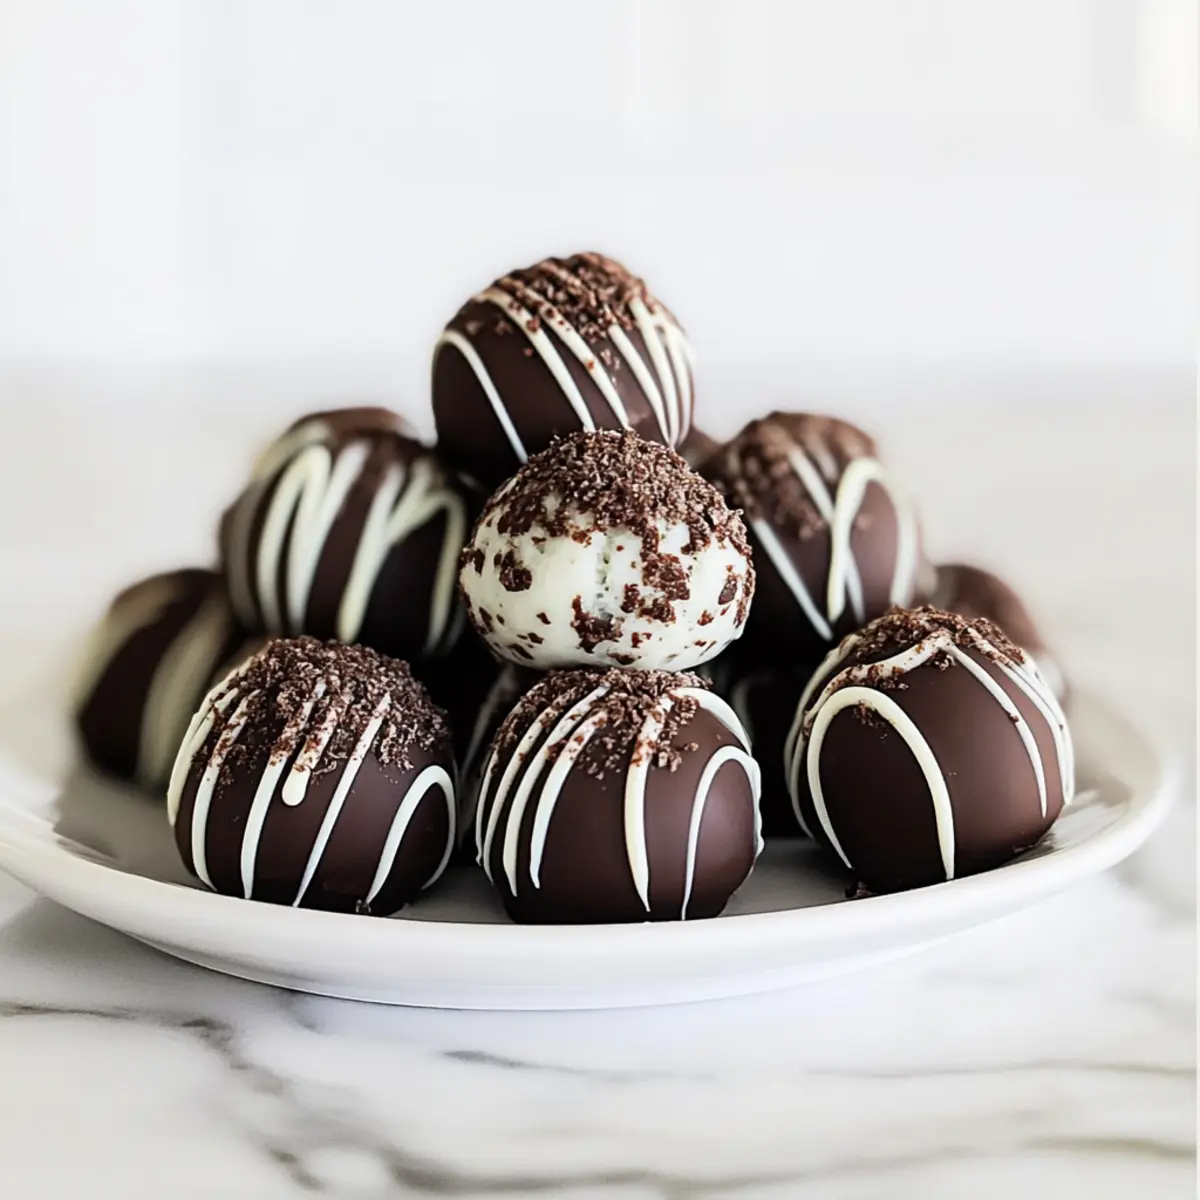
The chatter of excited friends fills my kitchen as I whip up a batch of these delightful Gluten-Free OREO Balls. This three-ingredient no-bake dessert strikes the perfect balance of ease and indulgence, making it ideal for those of us who crave homemade treats without the fuss. Picture rich, chocolate-covered truffles that can be prepared in mere minutes, perfect for gatherings or cozy nights in. These little bites of joy not only cater to gluten-sensitive palates but also appeal to everyone—no one will guess they’re gluten-free! Plus, they’re effortlessly versatile, allowing for creative flair with toppings. Ready to impress your guests or pamper yourself? Let’s dive into this simple yet satisfying recipe!

Why Are Gluten-Free OREO Balls So Irresistible?
Ease of Preparation: You’ll love how simple it is to whip these up in just a few minutes. No baking required means more time to enjoy!
Decadent Flavors: The rich chocolate coating paired with the creamy center creates a taste experience that is truly indulgent.
Versatile Treat: Feel free to get creative with toppings like crushed nuts, sprinkles, or a drizzle of white chocolate!
Crowd Pleaser: Whether it’s a party or a cozy night in, these sweet bites are sure to wow friends and family alike. For more crowd-pleasing ideas, consider making some Turkey Stuffing Balls as well!
Diet-Friendly: Perfect for gluten-sensitive individuals, this recipe ensures everyone can join in on the dessert fun without sacrifice.
Make-Ahead Delight: Prepare these ahead of time and store for a quick, impressive treat whenever cravings strike.
Gluten-Free OREO Balls Ingredients
For the Base
• Gluten-Free OREO Cookies – These provide the delightful chocolatey flavor essential for our truffles.
For the Creamy Filling
• Cream Cheese – Ensure it’s softened for easier mixing, as it binds the cookie crumbs beautifully.
For the Chocolate Coating
• Chocolate – Choose your favorite: milk, dark, or white chocolate, as it envelops the truffles in a sumptuous layer.
Step‑by‑Step Instructions for Gluten-Free OREO Balls
Step 1: Prepare Cookie Crumbs
Start by placing your gluten-free OREO cookies into a food processor. Pulse until the cookies are finely crushed, resembling sand, for about 30 seconds. This step is crucial, as the cookie crumbs form the base of your Gluten-Free OREO Balls, so make sure there are no large pieces remaining.
Step 2: Mix Filling
In a mixing bowl, combine the cookie crumbs with softened cream cheese. Using a fork or spatula, blend them together until the mixture is smooth and homogenous. This should take about 2-3 minutes. The cream cheese binds the crumbs, creating a creamy filling that will hold its shape when formed into balls.
Step 3: Form Balls
Using your hands, scoop out the mixture and roll it into 1-inch balls. Place each formed ball onto a parchment-lined baking sheet, ensuring they have space between them so they don’t stick together. After rolling about 12-15 balls, you’ll notice the mixture is sweet and delicious, and the texture will be pleasantly creamy.
Step 4: Chill
Now, pop the baking sheet into the freezer for about 15 minutes. This will firm up the Gluten-Free OREO Balls, making them easier to coat in chocolate. Keep an eye on them; they should feel firm to touch but not frozen solid, making them perfect for the next step.
Step 5: Melt Chocolate
While the balls are chilling, prepare to melt your chocolate. Place your chocolate in a microwave-safe bowl and heat in 30-second intervals, stirring in between until completely melted and smooth. This should take about 1-2 minutes total. The melted chocolate will create a luscious coating for your treats!
Step 6: Coat Balls
Once the balls are firm and the chocolate is melted, take each frozen ball and dip it into the chocolate. Use a fork to lift it out, allowing any excess chocolate to drip off. Place each coated ball back on the parchment-lined baking sheet. The chocolate should create a shiny, smooth layer over each truffle.
Step 7: Finish and Cool
After coating all the balls, drizzle any leftover melted chocolate over the top for an elegant touch. If you have some crushed gluten-free OREO cookies, sprinkle them on top for added texture and flair. Allow the chocolate to set at room temperature or refrigerate for about 30 minutes before serving your delightful Gluten-Free OREO Balls.

Expert Tips for Gluten-Free OREO Balls
- Choose Quality Cookies: Use only gluten-free OREO cookies to keep this dessert gluten-free and satisfy your cravings without worry.
- Softened Cream Cheese: Make sure your cream cheese is at room temperature for easy blending; this prevents lumps in your mixture.
- Watch the Chocolate: When melting chocolate, heat in short intervals and stir often to avoid scorching, ensuring a smooth coating for your Gluten-Free OREO Balls.
- Chill for Firmness: Don’t skip the chilling step! It helps the balls hold their shape while coating, making the process much easier and mess-free.
- Store Properly: Keep your finished OREO balls in an airtight container in the fridge for up to 2 weeks, or freeze them for indulgent treats anytime!
Make Ahead Options
These Gluten-Free OREO Balls are a fantastic choice for meal prep aficionados! You can prepare the cookie filling and form the balls up to 24 hours in advance. Simply follow the steps to mix the cookie crumbs with cream cheese and roll them into balls, then place them on a parchment-lined baking sheet and refrigerate. For optimal freshness and to maintain that delicious texture, cover the baking sheet with plastic wrap or place the balls in an airtight container. When you’re ready to serve, melt your chocolate and coat the chilled balls—the result will be just as delightful and indulgent as if made fresh, saving you time without compromising on flavor!
What to Serve with Gluten-Free OREO Balls?
Imagine a delightful gathering where every bite of sweetness is complemented by the perfect pairing!
-
Rich Coffee: The robust flavors of coffee enhance the chocolatey decadence, creating a warm and inviting experience. A rich espresso or a creamy latte will perfectly balance the sweetness.
-
Fresh Berries: Sweet, tangy berries like raspberries or strawberries add a refreshing contrast to the creamy OREO balls. Their burst of juiciness cuts through the richness, making each bite even more delightful.
-
Ice Cream: Creamy vanilla or chocolate ice cream brings an extra layer of indulgence, turning your dessert into a heavenly treat. The cold melt-in-your-mouth texture pairs beautifully with the chocolate coating.
-
Nutty Granola: A sprinkle of crunchy, gluten-free granola on top adds texture and a hint of earthiness. This classic pairing introduces a satisfying crunch as you bite into the smooth truffle.
-
Sparkling Wine: A glass of bubbly sparkling wine or sweet prosecco adds a celebratory touch. The effervescence refreshes the palate, urging you to reach for another gluten-free delight.
-
Chocolate Dipping Sauce: If you want to take it a step further, a warm chocolate sauce for dipping delights both the eyes and the taste buds—it’s the ultimate chocolate lover’s treat!
These pairings will elevate your Gluten-Free OREO Balls, ensuring a memorable dessert experience for you and your guests!
Gluten-Free OREO Balls Variations
Feel free to explore these creative twists and substitutions to make the Gluten-Free OREO Balls truly your own!
-
Nutty Indulgence: Add finely chopped nuts like walnuts or almonds to the cookie mixture for a delightful crunch. This adds an extra layer of texture, creating a wonderfully satisfying snack.
-
Minty Fresh: Incorporate a few drops of peppermint extract into your filling for a refreshing minty flavor. Mint pairs beautifully with chocolate, making every bite a festive delight that’s hard to resist.
-
Dairy-Free Delight: Use vegan cream cheese and dairy-free chocolate for a completely plant-based treat. Don’t worry—these alternatives won’t skimp on flavor, ensuring everyone can enjoy them!
-
Rainbow Sprinkles: Roll the finished balls in colorful sprinkles to create a fun, party-ready treat. These cheerful additions can brighten up your dessert table and add a pop of joy to every bite.
-
Spicy Kick: Mix in a pinch of cayenne pepper or cinnamon to the chocolate coating for a surprising kick. A little heat can elevate the chocolate experience and intrigue your taste buds!
-
Dark Chocolate Lovers: Swap the coating for rich dark chocolate for a more intense flavor experience. The bittersweet notes of dark chocolate provide a lovely contrast to the sweetness of the cookie and cream cheese.
-
Matcha Green Tea: Dust the finished OREO balls with matcha powder for a unique flavor and beautiful green color. Not only does matcha add a hint of earthiness, it also gives your treats a stunning presentation!
-
Chocolate-Covered Strawberry: Top with a drizzle of melted strawberry or raspberry chocolate for a fresh fruit twist. These fruity accents are bound to be a hit, reminiscent of delightful summer treats!
For additional tasty treats, consider pairing with some Turkey Stuffing Balls for an exquisite flavor combo, perfect for festive gatherings! Enjoy the journey of experimenting with flavors while crafting these delightful Gluten-Free OREO Balls!
How to Store and Freeze Gluten-Free OREO Balls
Fridge: Store your Gluten-Free OREO Balls in an airtight container in the fridge for up to 2 weeks. This helps maintain their delicious creaminess and prevents them from drying out.
Freezer: For longer storage, freeze the balls in a single layer on a baking sheet until solid, then transfer them to a freezer-safe bag. They’ll stay fresh for up to 2 months.
Thawing: When you’re ready to indulge, simply remove the desired amount from the freezer and let them thaw in the fridge for a few hours before serving.
Reheating: While these treats are best enjoyed cold, you can gently warm them in the microwave for about 10-15 seconds if you prefer a softer texture.

Gluten-Free OREO Balls Recipe FAQs
How do I choose the right gluten-free OREO cookies?
Absolutely! When selecting gluten-free OREO cookies, always check the packaging to confirm they are labeled gluten-free. Look for dark, intact cookies without any softening or crumbling—this ensures they will give you the best flavor and texture for your OREO Balls.
How should I store my Gluten-Free OREO Balls?
You can store your delicious Gluten-Free OREO Balls in an airtight container in the fridge for up to 2 weeks. Make sure they are fully cooled and set before refrigerating to maintain their creamy texture and to prevent them from sticking together.
Can I freeze Gluten-Free OREO Balls, and how?
Absolutely! To freeze your Gluten-Free OREO Balls, spread them in a single layer on a parchment-lined baking sheet and place them in the freezer until they are solid, which should take about 1-2 hours. Once firm, transfer them to a freezer-safe bag or container. They can be stored in the freezer for up to 2 months. When you’re ready to enjoy them, simply thaw in the fridge for a few hours or at room temperature for quicker enjoyment!
What if my chocolate coating doesn’t set properly?
Very! If your chocolate coating isn’t setting, it could be due to moisture on the surface of your truffles. Ensure they’re completely cool before dipping. If needed, pop them back in the fridge for a quick chill before coating. If the chocolate still does not set, you can rehear it gently and re-dip the balls to create a more consistent coat.
Are these Gluten-Free OREO Balls safe for pets?
It’s important to note that these treats contain chocolate, which is toxic to dogs and other pets. So, be sure to keep your Gluten-Free OREO Balls out of reach of pets to ensure their safety. If you’re looking for pet-friendly treats, consider making special treats designed just for them!
Can I make substitutions for dietary restrictions?
Absolutely! If you or someone you know has dairy allergies, you can substitute the cream cheese with a dairy-free alternative, like cashew cream or vegan cream cheese. For the coating, use dairy-free chocolate chips to keep this sweet treat friendly for everyone!
Deliciously Creamy Gluten-Free OREO Balls You’ll Love
Ingredients
Equipment
Method
- Start by placing your gluten-free OREO cookies into a food processor. Pulse until the cookies are finely crushed, resembling sand, for about 30 seconds.
- In a mixing bowl, combine the cookie crumbs with softened cream cheese. Using a fork or spatula, blend them together until the mixture is smooth and homogenous.
- Using your hands, scoop out the mixture and roll it into 1-inch balls. Place each formed ball onto a parchment-lined baking sheet.
- Pop the baking sheet into the freezer for about 15 minutes to firm up the Gluten-Free OREO Balls.
- While the balls are chilling, prepare to melt your chocolate. Place your chocolate in a microwave-safe bowl and heat in 30-second intervals, stirring in between.
- Once the balls are firm and the chocolate is melted, dip each ball into the chocolate and place it back on the parchment-lined baking sheet.
- After coating all the balls, drizzle any leftover melted chocolate over the top and sprinkle with crushed gluten-free OREO cookies, if desired.
Leave a Reply