
The rich aroma of melted chocolate wafted through my kitchen, instantly transforming a cold evening into a cozy celebration. I never imagined it could be so simple to whip up these delightful Christmas bars, yet here I am, sharing my go-to dessert that’s both festive and customizable! This quick recipe requires just 45 minutes and a handful of ingredients, making it the perfect choice for those last-minute holiday gatherings. With a delicious combination of fluffy marshmallows, a crunchy base, and layers of chocolatey goodness, these Christmas bars are sure to impress friends and family alike. Plus, they’re incredibly versatile—think nut-free, gluten-free, or even vegan adaptations to suit everyone’s needs. So, are you ready to fill your kitchen with warmth and sweetness this holiday season? Let’s dive into this treat that promises joy in every bite!

Why are Christmas Bars a Must-Try?
Quick and Easy: These bars come together in just 45 minutes, making them an ideal last-minute dessert option during the busy holiday season.
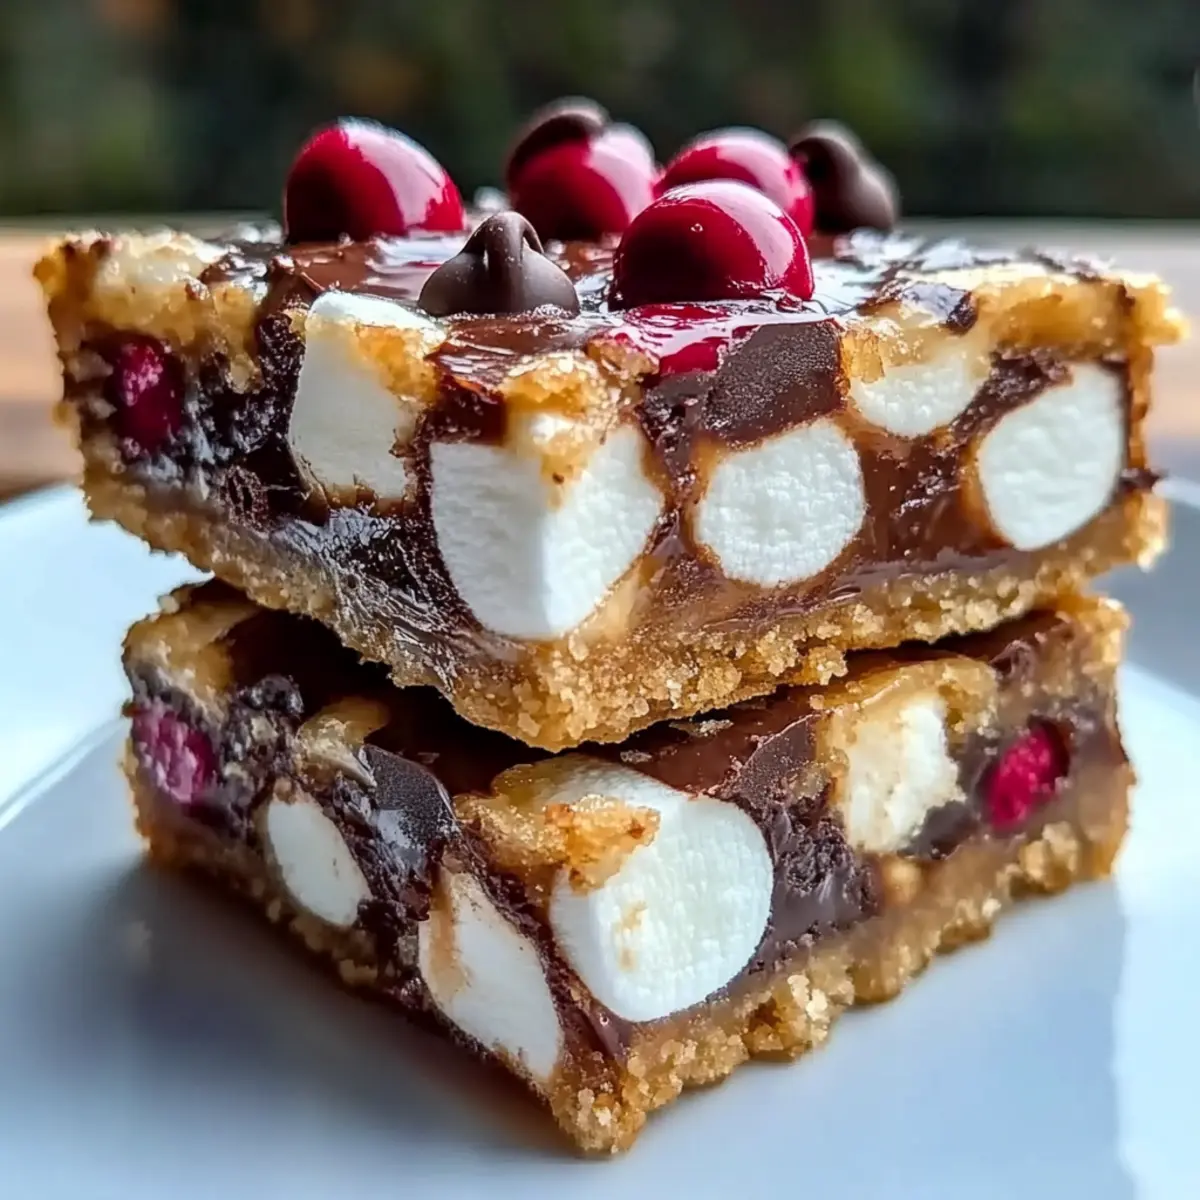
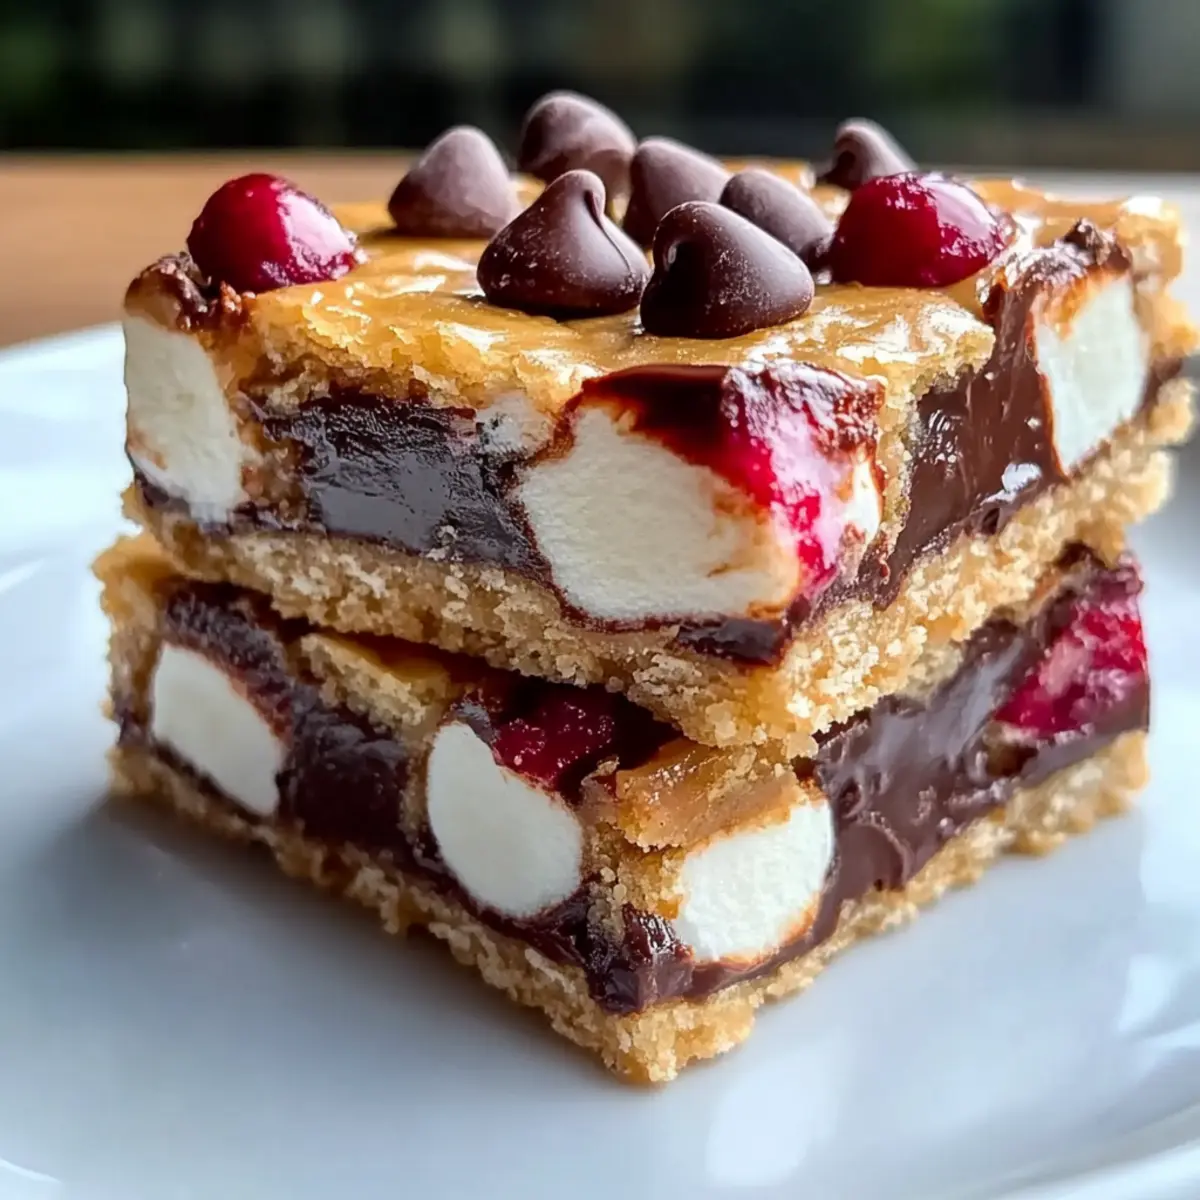
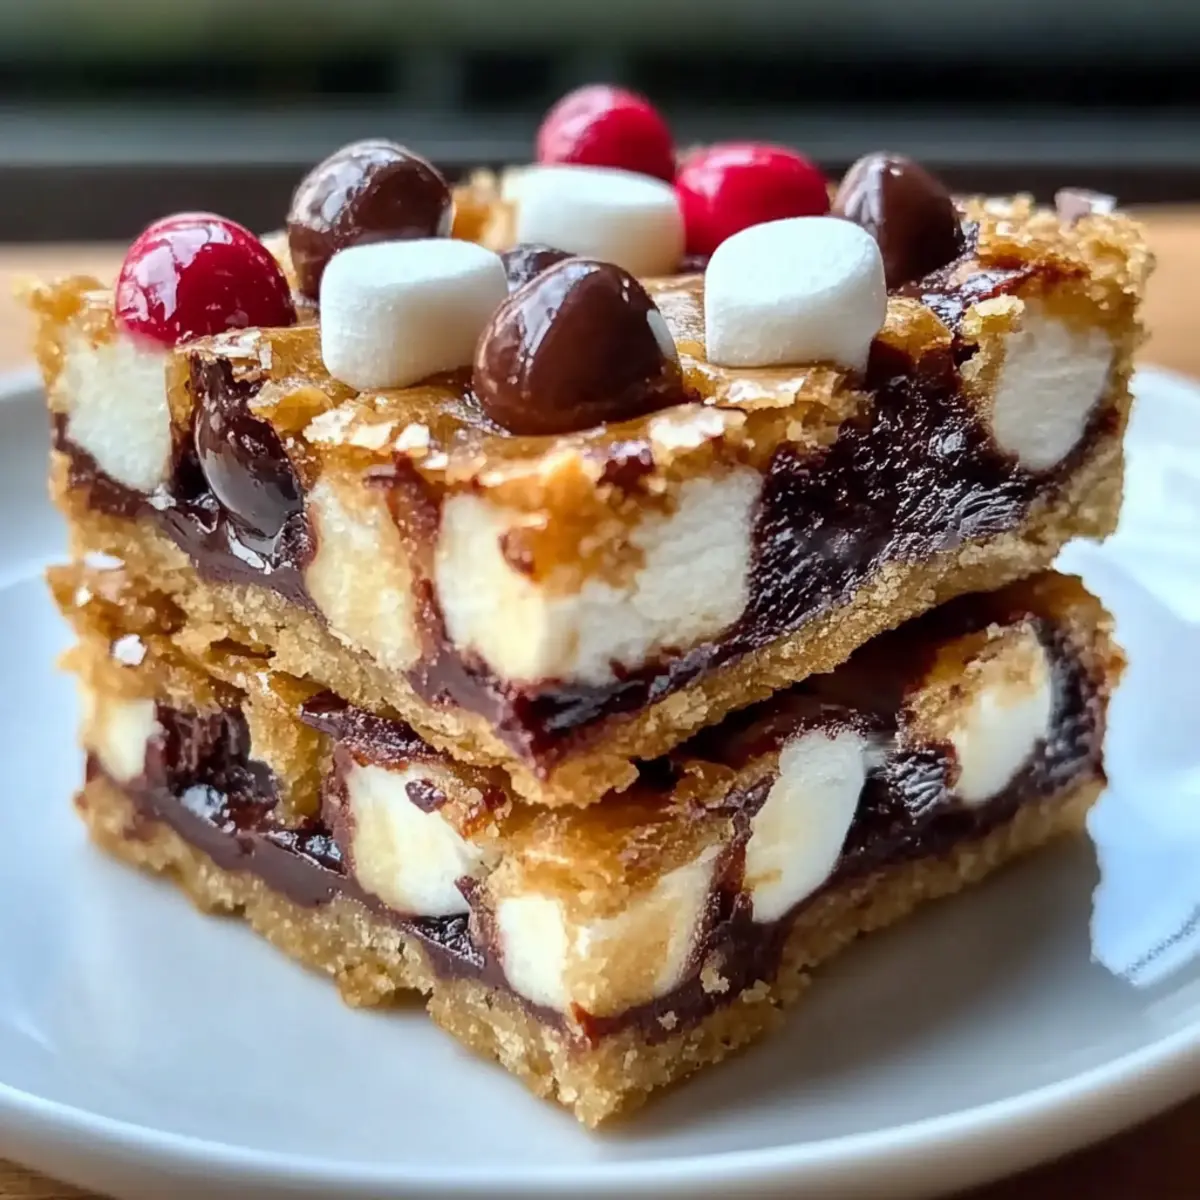
Irresistible Flavor: With rich chocolate, fluffy marshmallows, and a crunchy base, they create a delightful balance of textures and tastes.
Customizable Options: Whether you need a nut-free, gluten-free, or vegan version, there’s a twist for everyone. Try adding a Mint Chocolate Twist for a refreshing holiday flair!
Crowd Pleaser: Perfect for sharing at gatherings, these bars are sure to be a hit with family and friends, leaving them asking for seconds.
Make-Ahead Friendly: Prepare them in advance and store in an airtight container, ensuring you have a sweet surprise ready to go throughout the festive season.
Christmas Bars Ingredients
For the Base
• Graham Cracker Crumbs – Provides a sweet, crunchy base; can crush whole graham crackers for homemade crumbs.
• Unsweetened Cocoa Powder – Adds a rich chocolate flavor; use high-quality cocoa for best results.
• Powdered Sugar – Sweetens the bars and contributes to a smooth texture; essential for that melt-in-your-mouth experience.
• Unsalted Butter, Melted – Binds ingredients together and adds richness; can substitute with melted coconut oil for a dairy-free version.
For the Filling
• Sweetened Condensed Milk – Moistens the mixture and adds sweetness; crucial for the chewy texture of these Christmas bars.
• Mini Marshmallows – Add a fun, chewy element; mini versions distribute better than regular marshmallows.
• Chocolate Chips – Enhance the chocolate flavor; options include dark, milk, or white chocolate.
Optional Additions
• Chopped Nuts – Adds crunch; walnuts or pecans are recommended; omit for nut allergies, creating a delightful nut-free Christmas bar.
Step‑by‑Step Instructions for Christmas Bars
Step 1: Preheat the Oven
Begin by preheating your oven to 350°F (175°C) to ensure the perfect baking environment for your Christmas bars. This step is crucial as it allows for even cooking throughout your delicious treat. Meanwhile, prepare a 9×13 inch baking pan by greasing it lightly or lining it with parchment paper for easy removal later.
Step 2: Mix the Dry Ingredients
In a large mixing bowl, combine your graham cracker crumbs, unsweetened cocoa powder, and powdered sugar. Whisk them together thoroughly until they are well combined, creating a sweet and chocolatey base. The mixture should appear cohesive and uniform, with no lumps visible, setting the foundation for your tasty Christmas bars.
Step 3: Combine Wet Ingredients
Next, pour in the melted unsalted butter and sweetened condensed milk into the dry ingredient mixture. Stir vigorously until you achieve a thick, sticky consistency that holds together well. You’ll want to ensure the mixture is fully combined, showcasing a rich and hearty texture that will make your Christmas bars wonderfully chewy.
Step 4: Fold in the Fun Ingredients
Now it’s time to gently fold in the mini marshmallows, chocolate chips, and optional chopped nuts. Be careful not to overmix; you want the marshmallows and chocolate to be evenly distributed throughout the batter without breaking down. This step will add delightful bursts of flavor in every bite of your finished Christmas bars.
Step 5: Spread and Bake
Transfer the mixture into your prepared baking pan, spreading it evenly with a spatula for uniform baking. Pop the pan into the preheated oven and bake for 25-30 minutes, or until the edges are set, and the center feels firm to the touch. The delightful aroma of chocolate will fill your kitchen, letting you know your Christmas bars are almost ready.
Step 6: Cool and Cut
Once baked, remove the pan from the oven and allow the Christmas bars to cool completely in the pan. This could take about 1 hour to ensure they set properly. After cooling, use a sharp knife to cut the bars into squares, revealing their chewy, fudgy texture that is simply irresistible. Enjoy your festive creation!
Christmas Bars Variations & Substitutions
Feel free to make these Christmas bars your own with these fun and easy variations!
- Nut-Free Version: Simply omit chopped nuts, adding extra chocolate chips instead for a richness that everyone can enjoy. This way, no one has to miss out on that delightful crunch!
- Gluten-Free Option: Substitute graham cracker crumbs with gluten-free options like gluten-free graham crackers or almond flour, allowing those with dietary restrictions to indulge just as joyfully.
- Vegan Adaptation: Replace butter with coconut oil and use a vegan version of sweetened condensed milk made from coconut milk and sugar. This adaption ensures no one is left out of the festive fun!
- Mint Chocolate Twist: Add a splash of peppermint extract for a refreshing, holiday-inspired taste. This delightful addition transforms your bars into a seasonal favorite that’s sure to shine!
- Fruit and Nut Medley: Incorporate dried cranberries or cherries with nuts for a colorful and festive addition, bringing in a burst of fruity flavor and a chewy texture with every bite.
- Coconut Delight: Add shredded coconut to the mixture for an extra layer of flavor and chewiness, creating a tropical vibe right in your Christmas bars.
- Spicy Heat: Add a pinch of cayenne pepper or chili powder for a surprising heat that contrasts beautifully with the sweetness, giving your bars a kick that dazzles the palate.
- Chocolate Lover’s Boost: Replace regular chocolate chips with a mixture of dark, white, and milk chocolate chips for an even richer chocolate experience in every delicious mouthful.
For more festive treats, don’t forget to check out these Cheesy Christmas Tree bites or these dreamy Deviled Egg Christmas trees!
Expert Tips for Christmas Bars
• Melted Butter Magic: Ensure your butter is fully melted for a smooth, cohesive mixture that binds the ingredients perfectly.
• Parchment Paper Perks: Use parchment paper in your baking pan for easy removal—this helps keep your Christmas bars intact and perfectly squared.
• Cool for Success: Always let your bars cool completely in the pan before cutting; this prevents crumbling and helps achieve that perfect chewy texture.
• Mix-In Creativity: Don’t be afraid to experiment! Add dried fruits, coconut, or even a touch of peppermint extract for a unique twist on traditional Christmas bars.
• Check Baking Time: Keep an eye on your bars; ovens can vary. Check that the edges are set, but don’t overbake to avoid dryness.
Make Ahead Options
These Christmas bars are perfect for busy home cooks looking to save time during the hectic holiday season! You can prepare the base mixture up to 24 hours in advance; simply combine the graham cracker crumbs, cocoa powder, powdered sugar, melted butter, and sweetened condensed milk, then refrigerate it until you’re ready to bake. This not only allows the flavors to meld beautifully but also saves precious minutes on the day of serving. Additionally, once baked, the bars can be stored in an airtight container at room temperature for up to 3 days, or they can be frozen for up to three months. When you’re ready to enjoy the Christmas bars, simply thaw in the fridge overnight for the best texture. You’ll have sweet, festive treats on hand with minimal effort!
Storage Tips for Christmas Bars
Room Temperature: Store your Christmas bars in an airtight container at room temperature for up to 1 week. This keeps them chewy and flavorful, ready to enjoy at a moment’s notice.
Refrigerator: If you’d like to improve the flavors, store the bars in the fridge for up to 2 weeks. Just make sure they’re sealed properly to prevent drying out.
Freezer: For longer storage, wrap the bars tightly in plastic wrap, then place them in a freezer-safe container. They can be frozen for up to 3 months while maintaining their delicious quality.
Reheating: When ready to enjoy, simply thaw the Christmas bars at room temperature or microwave for a few seconds to warm them slightly before serving.
What to Serve with Christmas Bars
These festive treats are more than just bars; they create the perfect centerpiece for your holiday gatherings. Elevate your celebration with complementary delights and cozy accompaniments!
- Warm Hot Cocoa: The rich chocolatey flavors of hot cocoa provide a comforting contrast to the chewy sweetness of the bars.
- Vanilla Ice Cream: A scoop of creamy vanilla ice cream creates a delightful contrast, balancing the richness of the Christmas bars. The melt-in-your-mouth experience is heavenly!
- Fresh Berries: Add a pop of color and a refreshing tartness with strawberries or raspberries to cut through the sweetness. They add a light, fruity note that complements the bars beautifully.
- Peppermint Stick Milkshake: This indulgent drink combines classic flavors of the season, perfectly matching the chocolatey richness while adding a holiday twist!
- Coffee or Espresso: Rich coffee enhances the chocolate notes, making for a sophisticated dessert pairing. The warmth of the drink complements the bars beautifully, creating a cozy vibe.
- Chewy Gingerbread Cookies: Another festive treat, these cookies offer a spiced flavor that pairs well with your sweet, chocolatey bars, creating a holiday dessert platter that sings of winter warmth.
- Spiced Apple Cider: Serve warm spiced apple cider for a comforting beverage option, its seasonal spices mirroring the festive spirit of your Christmas bars.
- Mint Chocolate Chip Cookies: Adding an extra layer of flavor with a minty twist, they harmonize perfectly with the marshmallowy goodness of the bars, offering a delightful variety!
- Dusting of Powdered Sugar: A light dusting on the bars not only enhances their visual appeal but also adds a touch of sweetness that brightens each bite.
Christmas Bars Recipe FAQs
What kind of graham cracker crumbs should I use?
Absolutely! You can either purchase pre-made graham cracker crumbs or crush whole graham crackers in a food processor. I recommend using honey-flavored graham crackers for a touch of sweetness that complements the chocolate beautifully.
How should I store leftover Christmas bars?
Store your Christmas bars in an airtight container at room temperature for up to 1 week. If you’d like to enhance the flavors, moving them to the fridge is great too. Just ensure they are tightly sealed so they don’t dry out!
Can I freeze Christmas bars?
Certainly! To freeze your Christmas bars, wrap them tightly in plastic wrap and then place them in a freezer-safe container. They will stay fresh for up to 3 months. When you’re ready to enjoy, simply thaw them at room temperature for a few hours or microwave them for a few seconds to heat up slightly.
What if my Christmas bars turn out too crumbly?
If your bars crumble while cutting, it could be due to overbaking or not allowing them to cool completely. Next time, ensure the edges are set but the center remains slightly firm. Cool in the pan for about an hour before cutting to allow the chewy texture to set just right.
How do I make these Christmas bars nut-free?
Very easy! Simply omit the chopped nuts from the recipe. If you still want a bit of crunch, feel free to add extra chocolate chips or even some crispy rice cereal for a delightful twist without the nuts.
Are there any substitutes for sweetened condensed milk?
Absolutely! You can make a dairy-free version using coconut milk and sugar. Simply simmer one can of coconut milk with ⅔ cup of sugar until it thickens, stirring constantly. This will give you a similar texture and sweetness for your Christmas bars!
Irresistibly Chewy Christmas Bars to Brighten Your Holidays
Ingredients
Equipment
Method
- Preheat your oven to 350°F (175°C) and prepare a 9x13 inch baking pan.
- In a large mixing bowl, combine graham cracker crumbs, cocoa powder, and powdered sugar.
- Add melted butter and sweetened condensed milk to the dry ingredients, stirring until thick and sticky.
- Gently fold in mini marshmallows, chocolate chips, and chopped nuts.
- Spread the mixture in the prepared pan and bake for 25-30 minutes.
- Remove from oven and cool completely before cutting into squares.
Leave a Reply