
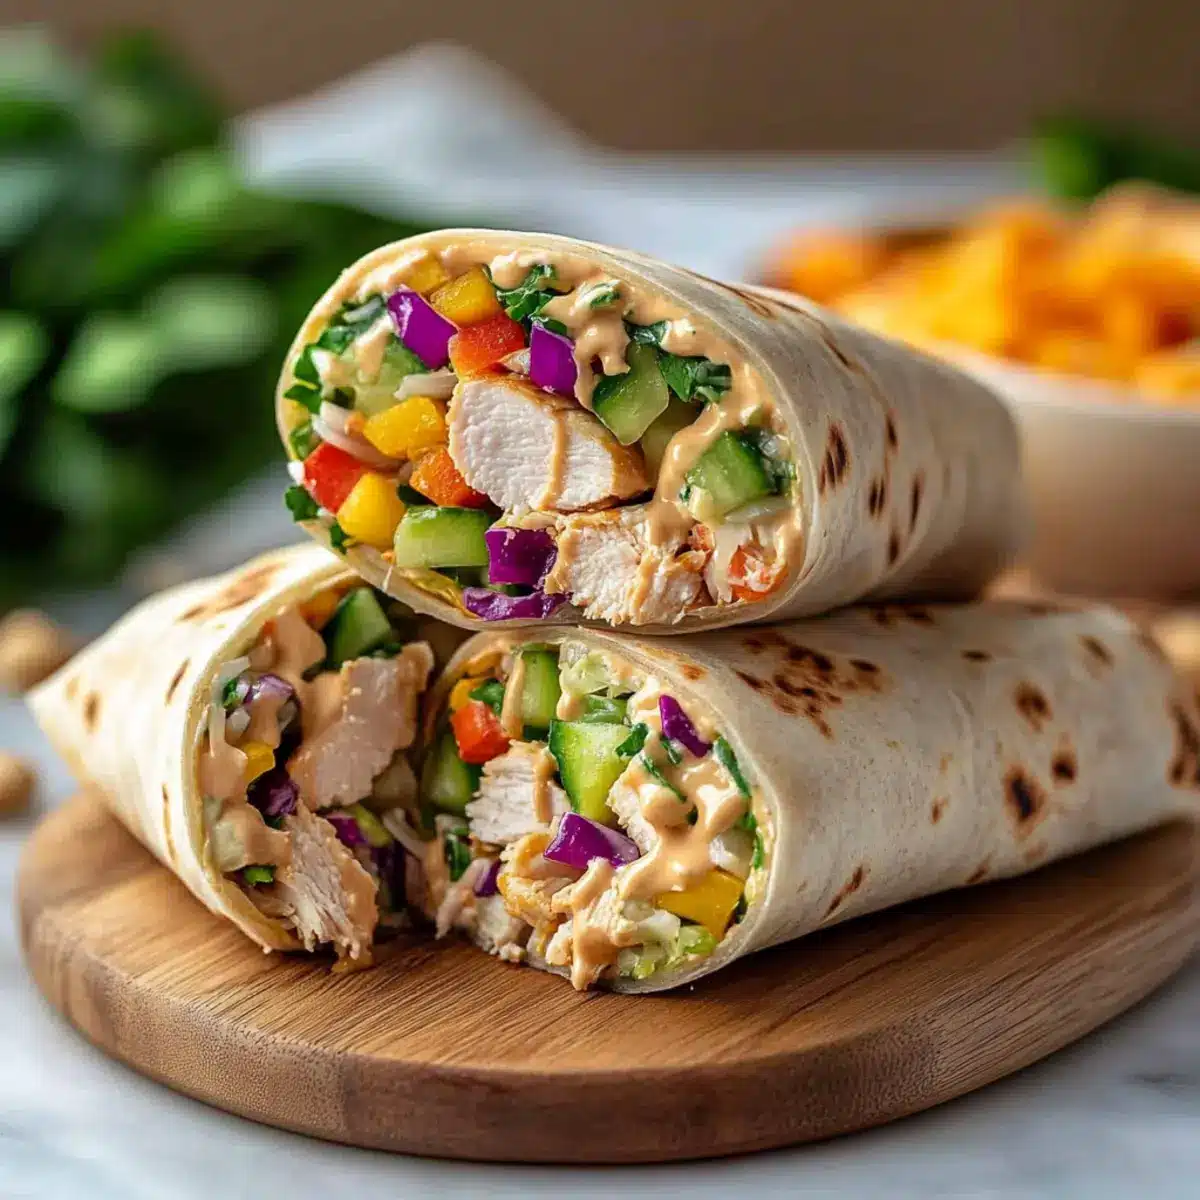
As the sizzling aroma of sesame and ginger filled the air, I felt a sudden urge to turn a fully stocked fridge into something spectacular. That’s when I decided to whip up these delightful Thai Peanut Chicken Wraps! In just 15 minutes, you’ll transform simple ingredients into a flavor-packed meal that’s not only healthy but also utterly customizable for various dietary needs. Whether you’re pressed for time on a busy weeknight or packing lunch for the family, these wraps deliver both convenience and satisfaction. With options for vegetarian, gluten-free, and peanut-free variations, everyone can enjoy this guilt-free feast! What’s your favorite twist to make these wraps your own?
Why Are Thai Peanut Chicken Wraps a Must-Try?
Quick and Easy: These wraps can be ready in just 15 minutes, making them perfect for those hectic weeknights when you crave a homemade meal without the fuss.
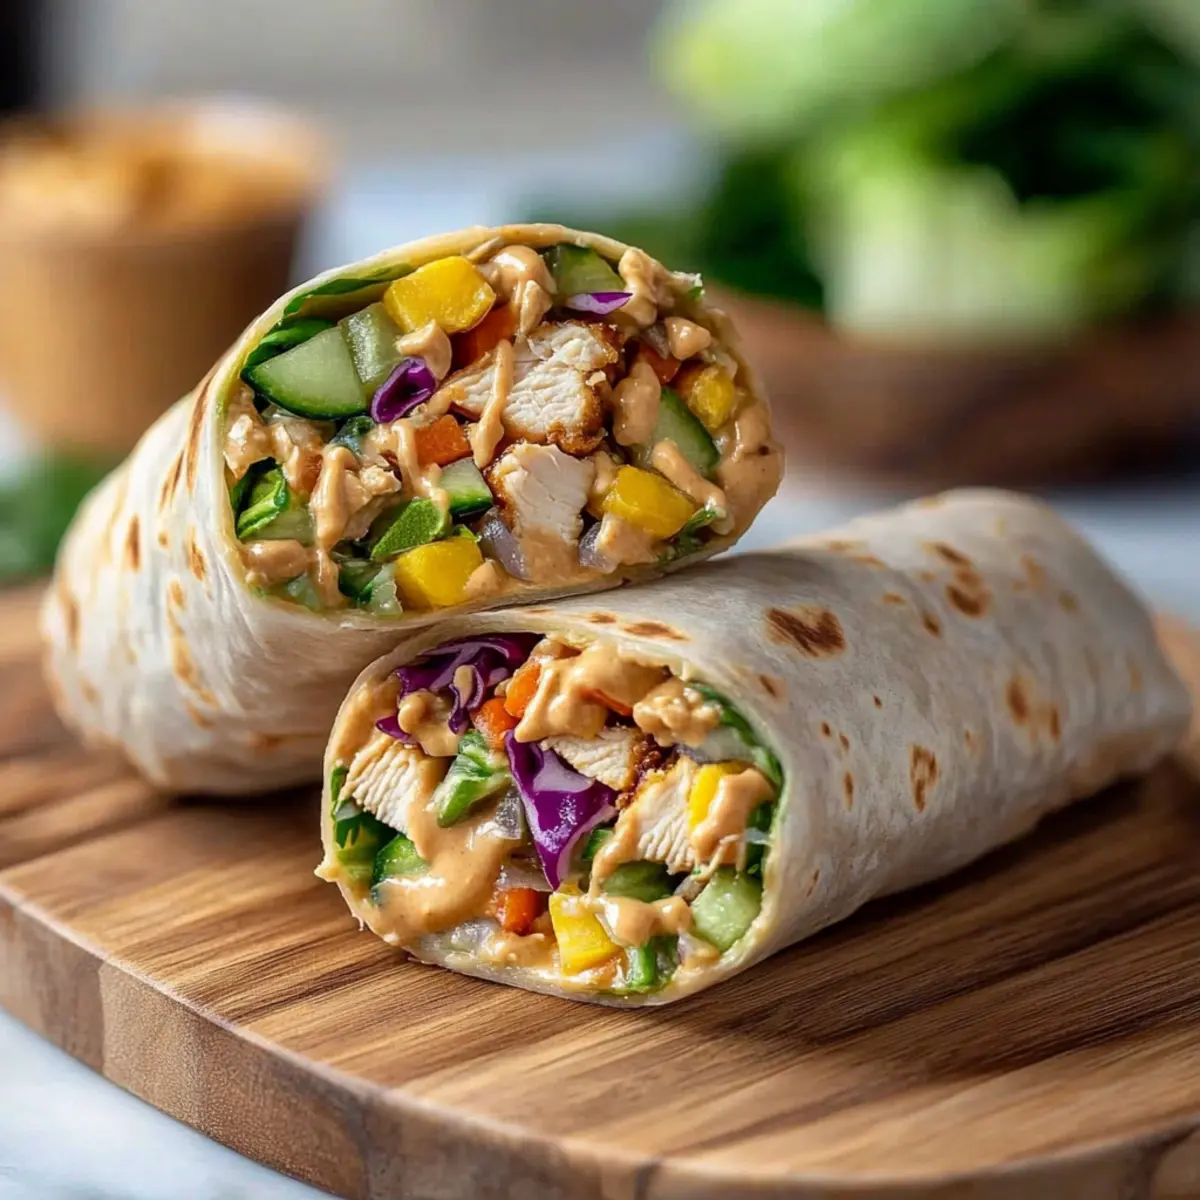
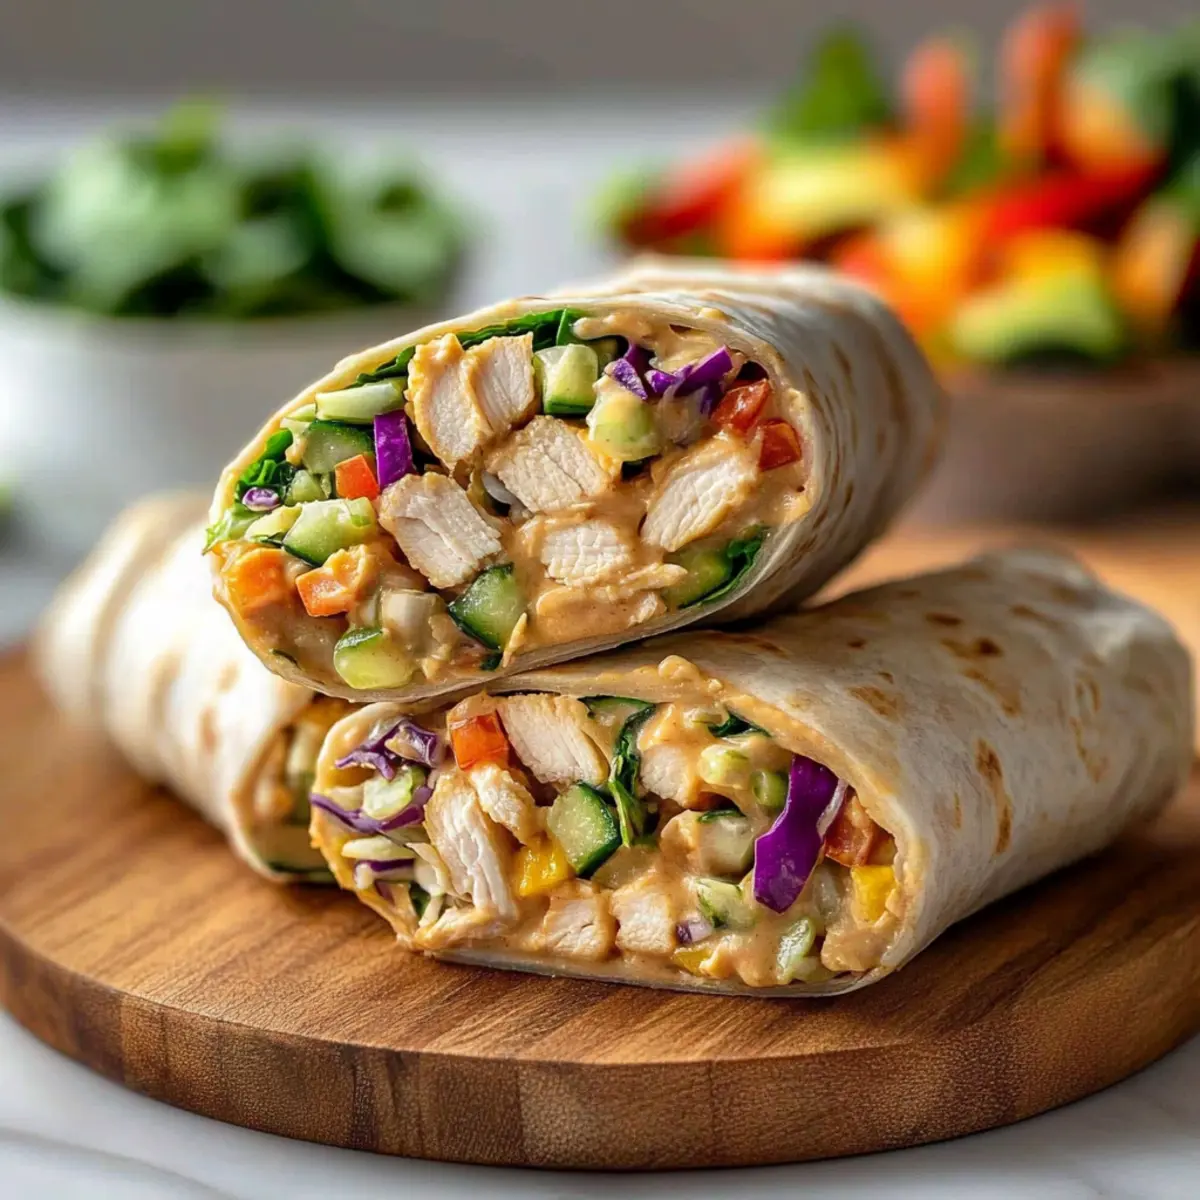
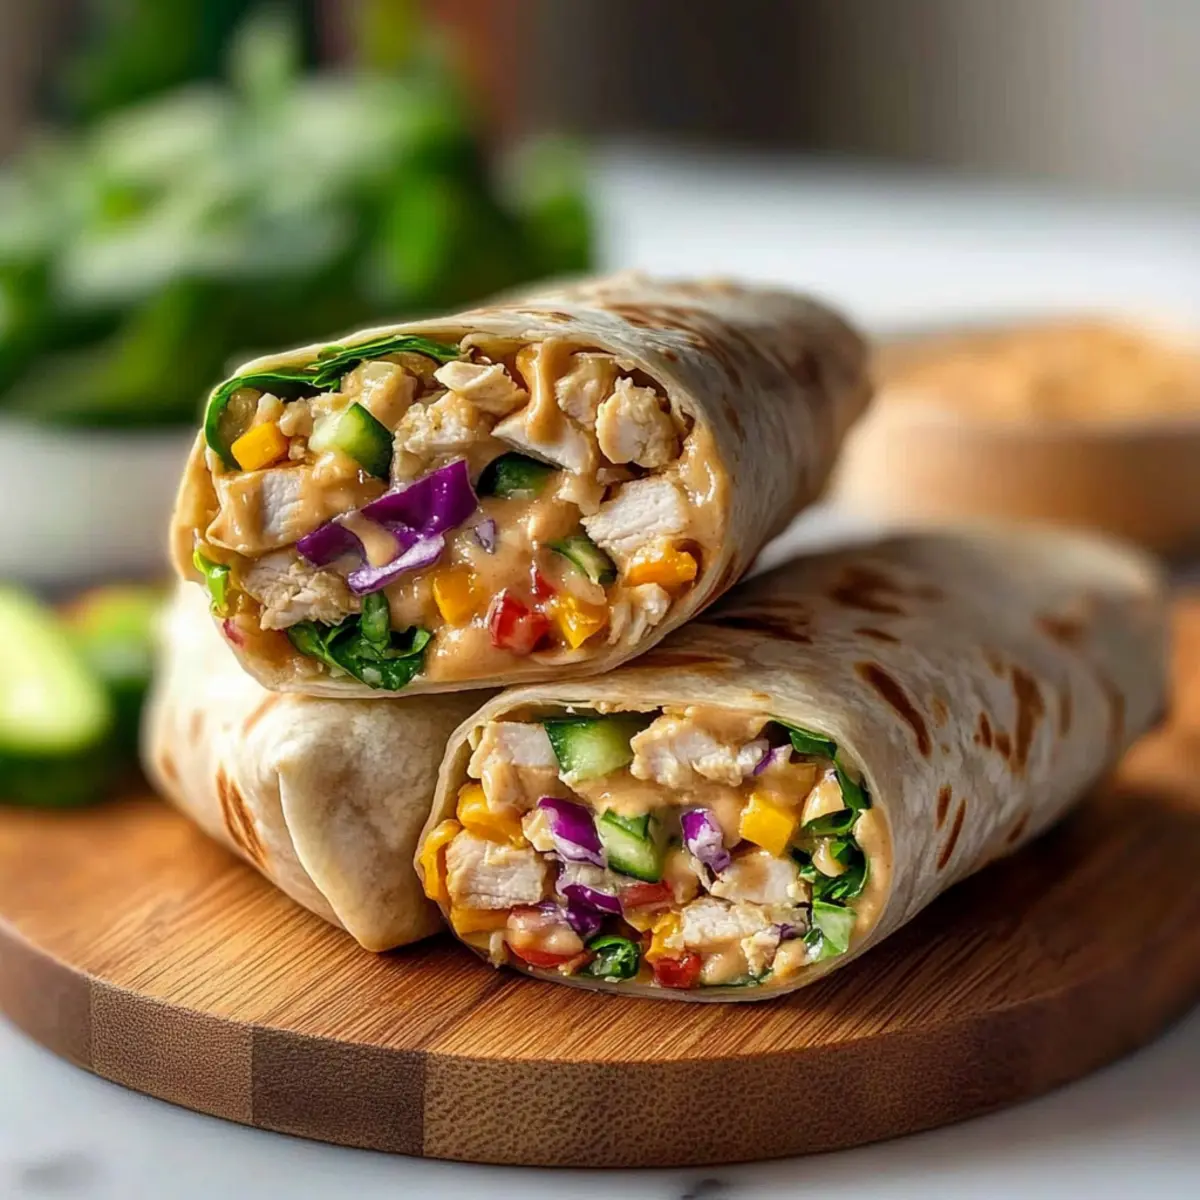
Flavor Explosion: Each bite offers a delightful blend of tender chicken, crunchy veggies, and a creamy, zesty peanut sauce that will have your taste buds dancing!
Customizable Options: With variations like vegetarian-friendly alternatives or peanut-free sauces, you can easily adapt this recipe to suit dietary preferences.
Meal Prep Friendly: Make the filling and sauce ahead of time for effortless lunches throughout the week. These wraps can even be enjoyed as yummy pinwheels during gatherings!
Healthy and Nutritious: Packed with lean protein and fresh vegetables, these wraps provide a satisfying and guilt-free meal that doesn’t compromise on taste.
Get ready to transform your dining experience with these Thai Peanut Chicken Wraps!
Thai Peanut Chicken Wraps Ingredients
For the Sauce
- Peanut Butter – Creaminess and flavor in the sauce; substitute with sunflower seed butter or tahini for a peanut-free version.
- Low-Sodium Soy Sauce – Adds saltiness and umami; use tamari for a gluten-free option.
- Brown Sugar or Honey – Sweetness to balance flavors; swap for coconut sugar for a healthier alternative.
- Rice Wine Vinegar – Provides acidity to the sauce; apple cider vinegar can be used as a substitute.
- Minced Garlic – Enhances flavor; fresh garlic is preferable, but garlic powder can be used in a pinch.
- Minced Ginger – Adds warmth and spice in the sauce; use ground ginger if fresh is unavailable.
- Sriracha Sauce – Adds heat to the sauce; adjust the amount to taste, or omit for a milder version.
For the Wrap Filling
- Chicken Breasts – Primary protein source; can replace with shredded rotisserie chicken or firm tofu for a vegetarian option.
- Coleslaw Mix – Adds crunch and nutrition; you can include shredded cabbage or buy pre-mixed.
- Grated Carrot – Adds sweetness and color; optional for extra texture.
- Chopped Cilantro – Fresh herb to enhance flavor; omit if not a fan, or substitute with basil.
- Roasted Salted Peanuts – Adds crunch; can replace with sunflower seeds or omit for nut-free wraps.
For the Wraps
- Tortillas – Base for the wraps; for a lower-carb option, use large lettuce leaves.
Explore the delicious possibilities with these Thai Peanut Chicken Wraps, and enjoy a healthy, quick meal that caters to everyone’s tastes!
Step‑by‑Step Instructions for Thai Peanut Chicken Wraps
Step 1: Prepare the Peanut Sauce
In a medium bowl, whisk together 1/3 cup of peanut butter, 2 tablespoons of low-sodium soy sauce, 1 tablespoon of brown sugar (or honey), and 2 tablespoons of rice wine vinegar. Add 1 clove of minced garlic, 1 teaspoon of minced ginger, and a dash of sriracha for heat. If the sauce is too thick, thin it with a little water until you achieve a pourable consistency. Set aside to let the flavors meld.
Step 2: Mix the Wrap Filling
In a large mixing bowl, combine 2 cups of cooked, chopped chicken, 2 cups of coleslaw mix, 1 grated carrot, and 1/4 cup of chopped cilantro. Drizzle half of the prepared peanut sauce over the mixture and toss everything together until well coated. Allow the filling to sit for about 5 minutes, letting the flavors absorb and intensify for the Thai Peanut Chicken Wraps.
Step 3: Warm the Tortillas
To make the tortillas pliable, wrap them in a damp paper towel and microwave for 30 seconds. If they aren’t warm and soft after that time, give them an additional 10 seconds. This step is crucial for assembling your wraps easily without tearing the tortillas. A properly warmed tortilla will perfectly envelop the flavorful filling.
Step 4: Assemble the Wraps
Lay a warm tortilla on a flat surface and spoon a generous portion of the chicken and vegetable filling down the center, leaving about an inch of space on the edges. Drizzle a little more peanut sauce on top of the filling for extra flavor. Carefully fold in the sides and then roll the tortilla tightly from the bottom up to create a firm wrap. Repeat this process for the remaining tortillas.
Step 5: Slice and Serve
For an elegant touch, slice each wrap in half diagonally and arrange them on a platter. Feel free to drizzle some more of the delicious peanut sauce on top for a visual appeal. These ready-to-eat Thai Peanut Chicken Wraps are best enjoyed immediately while the flavors are fresh and vibrant, although they can be stored in the fridge for a quick meal later.
Step 6: Enjoy Your Meal!
Gather your family or friends, and present the vibrant Thai Peanut Chicken Wraps as a quick meal that’s both satisfying and full of textures. Feel free to accompany them with extra dipping sauce and a side of fresh veggie sticks for a complete and healthful feast that everyone will enjoy!
Make Ahead Options
These Thai Peanut Chicken Wraps are a fantastic choice for meal prep enthusiasts looking to save time! You can prepare the filling and peanut sauce up to 3 days in advance, storing each in airtight containers to preserve freshness. Just make sure to keep the components separate until you’re ready to serve to maintain the crunch of the veggies and prevent the tortillas from getting soggy. When you’re ready to enjoy your wraps, warm the tortillas in the microwave for about 30 seconds, assemble with the prepped filling, drizzle with extra sauce if desired, and you’ll have a delicious meal in minutes, just as fresh and flavorful as if you’d made them on the spot!
How to Store and Freeze Thai Peanut Chicken Wraps
Fridge: Store assembled wraps tightly wrapped in plastic or foil for up to 2 days. To keep them fresh, add a splash of extra peanut sauce before serving if they seem dry.
Freezer: For longer storage, freeze unassembled wraps by wrapping each individually in parchment paper. They can last in the freezer for up to 2 months; just thaw in the fridge overnight before reheating.
Reheating: Warm in the microwave or on a skillet until heated through, approximately 1-2 minutes. If frozen, allow to thaw before reheating for best results.
Prep Ahead: Prepare the filling and peanut sauce up to 3 days in advance, keeping them in airtight containers in the fridge for quick assembly later.
Thai Peanut Chicken Wraps Variations & Substitutions
Feeling adventurous? Let’s explore some exciting twists you can make to personalize these wraps to your liking!
- Vegetarian: Substitute chicken with firm tofu or chickpeas for a delicious plant-based option. This swap keeps the wraps hearty and satisfying.
- Peanut-Free: Use sunflower seed butter or tahini in the sauce to create a nut-free alternative. Your wraps will still be wonderfully creamy and delicious!
- Gluten-Free: Opt for tamari instead of soy sauce and check your tortillas for gluten-free options, ensuring everyone can indulge without worry.
- Extra Veggies: Add colorful veggies like bell peppers, cucumber, or shredded cabbage for added crunch and nutrition. Switch up your flavors by mixing in fresh herbs like basil!
- Heat Levels: For a spicier kick, simply increase the amount of sriracha or toss in fresh chili peppers. Feel free to tailor it to your tastebuds!
- Wrap Variations: Swap tortillas for large lettuce leaves for a fresh, low-carb side. Lettuce wraps will give a delightful crunch that keeps things light.
- Creative Dips: Serve with a cool cucumber salad or spicy tom yum soup on the side to elevate your meal. A flavorful side can provide a refreshing contrast!
- Meal Prep Master: Make the wrap filling and peanut sauce up to three days in advance to save time. Enjoy a hassle-free lunch that excites your palate!
Remember, flexibility makes these Thai Peanut Chicken Wraps even more enjoyable. Once you start playing around with flavors, you’ll discover your unique favorite variations, just like I did! Enjoy the journey of cooking these wraps, and explore other delicious recipes like Chili Chicken Wraps or Garlic Butter Chicken for more meal inspiration.
Expert Tips for Thai Peanut Chicken Wraps
• Warm Tortillas First: Ensuring tortillas are gently warmed prevents tearing and makes them easier to roll. Use a damp paper towel for best results.
• Don’t Overfill: Avoiding an overstuffed wrap prevents breaks during assembly. Less is more when it comes to filling these delicious Thai Peanut Chicken Wraps.
• Mix Flavors Ahead: Let the filling sit for a few minutes after mixing to allow the flavors to meld. This step enhances the taste and overall enjoyment.
• Customize Protein: Experiment with proteins like firm tofu, chickpeas, or even shrimp to suit your dietary preferences or family tastes.
• Sauce Variations: For a nut-free option, try using sunflower seed butter or tahini in place of peanut butter without sacrificing flavor.
• Storage Know-How: If prepping ahead, store the filling and sauce separately to maintain freshness. Assembled wraps can last up to two days in the fridge.
What to Serve with Thai Peanut Chicken Wraps
Elevate your dining experience by exploring delightful sides and drinks that beautifully complement these flavor-packed wraps.
- Cucumber Salad: A refreshing side that adds a crisp texture and balances the richness of the peanut sauce.
- Tom Yum Soup: This aromatic soup brings a lovely warmth and complements the wraps’ vibrant flavors perfectly.
- Quinoa Pilaf: A nutty and hearty grain that enhances protein content while providing a base that absorbs delightful flavors.
A side of quinoa pilaf can really round out the meal, bringing altogether a wholesome experience. Add some toasted nuts for texture and flavor contrasts!
- Fresh Spring Rolls: Light and crisp, these can be a fun starter that showcases fresh veggies and flavors, perfect for dipping in extra peanut sauce.
- Mango Sticky Rice: For dessert, this sweet treat offers a delightful contrast to the savory wraps, satisfying those with a sweet tooth.
- Smoothies: A tropical fruit smoothie blends beautifully, cooling the palate while echoing the Thai essence. Pineapple or mango would work wonders!
Choose a mix of these complementary dishes to craft a multi-course meal that’s as satisfying as it is delicious.
Thai Peanut Chicken Wraps Recipe FAQs
How do I select ripe ingredients for my Thai Peanut Chicken Wraps?
Absolutely! For the best flavor, opt for fresh, crunchy vegetables. Look for coleslaw mix that has vibrant green cabbage and carrots without browning. When choosing chicken, go for breasts that are firm to the touch and free from any funky smell. Fresh cilantro should be bright green and fragrant, avoiding any yellow or wilted leaves.
What’s the best way to store leftover wraps?
Very important! Store your assembled Thai Peanut Chicken Wraps tightly wrapped in plastic wrap or aluminum foil in the fridge for up to 2 days. If they start to dry out, adding a splash of the peanut sauce will help keep them moist and flavorful!
Can I freeze the wraps for later use?
Sure! To freeze, assemble the wraps but don’t add peanut sauce yet. Wrap each one individually in parchment paper and then put them into a freezer-safe bag. They can last up to 2 months in the freezer. Thaw in the fridge overnight before reheating, then warm in the microwave or skillet for about 1-2 minutes.
What should I do if my wraps are falling apart?
Ah, the struggle! If your wraps are falling apart, it may be because they are overstuffed. I recommend using less filling for each and ensuring the tortillas are warm before assembly—this helps make them more pliable. If you’ve already made them, you can try wrapping them with parchment paper to hold everything together.
Are there any dietary considerations for these wraps?
Absolutely important! For those with peanut allergies, you can substitute peanut butter with sunflower seed butter or tahini, which still offers a creamy texture without the nuts. Additionally, if you’re looking to keep them gluten-free, use tamari instead of regular soy sauce and opt for gluten-free tortillas.
How long can I store the filling and sauce if I prep ahead?
Great question! You can prepare the filling and sauce up to 3 days in advance. Keep them in airtight containers in the refrigerator. This makes it super easy to whip up your Thai Peanut Chicken Wraps whenever hunger strikes!
Delicious Thai Peanut Chicken Wraps Ready in Just 15 Minutes
Ingredients
Equipment
Method
- In a medium bowl, whisk together peanut butter, soy sauce, brown sugar, and rice wine vinegar. Add garlic, ginger, and sriracha. Thin with water if needed.
- In a large mixing bowl, combine chicken, coleslaw mix, grated carrot, and cilantro. Drizzle half of the sauce over the mixture and toss until well coated.
- Wrap tortillas in a damp paper towel and microwave for 30 seconds until pliable.
- Lay a warm tortilla flat, spoon filling, and drizzle more sauce. Fold sides in, roll tightly and repeat.
- Slice each wrap in half and serve, optionally drizzling with more peanut sauce.
- Enjoy your meal!
Leave a Reply