
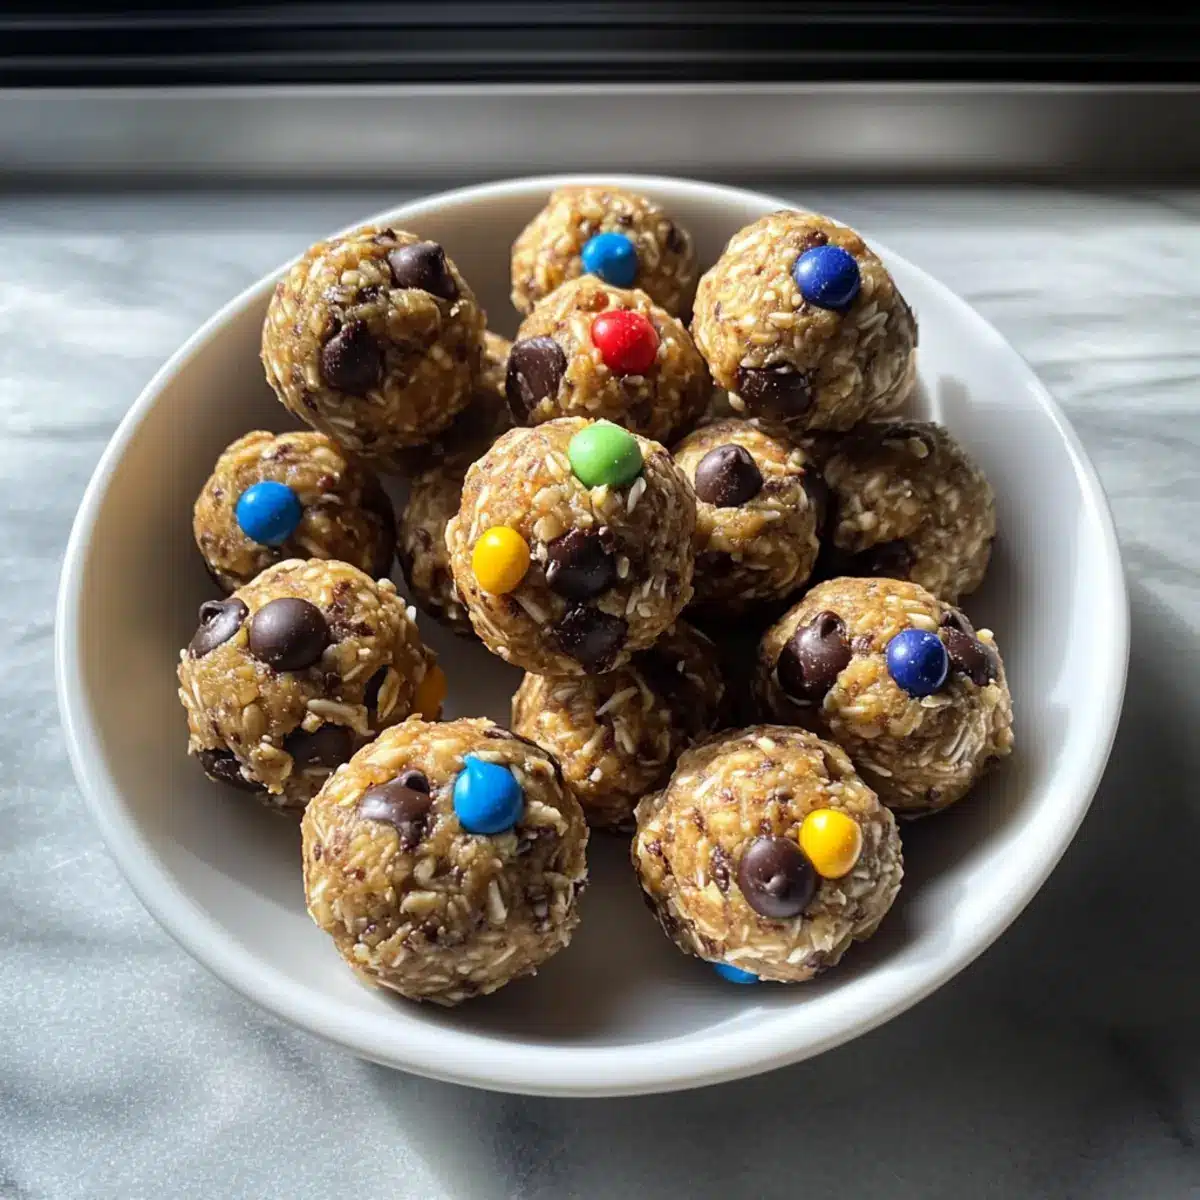
As I rummaged through my pantry last week, searching for a healthy snack that wasn’t just another boring granola bar, I stumbled upon the perfect solution: High Protein Energy Balls. These delightful no-bake bites are an incredibly easy and customizable way to satisfy your sweet tooth and supercharge your energy— packing a whopping 9g of protein into each ball! Not only do they whip up in a flash, making them ideal for busy days, but they also let you mix and match flavors to suit your cravings. From nut butters to chocolate chips, the possibilities are endless! Curiosity piqued? Let’s dive into making these nutritious gems that will keep you fueled and ready for anything!
Why are High Protein Energy Balls a must-try?
Easy to Prepare: These High Protein Energy Balls come together in just minutes – no baking or elaborate techniques required!
Nutritious Snacking: Each ball packs an impressive 9g of protein, providing a satisfying and energizing snack without the guilt of fast food.
Customizable Flavors: Tailor them to your taste! Use almond butter, peanut butter, or add your favorite mix-ins like coconut or nuts.
Perfect for Busy Lifestyles: They’re a grab-and-go snack, ideal for everything from pre-workout energy boosts to after-school treats.
Kid-Friendly Option: Kids will love the sweet cookie dough flavor, making it a fun way to sneak in nutrition.
If you’re interested in exploring more nutritious options, check out our delicious Cinnamon Roll Protein and Breakfast Protein Biscuits for easy, healthy ideas!
High Protein Energy Balls Ingredients
• The key to a delightful no-bake snack!
For the Base
- Oats – Provides structure and helps bind the energy balls; substitute with nut flour for a gluten-free option.
- Nut Butter (e.g., almond or peanut) – Adds delicious creaminess and healthy fats; can be swapped with sun butter for a nut-free alternative.
- Honey – Naturally sweetens and binds ingredients together; maple syrup works as a great vegan substitute.
For the Protein Boost
- Protein Powder – Increases the overall protein content to about 9g per ball; choose a flavor that enhances the other components.
For the Sweetness
- Dark Chocolate Chips – Offers a delightful burst of sweetness and texture; consider substituting with dried fruits or nuts for a different twist.
Step‑by‑Step Instructions for High Protein Energy Balls
Step 1: Combine Ingredients
In a large mixing bowl, combine 1 cup of oats, ½ cup of your choice nut butter, ¼ cup of honey, 1 scoop of protein powder, and ½ cup of dark chocolate chips. Use a rubber spatula to mix everything together until well combined. The mixture should appear sticky and cohesive, which is essential for shaping your High Protein Energy Balls.
Step 2: Mix Thoroughly
With the spatula, mix vigorously for about 2-3 minutes, ensuring that all ingredients are evenly distributed. As you stir, your mixture may seem dense at first, but keep blending until the oats are moistened and the chocolate chips are distributed. This ensures each bite of your energy balls is packed with flavor and nutrition.
Step 3: Adjust Consistency
Check the consistency of your batter after mixing. If it feels too wet, add a bit more oats—about a tablespoon at a time—until it’s manageable. Conversely, if the mixture is dry and crumbly, incorporate another tablespoon of nut butter or honey. The final consistency should be sticky but easy enough to roll into balls.
Step 4: Form Balls
Now it’s time to shape your High Protein Energy Balls! Using your hands, take a small portion of the mixture (about 1 inch in diameter) and roll it between your palms to form a smooth ball. Place each ball on a parchment-lined tray as you work. This step is fun and allows for a personal touch in shaping each energy ball.
Step 5: Chill to Set
Once all the balls are formed, place the tray in the refrigerator and let them chill for at least 30 minutes. This cooling process helps the energy balls firm up, allowing them to hold their shape during snacking. You’ll know they’re ready when they feel solid to the touch.
Step 6: Store for Enjoyment
After chilling, transfer your High Protein Energy Balls to an airtight container. They can be stored in the refrigerator for up to 2 weeks or frozen for up to 3 months. Enjoy your nutritious treats whenever you need a quick energy boost on busy days!
Expert Tips for High Protein Energy Balls
-
Consistency Check: Ensure the mixture is sticky enough to hold together; adjust by adding more oats if too wet, or nut butter if too dry.
-
Chill Time: Don’t skip chilling! Letting the energy balls sit in the fridge for at least 30 minutes helps them firm up for easier snacking.
-
Storage Solutions: Store in an airtight container in the refrigerator for up to 2 weeks, or freeze them for up to 3 months for long-term enjoyment.
-
Flavor Blends: Experiment with different nut butters and add-ins like seeds or dried fruits to customize your High Protein Energy Balls to your liking.
-
Avoid Overmixing: Stir until ingredients are well combined; overmixing can lead to a denser texture and may impact the sweetness.
What to Serve with High Protein Energy Balls?
Treat yourself to a nourishing snack experience that balances sweetness and nutrition, perfect for any time of day.
- Fresh Fruit Platter: Serve with a mix of seasonal fruits like apple slices, strawberries, and bananas, bringing a refreshing crunch that complements the chewy energy balls.
- Nutty Yogurt Dip: A creamy dip made from Greek yogurt and a touch of honey pairs perfectly, adding delightful smoothness and extra protein.
- Veggie Sticks with Hummus: Crisp carrots, celery, and bell peppers dipped in hummus provide a satisfying crunch, rounding out a healthful snack platter.
- Dark Chocolate Toast: Spread some nut butter on whole-grain toast topped with dark chocolate shavings to tie in similar flavors, marrying the sweetness of both treats.
- Smoothie on the Side: A berry banana smoothie can be a delightful, creamy complement, enhancing the experience with fruity goodness and a nutritious boost.
- Iced Green Tea: Lightly sweetened iced green tea refreshes and cleanses the palate while providing antioxidants, making for a perfect beverage pairing.
- Trail Mix: A side of homemade trail mix featuring nuts, seeds, and dried fruits brings an extra crunch and diverse flavors to your snacking adventure.
- Coconut Water: This hydrating drink goes beautifully with the energy balls, providing natural electrolytes alongside your protein-packed snack.
- Chia Seed Pudding: For a wholesome dessert touch, pair with a small bowl of chia seed pudding topped with berries, evoking delightful match-ups of textures and flavors.
High Protein Energy Balls Variations
Feel free to get creative and make these energy balls your own; the flavor possibilities are endless!
- Nut-Free: Swap out nut butter for sun butter or tahini to accommodate nut allergies.
- Dairy-Free: Use dairy-free chocolate chips or leave out chocolate altogether; dried fruits add natural sweetness.
- Vegan: Replace honey with maple syrup or agave nectar, ensuring all ingredients maintain a plant-based profile.
- Flavor Boost: Add a teaspoon of vanilla extract or almond extract for an extra layer of flavor that complements the nuttiness.
- Spicy Kick: Incorporate a pinch of cayenne or a sprinkle of chili powder for a surprising warmth that enhances your energy balls.
- Seasonal Delight: Add pumpkin puree and spices like cinnamon or nutmeg in the fall, turning them into festive treats.
- Protein-Rich Twist: Use a flavored protein powder, like chocolate or vanilla, to enhance the overall taste experience of your energy bites.
- Coconut Lovers: Mix in unsweetened shredded coconut or roll them in coconut flakes for a tropical twist that brings a chewy, delightful texture.
For more energizing snack ideas, check out our delicious Turkey Stuffing Balls or explore Breakfast Protein Biscuits for a treat that balances flavor and nutrition!
Make Ahead Options
These High Protein Energy Balls are a dream for meal prep lovers! You can easily combine and form the mixture up to 24 hours in advance—just refrigerate the formed balls in an airtight container until you’re ready to chill and serve. Simply place them in the refrigerator after shaping, ensuring they don’t touch to maintain their round shape and texture. When you’re ready to enjoy, chill them for at least 30 minutes before serving to let them firm up. Trust me, they’ll be just as delicious, offering a quick and energizing snack for your busy days ahead!
Storage Tips for High Protein Energy Balls
Fridge: Store the energy balls in an airtight container in the refrigerator, where they will stay fresh for up to 2 weeks, making healthy snacking effortless.
Freezer: For long-term storage, freeze the balls in a single layer on a parchment-lined tray before transferring them to a freezer-safe bag or container. They can last for up to 3 months.
Thawing: When ready to enjoy, simply take out a few High Protein Energy Balls, let them thaw at room temperature for about 10 minutes, or pop them in the fridge overnight for a ready-to-eat snack!
Wrap Properly: Always ensure each ball is well-wrapped or stored separately if you’re concerned about freezer burn—this keeps the flavors intact!
High Protein Energy Balls Recipe FAQs
How do I choose the right oats for my High Protein Energy Balls?
Absolutely! When selecting oats, I recommend using rolled oats for a chewy texture that holds together beautifully. If you’re looking for a gluten-free option, ensure your oats are certified gluten-free, or you can substitute them with nut flour for a different flavor profile.
How should I store my High Protein Energy Balls?
Very! Store your energy balls in an airtight container in the refrigerator for up to 2 weeks. This keeps them fresh and ready for snacking. For longer storage, you can freeze them for up to 3 months. Just place them in a single layer on a parchment-lined tray before transferring them to a freezer-safe bag to prevent sticking.
Can I freeze my High Protein Energy Balls?
Yes, you can! For freezing, place the rolled energy balls on a parchment-lined tray and freeze them for about 1 hour. Once firm, transfer them to a freezer-safe bag or container. They can last up to 3 months in the freezer, and when you’re ready to enjoy, pop a few out and let them thaw at room temperature for around 10 minutes or in the fridge overnight.
What should I do if my energy balls are too dry or crumbly?
If you find your mixture is too dry, don’t worry! Just mix in an extra tablespoon of nut butter or honey to hydrate the mixture. Stir thoroughly. If it’s still crumbly, add more nut butter until you achieve a sticky consistency that allows you to easily roll the balls. The key is to adjust gradually until it feels just right.
Are these High Protein Energy Balls safe for kids with nut allergies?
Certainly! You can customize these energy balls to be nut-free by substituting nut butter with sunflower seed butter. This way, they remain a delicious and safe treat for kids with nut allergies. Always double-check ingredient labels to ensure they are free of cross-contaminants if allergies are a concern.
What is the best way to serve High Protein Energy Balls?
The more the merrier! These energy balls are perfect as grab-and-go snacks for busy mornings, pre-workout boosters, or nice little treats after school. You can even pack them for picnics or road trips—they’re easy to share and loved by all ages! Enjoy!
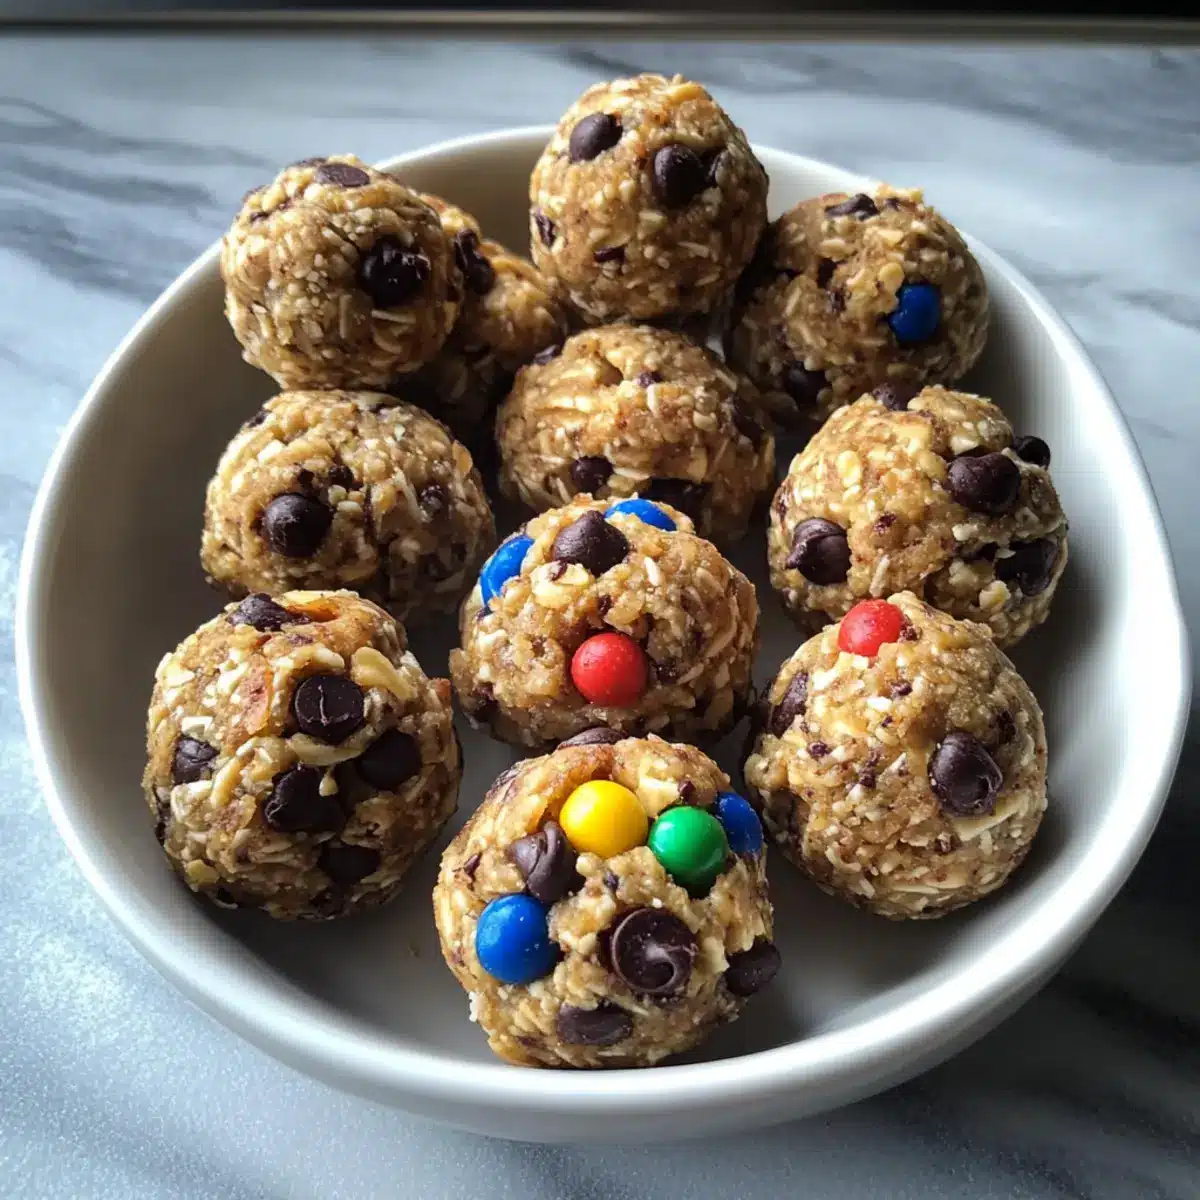
High Protein Energy Balls: Chewy Delights for Energy Boost
Ingredients
Equipment
Method
- Combine 1 cup of oats, ½ cup of your choice nut butter, ¼ cup of honey, 1 scoop of protein powder, and ½ cup of dark chocolate chips in a large mixing bowl. Mix everything together until well combined.
- Mix vigorously for about 2-3 minutes, ensuring all ingredients are evenly distributed.
- Check the consistency. If it feels too wet, add more oats; if too dry, add nut butter or honey.
- Roll the mixture into balls about 1 inch in diameter and place them on a parchment-lined tray.
- Chill in the refrigerator for at least 30 minutes to firm up.
- Transfer to an airtight container. They can be stored in the refrigerator for up to 2 weeks or frozen for up to 3 months.
Leave a Reply