
As I savored my first bite of these deliciously rich Gluten Free Tiramisu Brownies, the delightful combination of fudgy chocolate and bold espresso swept me off my feet. This indulgent treat takes the classic layers of tiramisu and combines them with a dense, stick-to-your-fingers brownie, resulting in a decadent dessert that’s both gluten-free and utterly satisfying. Quick to prepare, they’re perfect for impressing guests at gatherings or simply enjoying during a cozy night in. The best part? The marriage of creamy mascarpone and deep chocolate ensures that every mouthful is a blissful escape. Curious about how to whip up this delightful fusion for yourself? Let’s dive into the recipe!
Why gluten-free brownies taste so good?
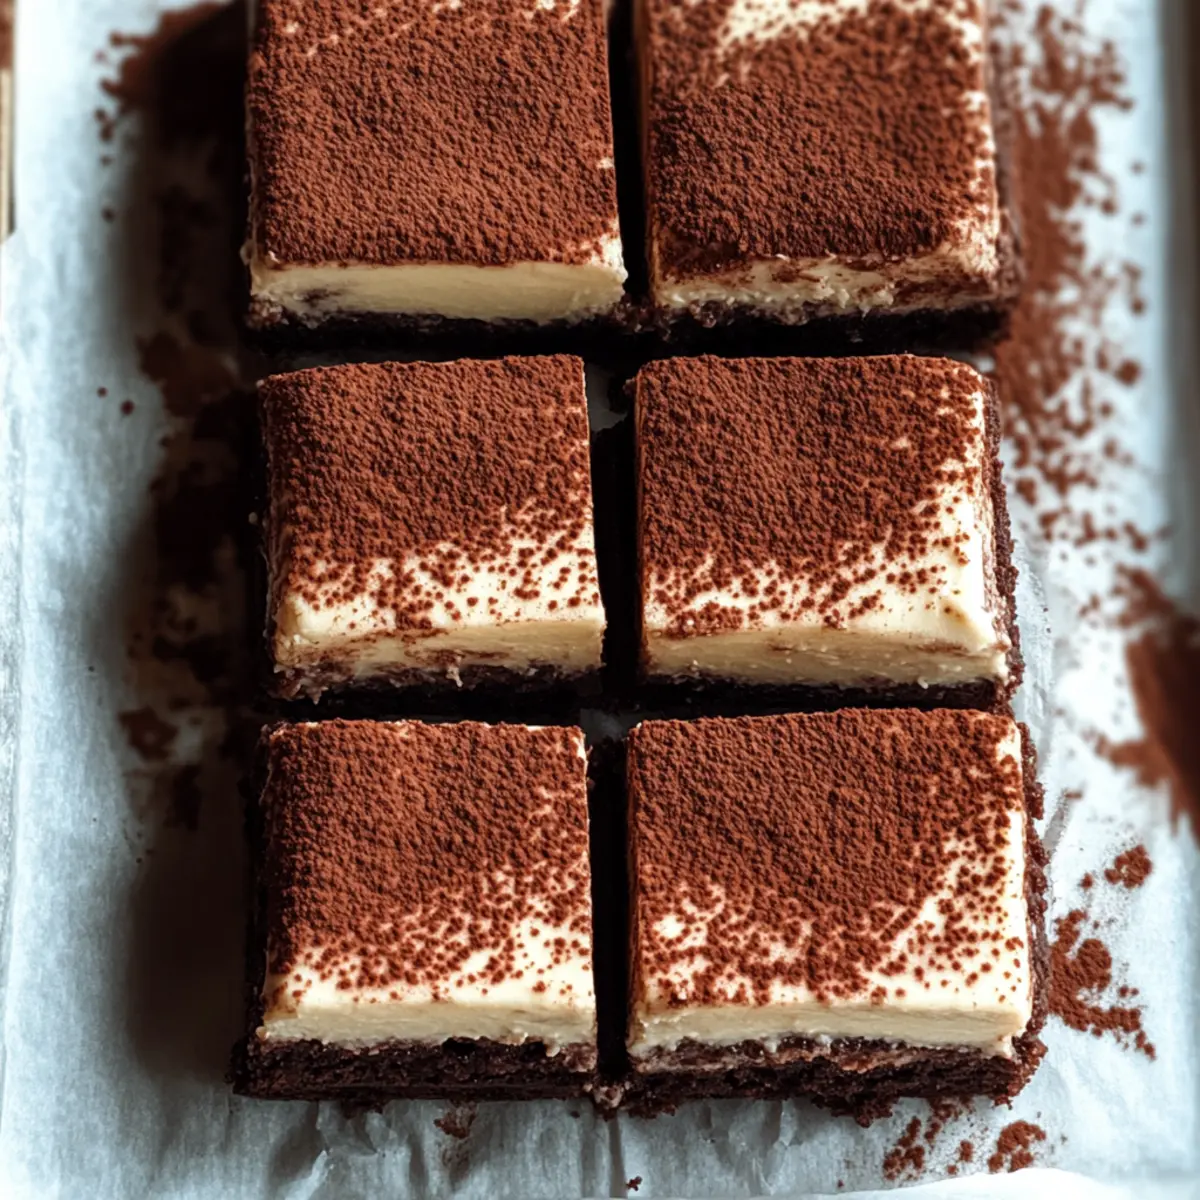
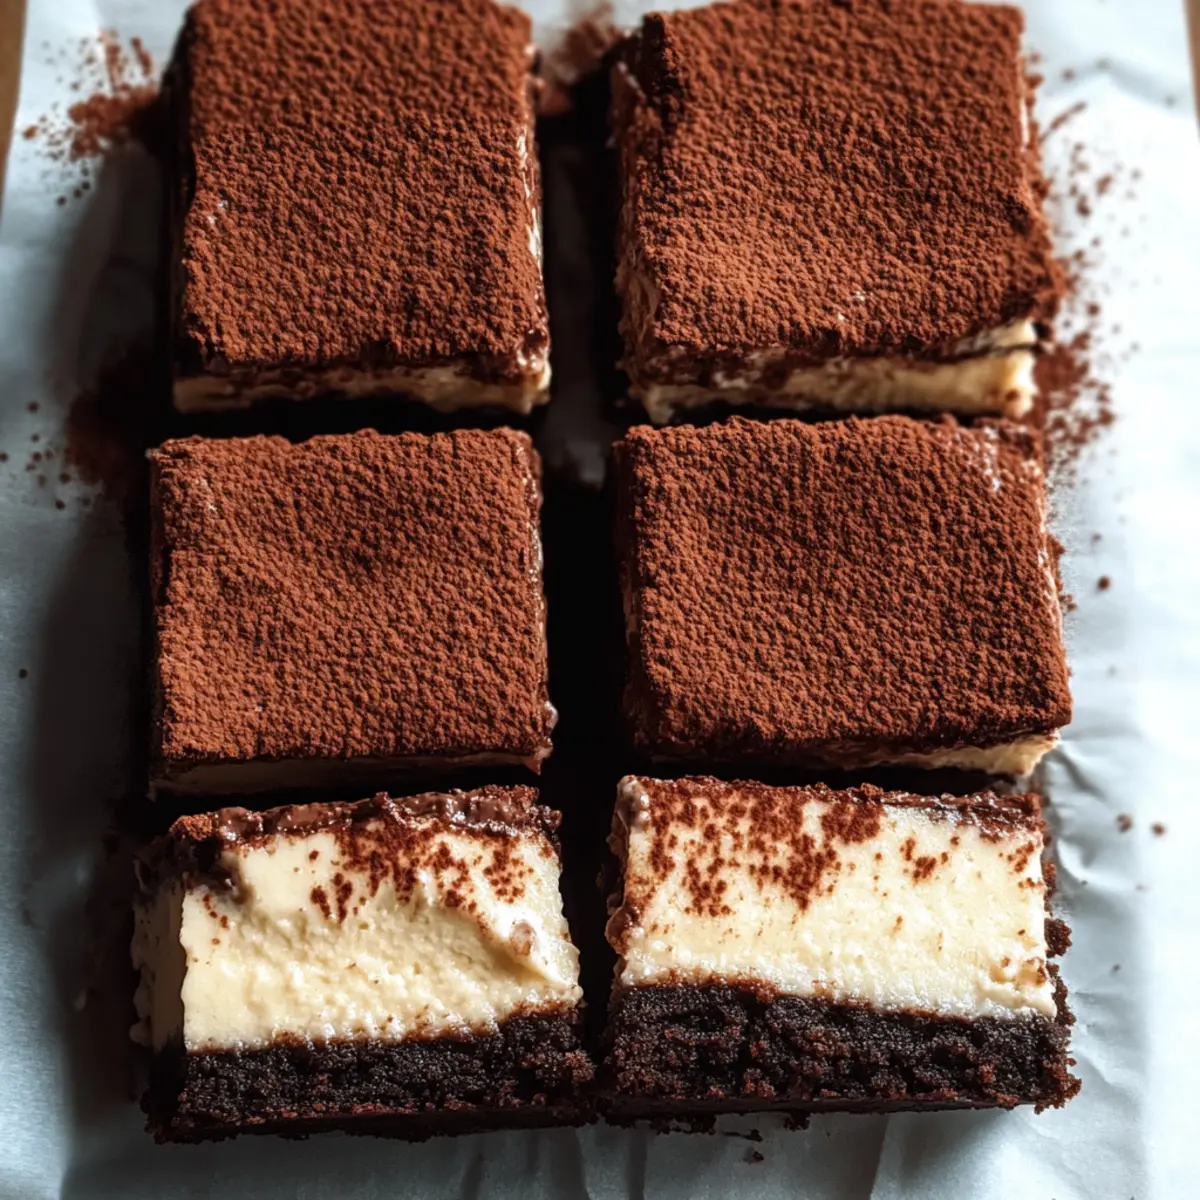
Indulgent and fudgy: These Gluten Free Tiramisu Brownies deliver a rich, chocolatey texture that feels luxurious with every bite.
Coffee-infused flavor: The espresso adds depth, perfectly balancing the sweetness of the brownie base.
Easy to make: With simple ingredients and straightforward steps, you’ll achieve bakery-quality results right at home.
Versatile serving: Perfect for gatherings or cozy nights, they pair beautifully with a warm cup of espresso or a scoop of vanilla bean ice cream.
Crowd-pleaser: Bring them to parties, and watch how quickly they disappear—who can resist such a decadent treat?
Gluten Free Tiramisu Brownies Ingredients
For the Brownie Base
• Gluten Free Flour – Provides structure and allows the brownies to be gluten-free; use almond flour for a nutty flavor.
• Cocoa Powder – Adds rich chocolate flavor to the brownie base; make sure it’s unsweetened for the best taste.
• Sugar – Sweetens the brownie layer; for a healthier option, try using coconut sugar.
• Butter – Adds moisture and richness; feel free to substitute with coconut oil for a dairy-free version.
• Eggs – Provides binding and structure; always use fresh eggs for optimal results.
• Espresso Powder – Enhances the chocolate and adds a coffee kick; substitute with strong brewed coffee if needed.
For the Tiramisu Layer
• Mascarpone Cheese – Creates the creamy tiramisu layer; if you’re in a pinch, cream cheese can work, though it will alter the flavor.
• Heavy Cream – Whipped to lightness for the tiramisu topping; coconut cream can also be used as a non-dairy alternative.
• Vanilla Extract – Adds depth to the flavor; try switching it out for almond extract for an exciting twist.
• Cocoa Powder (for dusting) – Finishes the dessert with a classic bitter note; it’s optional but truly elevates the presentation.
Each ingredient in these Gluten Free Tiramisu Brownies plays a vital role, ensuring you enjoy a memorable dessert that marries two classic favorites in delightful harmony!
Step‑by‑Step Instructions for Gluten Free Tiramisu Brownies
Step 1: Prepare the Brownie Base
Preheat your oven to 350°F (175°C) and line an 8×8-inch baking pan with parchment paper for easy removal. In a medium bowl, whisk together your gluten-free flour, cocoa powder, and a pinch of salt. In a large mixing bowl, beat softened butter and sugar until creamy and fluffy, about 3 minutes. Add the eggs, one at a time, mixing well after each addition, followed by the vanilla extract.
Step 2: Combine Mixtures
Gradually add the dry mixture to the wet ingredients, folding gently until just combined. Be careful not to overmix; a few lumps are perfectly fine! Pour the brownie batter into your prepared pan, smoothing the top with a spatula for an even finish. Bake for 25-30 minutes, until the edges look set and a toothpick inserted in the center comes out mostly clean. Allow the brownies to cool completely in the pan.
Step 3: Make the Tiramisu Topping
While the brownies are cooling, prepare the tiramisu topping. In a mixing bowl, combine mascarpone cheese, heavy cream, and espresso powder. Using an electric mixer, whip until the mixture is smooth and thick, about 3-5 minutes. It should hold soft peaks when you lift the beaters. Keep an eye on the consistency to ensure it remains light and creamy for the perfect layer on top of the brownies.
Step 4: Assemble the Layers
Once the brownies are completely cooled, gently spread the tiramisu mixture over the brownie base using a spatula. Aim for an even layer to ensure each bite has a perfect balance of fudgy brownie and creamy topping. After smoothing the top, cover the pan with plastic wrap and refrigerate for at least 2 hours, allowing the flavors to meld together beautifully.
Step 5: Finish and Serve
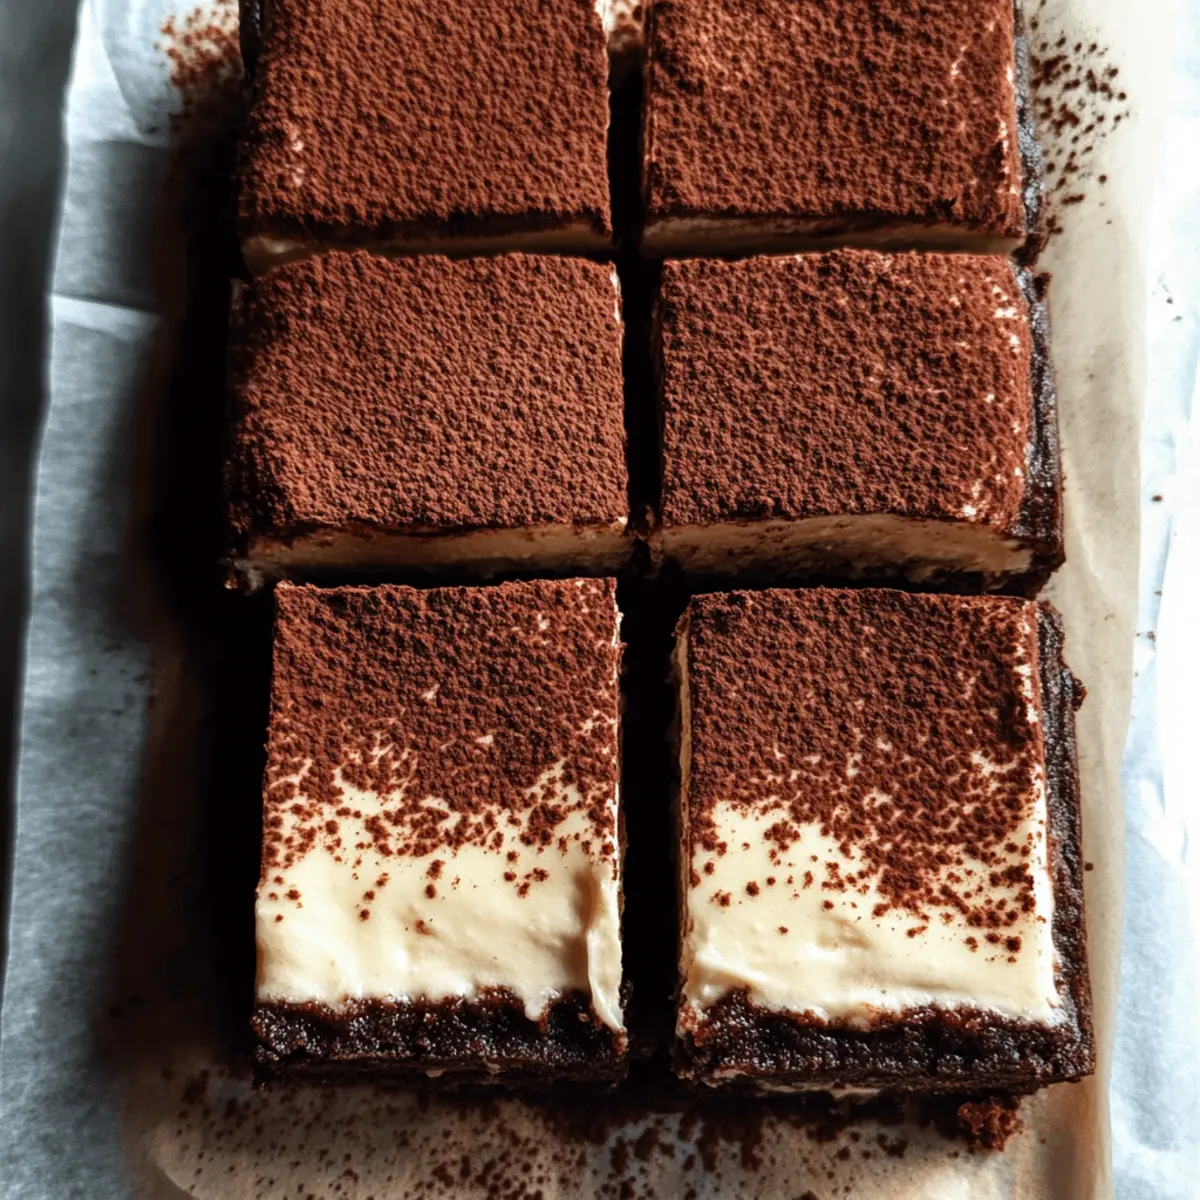
After chilling, it’s time to prepare for serving your Gluten Free Tiramisu Brownies. Dust the top lightly with cocoa powder for a classic, elegant finish. Use a sharp, hot knife to cut into squares, ensuring clean edges. Serve chilled, either plain or with a scoop of vanilla ice cream, to elevate this indulgent dessert further and delight your guests!
Make Ahead Options
These Gluten Free Tiramisu Brownies are ideal for meal prep enthusiasts! You can prepare the brownie base up to 24 hours in advance by baking and cooling them completely before covering and refrigerating. The tiramisu layer can also be made up to 2 days ahead; simply whip the mascarpone mixture and store it in the fridge until you’re ready to assemble. This step not only saves time but allows the flavors to meld beautifully. When you’re ready to serve, spread the tiramisu topping over the cooled brownies, dust with cocoa, and slice. By prepping ahead, you’ll enjoy this rich dessert with minimal effort, ensuring every bite is just as delicious!
Gluten Free Tiramisu Brownies Variations
Feel free to explore these delicious options to personalize your dessert and make it your own!
-
Mini Chocolate Chips: Add mini chocolate chips to the brownie batter for an extra burst of richness and a delightful texture.
-
Flavored Extracts: Experiment with almond or hazelnut extracts instead of vanilla to infuse unique tastes into your recipe.
-
Coffee-Soaked Brownies: Lightly brush the brownie base with brewed coffee before adding the topping for enhanced coffee flavor.
-
Dairy-Free Delight: Substitute mascarpone and heavy cream with coconut cream for a delicious dairy-free version that maintains creamy goodness.
-
Nutty Twist: Stir in crushed walnuts or pecans into the brownie batter for a delightful crunch and added nutritional benefits.
-
Flavorful Whip: Enhance the tiramisu layer with a splash of espresso liqueur for an irresistible adult twist, delivering that classic tiramisu flair.
-
Fruity Layer: Add a layer of fresh berries like raspberries or strawberries between the brownie and tiramisu layers for a fruity explosion.
-
Rich Caramel Drizzle: Finish the dessert with a drizzle of caramel sauce over the chilled brownies to add an indulgent touch that pairs beautifully with coffee flavors.
These delightful variations can transform your Gluten Free Tiramisu Brownies into something uniquely yours. If you love experimenting, why not try them out alongside a delicious batch of Cherry Amaretto Tiramisu or a comforting Thanksgiving Turkey Stress? Happy baking!
Expert Tips for Gluten Free Tiramisu Brownies
- Cool Completely: Make sure the brownies are completely cooled before adding the tiramisu layer; warm brownies may compromise the creamy texture.
- Use Quality Ingredients: Opt for high-quality cocoa powder and fresh mascarpone cheese for the best flavor and texture in your Gluten Free Tiramisu Brownies.
- Mix Gently: When combining the dry and wet ingredients, mix just until combined to keep your brownies fudgy; overmixing can lead to density.
- Chill Properly: Allow the assembled brownies to chill for at least 2 hours; this helps the flavors meld and ensures the layers set perfectly.
- Sharp Knife Trick: To achieve clean cuts, use a sharp, hot knife for slicing; this prevents the layers from separating and results in beautiful servings.
What to Serve with Gluten Free Tiramisu Brownies?
Indulge in a complete dessert experience that perfectly complements these decadent brownies, elevating every mouthful to another level of delight.
-
Espresso: The bold flavors of espresso enhance the coffee notes in the brownies, creating a perfect pairing for coffee lovers.
-
Vanilla Bean Ice Cream: A scoop of creamy vanilla bean ice cream adds a delightful contrast to the rich chocolate and coffee, making each bite even more satisfying.
-
Fresh Berries: Tart raspberries or strawberries offer a refreshing burst of flavor that cuts through the richness, adding a fresh note to each bite.
-
Cappuccino: The frothy milk and coffee of a cappuccino provide a comforting warmth, making it a cozy companion for these luscious treats.
-
Chocolate Sauce drizzled with Sea Salt: A drizzle of warm chocolate sauce topped with a sprinkle of sea salt elevates the chocolatey goodness, enhancing every flavor in a luxurious way.
-
Whipped Cream: Light and airy whipped cream provides a cloud-like contrast to the fudgy brownies, making for a perfectly balanced dessert experience.
-
Hazelnut Spread: A dollop of hazelnut spread adds nuttiness and creaminess that beautifully complements the coffee and chocolate flavors.
-
Limoncello: For a refreshing twist, pairing with a shot of Limoncello offers a bright contrast, lifting the deep flavors of the brownies.
-
Chilled Red Wine: A slightly chilled fruity red wine harmonizes with the chocolate, making for an unexpected yet delightful match that feels elegant.
How to Store and Freeze Gluten Free Tiramisu Brownies
Fridge: Keep your gluten free tiramisu brownies in an airtight container for up to 4 days. This will help maintain their rich, fudgy texture and creamy topping.
Freezer: For longer storage, freeze individual slices wrapped tightly in plastic wrap or stored in a freezer-safe container. They can last up to 3 months without losing flavor.
Thawing: When ready to enjoy, thaw the brownies in the fridge overnight or at room temperature for a couple of hours.
Serving Suggestions: Reheat briefly in the microwave (10-15 seconds) for a warm dessert experience, perfectly complemented by a scoop of ice cream or a shot of espresso!
Gluten Free Tiramisu Brownies Recipe FAQs
What type of gluten-free flour should I use?
Absolutely! For the best results, I recommend using a gluten-free all-purpose flour blend, which ensures the right structure. Alternatively, almond flour or oat flour can provide unique textures and flavors, adding a delightful nutty or wholesome touch to your brownies.
How should I store gluten-free tiramisu brownies?
You can store your gluten-free tiramisu brownies in an airtight container in the refrigerator for up to 4 days. This keeps the brownies fresh and maintains their rich, fudgy texture. Just make sure they are completely cooled before sealing them away!
Can I freeze gluten-free tiramisu brownies?
Very! To freeze, wrap individual slices tightly in plastic wrap and place them in a freezer-safe container. They will keep well for up to 3 months. When you’re ready to indulge, just thaw them overnight in the refrigerator or at room temperature for a few hours.
What if my brownies turn out too dense or gummy?
Don’t worry! If your brownies are too dense, it could be due to overmixing the batter or using too much gluten-free flour. When combining wet and dry ingredients, mix gently until just combined. If they seem gummy, allow them to cool completely before adding the tiramisu topping, as warm brownies can trap moisture.
Are there any dietary considerations for gluten-free tiramisu brownies?
Absolutely! These brownies are gluten-free, making them suitable for those with gluten sensitivities. However, if you’re accommodating allergies, ensure your ingredients (like the mascarpone) are free from other allergens such as dairy. For a dairy-free option, you can substitute mascarpone with a non-dairy cream cheese and heavy cream with coconut cream.

Decadent Gluten Free Tiramisu Brownies for Ultimate Indulgence
Ingredients
Equipment
Method
- Preheat your oven to 350°F (175°C) and line an 8x8-inch baking pan with parchment paper. In a medium bowl, whisk together gluten-free flour, cocoa powder, and a pinch of salt.
- In a large mixing bowl, beat softened butter and sugar until creamy and fluffy, about 3 minutes. Add the eggs, one at a time, mixing well after each addition, followed by the vanilla extract.
- Gradually add the dry mixture to the wet ingredients, folding gently until just combined. Pour the brownie batter into the prepared pan, smoothing the top with a spatula.
- Bake for 25-30 minutes, until the edges look set and a toothpick inserted in the center comes out mostly clean. Allow the brownies to cool completely in the pan.
- In a mixing bowl, combine mascarpone cheese, heavy cream, and espresso powder. Using an electric mixer, whip until smooth and thick, about 3-5 minutes.
- Once the brownies are cooled, spread the tiramisu mixture over the brownie base using a spatula. Cover the pan with plastic wrap and refrigerate for at least 2 hours.
- Dust the top lightly with cocoa powder before serving. Use a sharp, hot knife to cut into squares and serve chilled.
Leave a Reply