
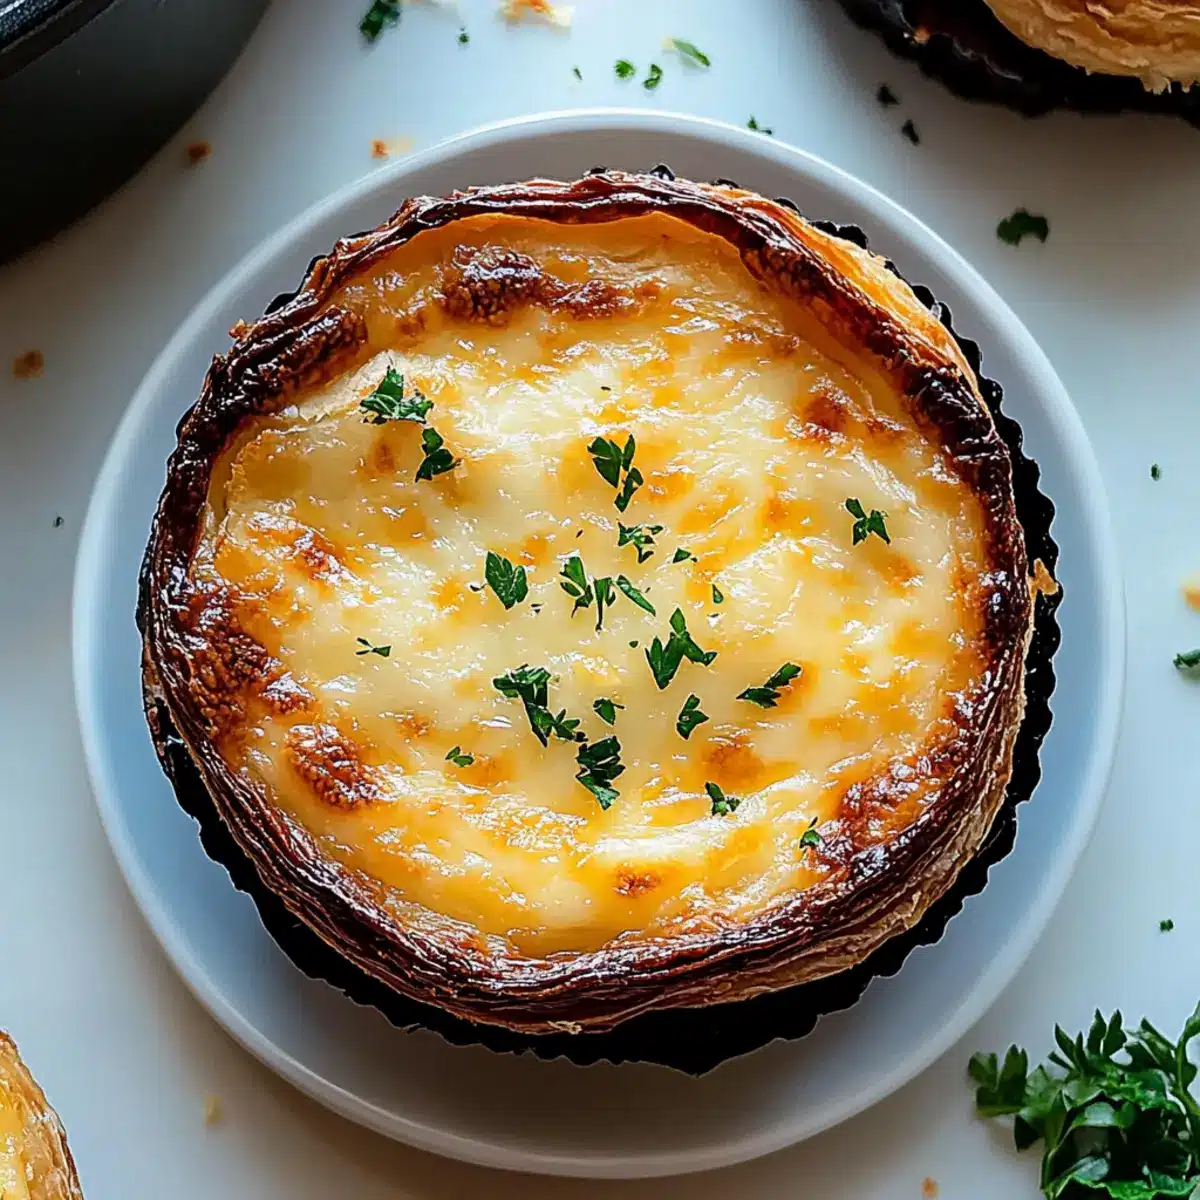
As I stood in my kitchen, the enticing aroma of garlic and melting cheese wafted through the air, igniting my senses and igniting memories of family dinners enjoyed together. Today, I’m thrilled to share my delightful recipe for Cheesy Garlic Cruffins. These flaky, buttery wonders combine savory flavors that make them perfect for a cozy lunch or a delightful afternoon snack. With quick prep that yields heavenly results, these cruffins promise to be a crowd-pleaser, catering to both garlic lovers and cheese enthusiasts alike. Imagine serving them warm, paired with a fresh salad or simply enjoying them solo—they’re a hug of flavor in every bite! What will you create to accompany your cruffins?
Why are Cheesy Garlic Cruffins a must-try?
Irresistibly Flaky: Each bite showcases layers of flaky goodness, giving a delightful textural contrast.
Bursting with Flavor: Packed with roasted garlic and melted cheese, they deliver a savory punch that’s hard to resist.
Quick and Easy: With straightforward instructions, you’ll whip these up in no time—perfect for busy days!
Versatile Pairing: They complement fresh salads or soups like Roasted Garlic Soup, making them ideal for any meal.
Crowd Favorite: These cruffins are sure to impress family and friends, and you’ll likely want to make extra!
Treat yourself to this cheesy delight—you won’t regret it!
Cheesy Garlic Cruffin Ingredients
For the Dough
- All-Purpose Flour – The foundation of your cruffin; for a chewier texture, use bread flour instead.
- Granulated Sugar – Adds a touch of sweetness that balances the savory flavors; omit for a more pronounced savory effect.
- Salt – Essential for enhancing overall flavor; make sure not to skip this step.
- Instant Yeast – Acts as a leavening agent for a lovely rise; you can substitute with active dry yeast, but remember to rehydrate it first.
- Warm Milk – Provides moisture and activates the yeast; choose a non-dairy alternative if desired.
- Unsalted Butter, Melted – Brings richness to the dough; coconut oil is a great dairy-free substitute.
- Warm Water – Hydrates your dough; use warm water to help activate the yeast effectively.
- Large Egg – Binds the ingredients and adds richness; for a vegan alternative, a flax egg works well.
For the Filling
- Parmesan Cheese, Grated – Delivers a savory, salty boost; substitute with Pecorino Romano for a sharper taste.
- Mozzarella Cheese, Shredded – Offers a gooey texture; cheddar can be an excellent alternative for a sharper flavor.
- Minced Garlic – The star flavor of this recipe; feel free to adjust to your garlic preference.
- Unsalted Butter, Softened – Essential for making the garlic butter filling; ensure it’s at room temperature for easy mixing.
- Fresh Parsley, Chopped – Adds a pop of color and freshness; you can switch to chives if you like.
Step‑by‑Step Instructions for Cheesy Garlic Cruffin
Step 1: Mix Dry Ingredients
In a large mixing bowl, combine 4 cups of all-purpose flour, 2 tablespoons of granulated sugar, 1 teaspoon of salt, and 2 teaspoons of instant yeast. Stir well to ensure the yeast is evenly distributed, providing a solid foundation for your Cheesy Garlic Cruffin. This mixture will create the dough’s delightful structure and flavor.
Step 2: Add Wet Ingredients
Create a well in the center of the dry ingredients and pour in 1 cup of warm milk, 1/2 cup of melted unsalted butter, and 1/4 cup of warm water. Mix with a wooden spoon until the dough begins to form. The warmth helps activate the yeast and brings your cruffin dough to life, setting the stage for a flaky treat!
Step 3: Combine & Knead
Crack 1 large egg into the dough mixture, and blend until fully incorporated. Transfer the dough to a floured surface and knead for about 8-10 minutes, until the dough feels smooth and elastic. This step builds the gluten, which creates the tender structure of your Cheesy Garlic Cruffins—watch for a smooth surface as you knead.
Step 4: First Rise
Place the kneaded dough in a greased bowl, covering it with a damp kitchen towel. Let it rise in a warm area for about 1 hour, or until it has doubled in size. You’ll know it’s ready when you gently poke it and the indentation remains, indicating a well-proofed dough.
Step 5: Prepare Filling
While the dough rises, make your filling by mixing 1/2 cup of softened unsalted butter, 4 cloves of minced garlic, and 2 tablespoons of chopped fresh parsley in a bowl. This savory garlic butter will infuse each cruffin with flavor, contributing to that mouthwatering aroma of your Cheesy Garlic Cruffin.
Step 6: Preheat Oven
Set your oven to 375°F (190°C) and grease a muffin tin with non-stick spray or butter. Preheating now will ensure your cruffins bake evenly, creating that perfect golden-brown crust all around, ready to embrace the cheesy goodness inside.
Step 7: Roll Dough
Once the dough has risen, turn it out onto a floured surface and roll it into a rectangle that is about 1/4 inch thick. Use a rolling pin for even thickness, as this encourages flaky layers to develop in each Cheesy Garlic Cruffin. Visualize those beautiful layers as you roll!
Step 8: Spread Filling
Spread the garlic butter mixture evenly over the rolled-out dough, ensuring you cover it to the edges. Then, sprinkle 1/2 cup of grated Parmesan and 1 cup of shredded mozzarella cheese over the top. This melty cheesy filling is what makes your cruffins irresistible—imagine the gooey center they’ll have!
Step 9: Roll & Slice
Carefully roll the dough into a log, ensuring the filling stays intact. Once you reach the end, slice the log into 8-10 equal portions with a sharp knife. Each slice will become a delightful Cheesy Garlic Cruffin, with all those layers and flavors waiting to come together beautifully.
Step 10: Muffin Tin Prep
Place the sliced portions upright in the greased muffin cups, allowing each cruffin to fit snugly. Cover them lightly with a towel again and let them rest for about 20 minutes. This second rise will help your cruffins become even fluffier and more inviting.
Step 11: Bake
Transfer the muffin tin to the preheated oven and bake for 20-25 minutes, or until the tops are beautifully golden brown. The delicious aroma of the Cheesy Garlic Cruffin will fill your kitchen as they bake; you’ll know they’re done when they are crisp on top and fluffy inside.
Step 12: Cool & Serve
Allow the cruffins to cool slightly in the tin before you gently remove them. Let them rest on a wire rack but enjoy warm to savor the gooey cheese and buttery layers. These Cheesy Garlic Cruffins are the perfect treat ready to offer comfort and delight in every bite!
Expert Tips for Cheesy Garlic Cruffins
- Yeast Freshness: Ensure your instant yeast is fresh for the best rise; if unsure, perform a quick test in warm water with sugar to check its activity.
- Temperature Matters: Maintain the temperature of your liquids; too hot can kill the yeast, while too cold will hinder its activation and prevent a fluffy Cheesy Garlic Cruffin.
- Don’t Skip the Rest: Allow the cruffins to rest after shaping; this second rise is essential for achieving that light, airy texture you desire.
- Layer Up Properly: Spread the filling evenly to the edges when rolling out the dough—this ensures a perfect distribution of savory flavor in every bite.
- Cooling Time: Let the cruffins cool slightly after baking; this helps the cheese set a bit, making them easier to handle and enjoy without burning your fingers!
Cheesy Garlic Cruffin Variations & Substitutions
Feel free to get creative and personalize your cruffins with these delightful twists!
-
Herb-Infused: Add dried herbs like thyme or rosemary to the dough for a fragrant touch. This gives your cruffins an aromatic depth, perfect for herb lovers.
-
Spicy Kick: Incorporate minced jalapeños or crushed red pepper flakes into the filling for a heat boost. A little spice can elevate the savory flavor profile, making each bite unforgettable.
-
Cheese Swaps: Try using smoked gouda or feta cheese instead of mozzarella for unique taste variations. Each cheese brings its own character, creating a flavor journey with each cruffin.
-
Veggie Delight: Mix in cooked spinach or roasted bell peppers to the filling. This adds color and a nutritional punch, making your cruffins not only delicious but wholesome too.
-
Bacon Bliss: Fold in crispy bacon bits for a meaty addition. The savory crunch pairs beautifully with the garlic and cheese, catering to both savoriness and texture.
-
Nutty Flavor: Adding a bit of finely chopped pecans or walnuts can give a delightful crunch and nuttiness. It’s a fun take that adds dimension to your cruffins.
-
Vegan Version: Use almond or oat milk, coconut oil in place of butter, and a flax egg to craft a vegan version. These swaps ensure everyone can indulge without missing out.
-
Garlic Lovers Upgrade: For an even bolder garlic flavor, roast the garlic before mixing it into the butter. Roasting mellows the sharpness, giving you a luscious garlicky goodness that elevates the cruffin experience.
Explore these variations and don’t hesitate to combine ideas! For more cheesy delights, check out our Garlic Butter Chicken or dive into the comforting world of Cheesy Root Vegetable Gratin! These recipes offer a wonderful way to enjoy cheesy goodness in different forms.
What to Serve with Cheesy Garlic Cruffin
Pair your cruffins with delightful accompaniments that enhance their irresistible flavors and textures, creating a memorable meal.
-
Fresh Garden Salad: A crisp salad tossed with vibrant greens and tangy vinaigrette offers a refreshing contrast to the rich, buttery cruffins.
-
Creamy Tomato Soup: A warm bowl of smooth tomato soup is the perfect match, complementing the savory garlic with its comforting acidity.
-
Butternut Squash Soup: This sweet and earthy soup pairs exceptionally well, enhancing the savory layers of your cruffins, perfect for a cozy meal.
-
Roasted Vegetables: Seasoned with herbs and spices, the slightly charred veggies provide an earthy balance that complements the cheesy goodness.
-
Sparkling Water with Citrus: The effervescence and zesty notes from a splash of lemon or lime invigorate your palate, brightening every bite.
-
Herbed Potato Wedges: Crispy, rosemary-infused wedges offer a satisfying crunch alongside the flaky cruffins, making for a delightful textural variety.
-
Garlic Aioli Dip: A creamy dip with a hint of garlic echoes the cruffins’ flavors, making each bite an indulgent treat.
-
Cheese Platter: Serve with a selection of cheeses for a delightful grazing experience, allowing guests to explore different flavor dynamics together.
Imagine enjoying these pairings on a leisurely day, your table brimming with colors and flavors, turning simple cruffins into a spectacular feast!
Make Ahead Options
These Cheesy Garlic Cruffins are perfect for meal prep enthusiasts looking to save time! You can prepare the dough and let it rise up to 24 hours ahead of time. Simply mix your dry and wet ingredients, knead the dough, and let it rise as directed. Once it’s risen, wrap the dough tightly in plastic wrap and refrigerate. You can also prepare the garlic butter filling and refrigerate it in an airtight container for up to 3 days. When you’re ready to bake, just take the dough out, roll it, fill it, and let it rest for 20 minutes before baking. This way, you’ll enjoy fresh, flaky cruffins with minimal effort, just as delicious as if you made them from scratch on the same day!
How to Store and Freeze Cheesy Garlic Cruffin
- Room Temperature: Store cooled cruffins in an airtight container at room temperature for up to 1-2 days. Enjoy them warm for the ultimate comfort treat!
- Fridge: For longer freshness, keep them in the fridge in an airtight container, where they will last for about 3-4 days, maintaining their flaky texture.
- Freezer: Individually wrap cruffins in plastic wrap and place them in a freezer-safe bag. They can be frozen for up to 2 months.
- Reheating: Reheat directly from frozen in a preheated oven at 350°F (175°C) for about 15-20 minutes, until warmed through and crispy again. Enjoy your Cheesy Garlic Cruffin!

Cheesy Garlic Cruffin Recipe FAQs
What type of flour is best for Cheesy Garlic Cruffins?
I recommend using all-purpose flour as it provides the perfect structure for your cruffins. If you’re looking for a chewier texture, bread flour can be a fantastic alternative. Just keep in mind that it may create a slightly different final product in terms of flakiness.
How should I store my Cheesy Garlic Cruffins?
Store your cooled cruffins in an airtight container at room temperature for up to 1-2 days. If you want them to last longer, refrigerate them, and they’ll stay fresh for about 3-4 days. Enjoy them warm, and they’ll taste like you just baked them!
Can I freeze Cheesy Garlic Cruffins?
Absolutely! For freezing, wrap each cruffin individually in plastic wrap and place them in a freezer-safe bag. They can be stored for up to 2 months. When you’re ready to enjoy one, reheat it directly from frozen in a preheated oven at 350°F (175°C) for about 15-20 minutes, until they are warmed through and nice and crispy again.
What if my dough isn’t rising properly?
If your dough isn’t rising well, it might be due to inactive yeast. Always ensure your yeast is fresh and active; a quick test is to mix it with warm water and a sprinkle of sugar—if it bubbles, you’re good to go! Also, maintaining the right temperature during mixing is essential—too hot can kill the yeast, while too cold can prevent it from activating.
Are Cheesy Garlic Cruffins suitable for people with dairy allergies?
You can definitely modify this recipe to be dairy-free! Substitute the unsalted butter with coconut oil and use non-dairy cheese alternatives for the filling. Additionally, use a flax egg instead of a regular egg to ensure the cruffins remain delightful even without dairy. Your loved ones can still enjoy a delicious treat!

Cheesy Garlic Cruffin: Flaky Comfort in Every Bite
Ingredients
Equipment
Method
- In a large mixing bowl, combine 4 cups of all-purpose flour, 2 tablespoons of granulated sugar, 1 teaspoon of salt, and 2 teaspoons of instant yeast.
- Create a well in the center of the dry ingredients and pour in 1 cup of warm milk, 1/2 cup of melted unsalted butter, and 1/4 cup of warm water. Mix with a wooden spoon.
- Crack 1 large egg into the dough mixture, and blend until fully incorporated. Knead for about 8-10 minutes.
- Place the kneaded dough in a greased bowl, cover it with a damp kitchen towel, and let it rise for about 1 hour.
- Mix 1/2 cup of softened unsalted butter, 4 cloves of minced garlic, and 2 tablespoons of chopped fresh parsley to make the filling.
- Preheat oven to 375°F (190°C) and grease a muffin tin.
- Turn out the dough and roll it into a rectangle about 1/4 inch thick.
- Spread the garlic butter mixture evenly over the rolled-out dough, then sprinkle 1/2 cup of grated Parmesan and 1 cup of shredded mozzarella cheese on top.
- Roll the dough into a log and slice into 8-10 equal portions.
- Place the sliced portions upright in the greased muffin cups and let them rest for about 20 minutes.
- Bake for 20-25 minutes, or until the tops are golden brown.
- Allow to cool slightly in the tin before removing.
Leave a Reply