
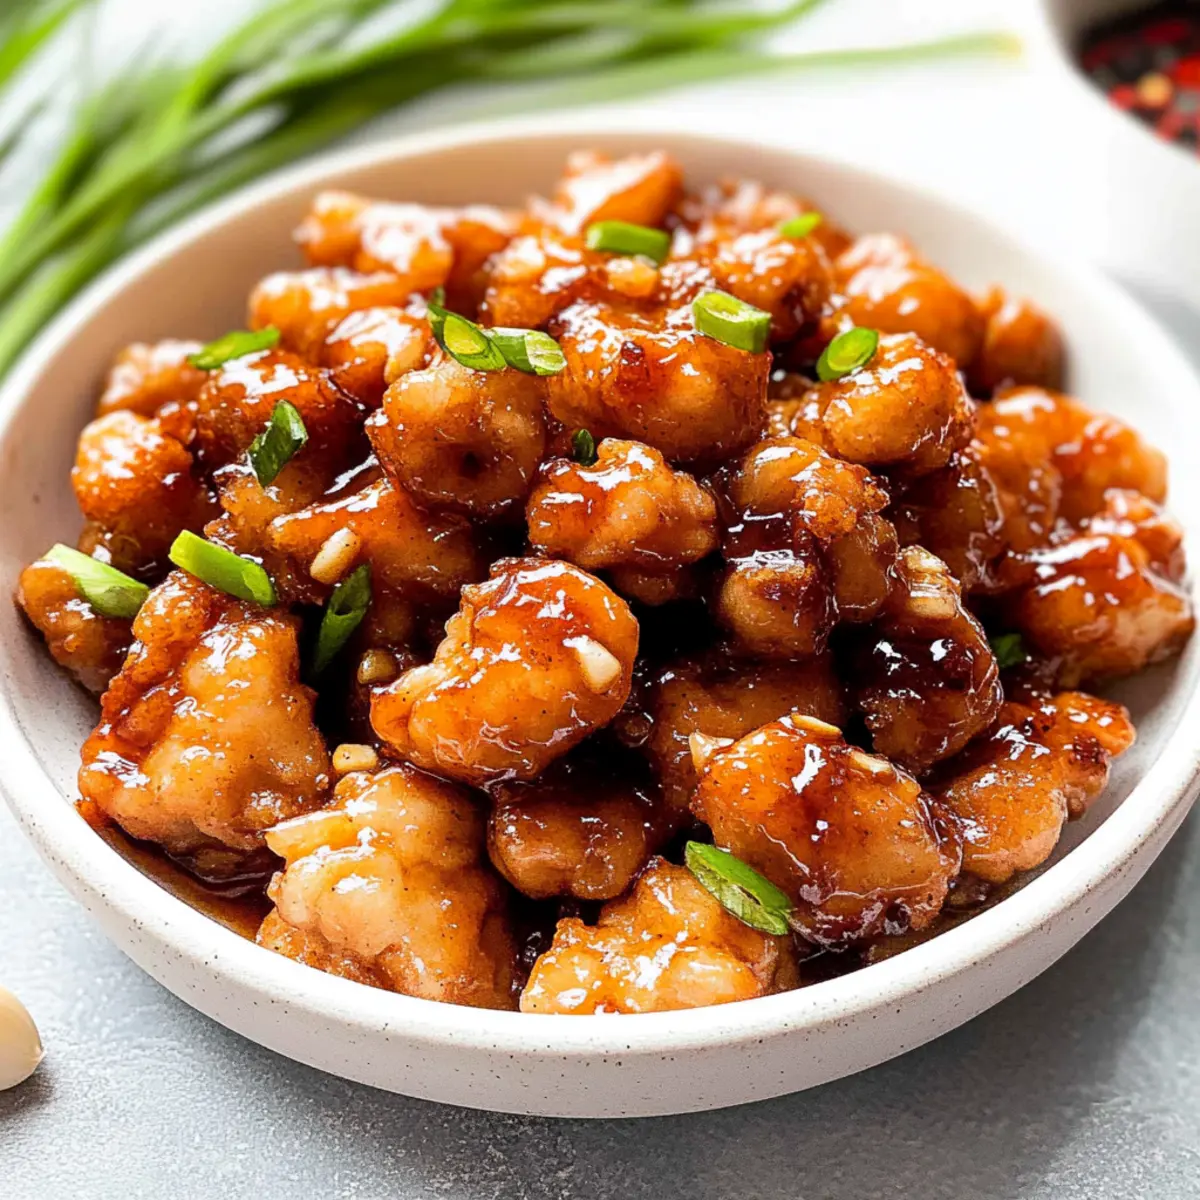
As I stood at the stove, the intoxicating aroma of sizzling chicken filled my kitchen, igniting a wave of nostalgia. I couldn’t help but think about how easy and delicious homemade meals can be. This Honey Butter Chicken transforms simple ingredients into a mouthwatering dish in just 30 minutes. With its crisp, golden crust and a luscious, sticky glaze, it’s perfect for busy weeknights or lazy weekends—no deep frying required, making it a lighter option without sacrificing flavor! Plus, you can effortlessly swap chicken thighs for breasts or tenders, catering to your taste buds and dietary needs. Imagine serving this delectable dish with fluffy rice or creamy mashed potatoes—your family will be asking for seconds! Are you ready to bring a delightful twist to your dinner routine? Let’s dive in!
Why is Honey Butter Chicken a Must-Try?
Quick and Easy: This recipe is a lifesaver on busy nights, requiring just 30 minutes from start to finish.
Versatile Options: Feel free to use chicken thighs, breasts, or tenders, making it adaptable to what you have on hand.
Mouthwatering Flavor: The combination of honey and butter creates a sweet and sticky glaze that elevates the dish to extraordinary heights.
Guilt-Free Indulgence: Shallow frying keeps it light without compromising on that crispy, golden crust.
Crowd-Pleasing Appeal: Serve it alongside rice, mashed potatoes, or roasted veggies, and watch it disappear at the dinner table! If you’re looking for more delicious chicken recipes, try the savory Garlic Butter Chicken or the tangy and satisfying Sweet Chili Chicken.
Honey Butter Chicken Ingredients
• Here’s everything you need to whip up this delightful dish!
For the Chicken
- Boneless Chicken Thighs or Tenders – Use chicken thighs for juiciness, but feel free to substitute with breasts or tenders based on your preference.
- Flour – This creates a crispy, golden crust; opt for gluten-free flour for a gluten-free option.
- Kosher Salt – Enhances flavor and highlights the chicken’s natural taste; use sea salt if you’d like.
- Black Pepper – Adds a hint of spice; adjust to suit your taste buds.
- Garlic Powder – Infuses a rich, aromatic flavor; switch to fresh minced garlic for even more depth.
For Frying
- Olive Oil (or Canola/Veggie Oil) – The oil for shallow frying; extra virgin olive oil is preferred for a flavor boost.
For the Honey Butter Sauce
- Unsalted Butter – Essential for the sauce’s richness; avoid margarine to maintain the authentic flavor.
- Honey – The star ingredient that provides sweetness and creates a sticky glaze, making your Honey Butter Chicken irresistible!
- Minced Garlic – Freshly minced garlic elevates the flavor, so steer clear of frozen varieties.
- Light Soy Sauce – Adds a savory depth to the sauce that perfectly complements the sweetness of the honey.
Step‑by‑Step Instructions for Honey Butter Chicken
Step 1: Prepare the Chicken
In a large mixing bowl, combine flour, kosher salt, black pepper, and garlic powder thoroughly. Coat the boneless chicken thighs or tenders generously in this mixture, ensuring each piece is evenly covered to create a crispy crust when cooked. Set aside the coated chicken for a few minutes to help the seasoning adhere.
Step 2: Heat the Oil
In a large skillet, heat about 1/4 inch of olive oil over medium-high heat. Allow the oil to reach around 350°F (175°C); it should shimmer and ripple when ready. Carefully place the coated chicken pieces in the pan, making sure not to overcrowd them to ensure even cooking. Fry the chicken for about 5-7 minutes on each side, until golden brown and crispy.
Step 3: Remove and Drain
Once the chicken is beautifully golden, remove it from the skillet and place it on a plate lined with paper towels to absorb any excess oil. This step helps maintain the chicken’s crispiness while you prepare the luscious honey butter sauce. Set the plate aside and keep the skillet over medium heat for the next step.
Step 4: Make the Honey Butter Sauce
In the same skillet, melt 4 tablespoons of unsalted butter, stirring to incorporate the flavorful bits left from frying the chicken. Add in the honey, light soy sauce, and freshly minced garlic, mixing well. Cook the sauce for about 2 minutes, allowing it to bubble slightly as it thickens and the garlic becomes aromatic with a rich flavor.
Step 5: Coat the Chicken
Return the crispy chicken to the skillet, ensuring each piece is well-coated in the sticky honey butter sauce. Cook for another minute, gently tossing the chicken until it’s completely glazed and heated through. You’ll know it’s ready when the sauce clings beautifully to the chicken, creating a delightful, shiny finish.
Step 6: Serve and Enjoy
Transfer the Honey Butter Chicken to a serving platter, allowing the sauce to drizzle over the chicken as you present it. This dish is best served hot alongside fluffy rice or creamy mashed potatoes, offering a delightful contrast to the savory sweetness of the honey glaze. Enjoy the scrumptious flavors that make this recipe a family favorite!
What to Serve with Honey Butter Chicken
As the enticing aroma of your Honey Butter Chicken wafts through your home, let’s brainstorm some delightful companions that will complete your meal perfectly.
-
Fluffy Rice: Perfectly cooked rice absorbs the sweet honey glaze, making every bite a delicious experience. A side of jasmine or basmati enhances the meal’s aromatic qualities.
-
Creamy Mashed Potatoes: The rich, buttery potatoes provide a smooth contrast to the crispy chicken, while the flavors meld wonderfully with the honey butter sauce.
-
Roasted Vegetables: Caramelized carrots, zucchini, and bell peppers add color and a slight sweetness, balancing the savory chicken. Their freshness comes through, brightening the entire plate.
-
Garlic Bread: Crunchy and buttery, this is a fantastic way to scoop up that sticky honey sauce. The garlic flavor adds an extra layer of deliciousness.
-
Coleslaw: A crisp, tangy coleslaw offers a refreshing crunch that cuts through the sweetness of the dish, making every bite feel light and satisfying.
-
Homemade Biscuits: Soft, flaky biscuits have the magic ability to soak up sauce, making them the perfect pairing for your Honey Butter Chicken. Each bite becomes a delightful sailing experience!
-
Sparkling Lemonade: The fizz of sparkling lemonade enhances the meal with a zesty brightness, cleansing your palate between each delicious morsel.
-
Chocolate Lava Cake: For dessert, a warm chocolate lava cake wraps up the meal beautifully, striking a balance with the sweet and savory tones of the chicken.
Honey Butter Chicken Variations
Feel free to put your own spin on this delightful dish with these tasty variations that will tickle your taste buds!
-
Dairy-Free: Swap the unsalted butter with vegan butter or coconut oil for a delicious, dairy-free version.
-
Gluten-Free: Use gluten-free flour to maintain all the crispy goodness without the gluten, making it friendly for gluten-sensitive diners.
-
Spicy Kick: Add cayenne pepper or crushed red pepper flakes to the flour mixture for an extra layer of heat; adjust to your personal spice tolerance.
-
Herbal Aromas: Incorporate dried thyme or rosemary with the flour to add a fragrant twist to your chicken. The earthy notes will elevate it to a new level!
-
Crispy Oven-Baked: For a healthier twist, consider baking the chicken instead of frying. Simply coat and bake in a preheated oven at 400°F (200°C) for 25-30 minutes.
-
Citrusy Zing: For a refreshing variation, add a tablespoon of orange or lemon zest to the honey sauce. This will brighten the flavors and add a delightful tang.
-
Sweet and Savory: Mix in some chopped pecans or walnuts in the honey butter sauce for extra crunch and flavor. This adds a delightful texture contrast!
-
Pasta Perfection: Toss the Honey Butter Chicken with cooked pasta of your choice and some steamed veggies for a hearty and comforting meal. It’s a quick way to create a complete dish!
As you explore these variations, keep in mind that each twist brings a fresh flavor profile to the table, much like the sweet uniqueness of dishes like the Honey Mustard Turkey or even the delightful Chipotle Chicken Avocado. Enjoy your culinary adventure!
How to Store and Freeze Honey Butter Chicken
Fridge: Store leftovers in an airtight container for up to 3 days. Ensure the chicken has cooled down before sealing to maintain its moisture.
Freezer: If you want to freeze your Honey Butter Chicken, wrap each piece tightly in plastic wrap and then place in a freezer-safe bag. It can be frozen for up to 2 months.
Reheating: To reheat, place the chicken in a microwave or toaster oven at medium heat. Cover it with a damp paper towel to retain moisture and avoid overcooking, ensuring the glaze stays sticky and delicious.
Expert Tips for Honey Butter Chicken
-
Perfect Timing: Ensure the chicken is not flipped too early while frying; let it cook undisturbed for at least 5 minutes for a proper crust.
-
Fresh Flavor: Opt for fresh minced garlic instead of frozen or powdered for a richer, more aromatic taste in your Honey Butter Chicken.
-
Customize Sweetness: Adjust the amount of honey in the sauce according to your preference—feel free to experiment for your ideal balance of sweetness!
-
Watch the Heat: Maintain the oil temperature around 350°F (175°C) for even cooking; too low and the chicken will absorb oil; too high and it may burn.
-
Rest After Frying: Let the chicken rest on paper towels after frying to keep it crispy while you prepare the honey butter sauce.
Make Ahead Options
These Honey Butter Chicken delights are perfect for busy meal prep! You can coat the chicken with the flour mixture up to 24 hours in advance; simply refrigerate it in an airtight container to maintain crispiness. The honey butter sauce can also be made up to 3 days ahead and stored in the fridge—just reheat it gently on the stove before serving. When you’re ready to enjoy this savory dish, fry the chicken as directed and then toss it in the reheated sauce to ensure it’s just as delicious as when freshly made. Enjoy the time-saving benefits of pre-prepping so you can spend more moments with your loved ones!
Honey Butter Chicken Recipe FAQs
What type of chicken is best for Honey Butter Chicken?
Absolutely! While chicken thighs are recommended for their juiciness and flavor, you can also use chicken breasts or tenders based on your preference. Each option will deliver slightly different textures—think crispy and tender thighs or leaner, lighter breasts.
How do I store leftover Honey Butter Chicken?
To keep it fresh, store your leftover Honey Butter Chicken in an airtight container in the refrigerator for up to 3 days. Make sure the chicken has cooled down entirely before sealing it; this helps prevent moisture buildup, which can make the chicken soggy.
Can I freeze Honey Butter Chicken?
Very! If you’re planning to freeze Honey Butter Chicken, wrap the chicken pieces tightly in plastic wrap, making sure none of it is exposed to air. Then place them in a freezer-safe bag. It can be frozen for up to 2 months. When you’re ready to enjoy it again, simply thaw overnight in the refrigerator before reheating.
What should I do if my chicken isn’t crispy?
If your chicken isn’t coming out crispy, there may be two culprits: overcrowding the pan or the oil temperature being too low. Ensure you give each piece enough space while frying to allow steam to escape, which helps to form the crust. Maintain the oil temperature around 350°F (175°C) for optimal frying results.
Can I make Honey Butter Chicken dairy-free?
Absolutely! To create a dairy-free version of this dish, simply swap the unsalted butter for a plant-based alternative, such as vegan butter or margarine. This change maintains the richness needed for the sauce without using dairy products.
Are there any allergy concerns with this recipe?
Yes, if you have gluten allergies, ensure you use gluten-free flour instead of regular flour to coat your chicken. Also, check that your soy sauce is labeled gluten-free, as some brands might contain wheat. Always read labels carefully to avoid allergens.
Sweet and Savory Honey Butter Chicken in 30 Minutes
Ingredients
Equipment
Method
- In a large mixing bowl, combine flour, kosher salt, black pepper, and garlic powder thoroughly. Coat the boneless chicken thighs or tenders generously in this mixture, ensuring each piece is evenly covered to create a crispy crust when cooked. Set aside the coated chicken for a few minutes to help the seasoning adhere.
- In a large skillet, heat about 1/4 inch of olive oil over medium-high heat. Allow the oil to reach around 350°F (175°C); it should shimmer and ripple when ready. Carefully place the coated chicken pieces in the pan, making sure not to overcrowd them to ensure even cooking. Fry the chicken for about 5-7 minutes on each side, until golden brown and crispy.
- Once the chicken is beautifully golden, remove it from the skillet and place it on a plate lined with paper towels to absorb any excess oil. This step helps maintain the chicken's crispiness while you prepare the luscious honey butter sauce. Set the plate aside and keep the skillet over medium heat for the next step.
- In the same skillet, melt 4 tablespoons of unsalted butter, stirring to incorporate the flavorful bits left from frying the chicken. Add in the honey, light soy sauce, and freshly minced garlic, mixing well. Cook the sauce for about 2 minutes, allowing it to bubble slightly as it thickens and the garlic becomes aromatic with a rich flavor.
- Return the crispy chicken to the skillet, ensuring each piece is well-coated in the sticky honey butter sauce. Cook for another minute, gently tossing the chicken until it's completely glazed and heated through. You’ll know it's ready when the sauce clings beautifully to the chicken, creating a delightful, shiny finish.
- Transfer the Honey Butter Chicken to a serving platter, allowing the sauce to drizzle over the chicken as you present it. This dish is best served hot alongside fluffy rice or creamy mashed potatoes, offering a delightful contrast to the savory sweetness of the honey glaze. Enjoy the scrumptious flavors that make this recipe a family favorite!
Leave a Reply