
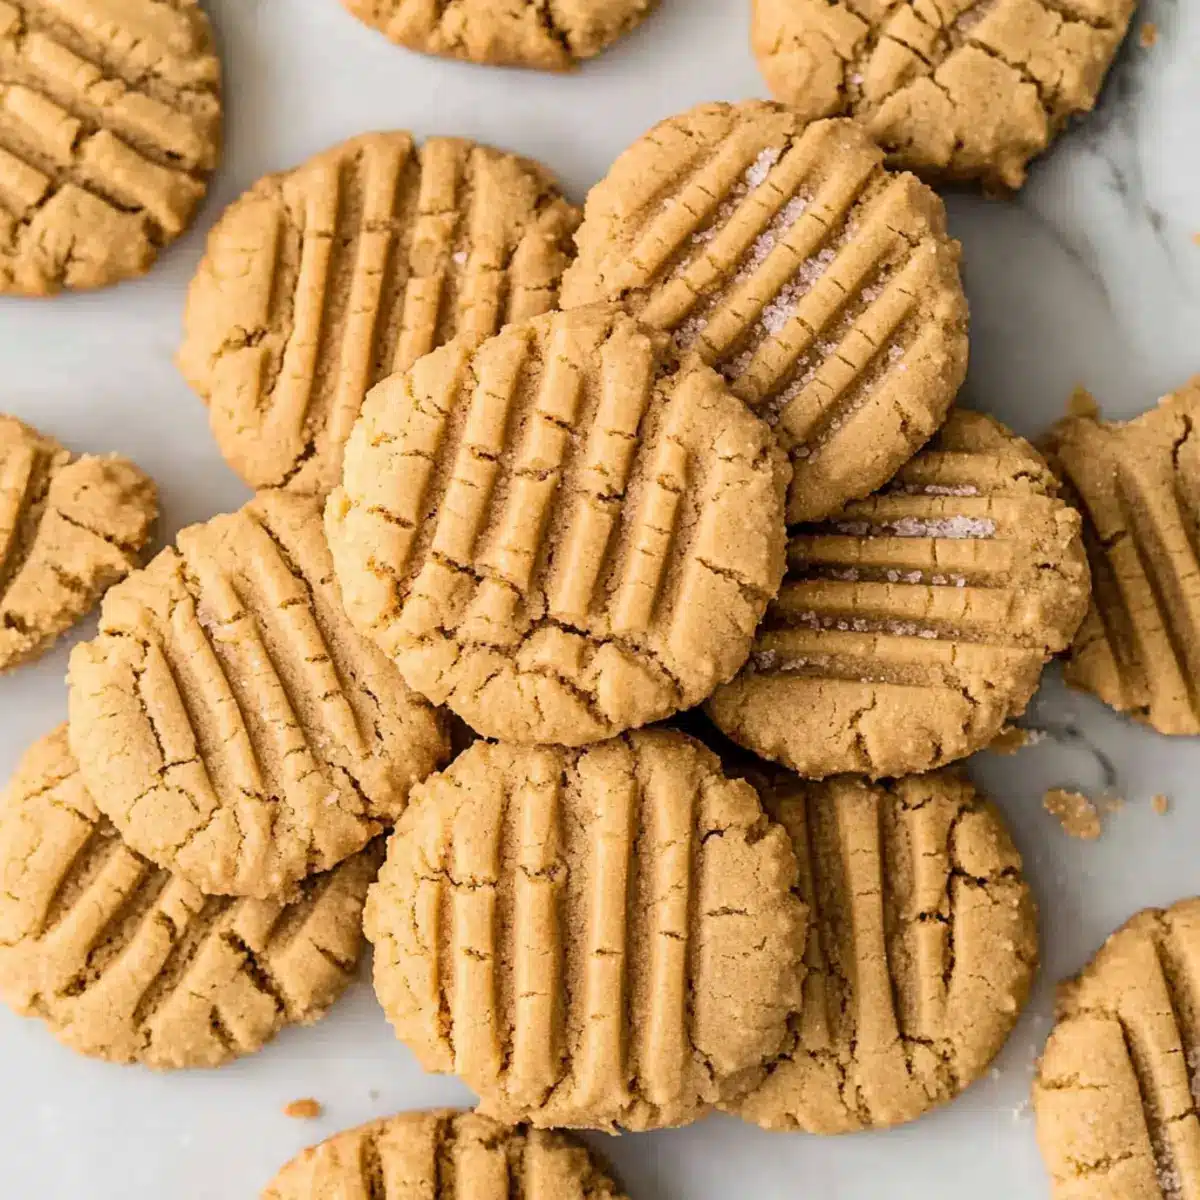
The sweet aroma of freshly baked goodies wafting through the kitchen is like a warm hug on a chilly day. With every fork-pressed crisscross and the rich scent of peanut butter filling the air, I’m transported back to my childhood, where the best memories were made alongside family, flour, and love. These Classic Peanut Butter Cookies are not only simple to whip up but also serve as a heartwarming reminder of the joys of home baking. Delightfully chewy and oh-so-satisfying, this peanut butter cookie recipe brings a nostalgic touch to the table that’s hard to resist. Whether you’re craving a sweet snack or looking for a crowd-pleasing treat to share, these cookies promise to deliver comfort and joy. Do you have your glass of milk ready? Let’s dive into cookie heaven!
Why Are These Cookies So Irresistible?
Nostalgic flavors transport you back to childhood, making every bite a sweet memory. Effortless preparation means even novice bakers can create delightful treats without stress. Chewy textures ensure a satisfying experience, with soft centers and crisp edges that melt in your mouth. Bake them alongside classics like Snowball Cookies Melting for a cookie platter sure to impress. Plus, these cookies are easily adaptable – add chocolate chips or nuts for extra flair. You’re just a few simple steps away from pure peanut butter bliss!
Peanut Butter Cookie Ingredients
For the Cookie Dough
• Peanut Butter – Natural, creamy peanut butter creates the rich flavor and texture these cookies are known for.
• Butter (unsalted, softened) – This adds moisture; margarine can serve as a dairy-free alternative.
• Sugar – Granulated sugar contributes essential sweetness and aids in browning.
• Brown Sugar (packed) – It adds moisture and a deeper flavor profile; either light or dark works beautifully.
• Large Egg – This binds the dough together; you can use a flaxseed egg for an egg-free version.
• Vanilla Extract – Pure vanilla extract enhances the flavor for a more aromatic cookie experience.
• All-Purpose Flour – This provides structure; a gluten-free flour blend can substitute for a gluten-free variation.
• Baking Soda – Helps the cookies rise for that perfect softness.
• Salt – Balancing the sweetness, don’t forget this important ingredient!
• Sugar (optional for topping) – A sprinkling of sugar before baking adds a delightful sweetness on top.
Step‑by‑Step Instructions for Peanut Butter Cookie
Step 1: Preheat the Oven
Begin by preheating your oven to 350°F (175°C). While the oven warms up, prepare a baking sheet by lining it with parchment paper or greasing it with non-stick spray. This ensures your Classic Peanut Butter Cookies will bake evenly and release easily once done.
Step 2: Cream the Ingredients
In a large mixer bowl, cream together the natural, creamy peanut butter and softened unsalted butter until smooth and well blended. Add in both granulated sugar and brown sugar, mixing until the mixture is light and fluffy in texture, which typically takes about 3-4 minutes.
Step 3: Add Wet Ingredients
Next, crack in a large egg and pour in pure vanilla extract. Beat the mixture until all the ingredients are fully combined and smooth. The rich flavors of the peanut butter will blend beautifully with the sweetness, creating a delightful base for your cookies.
Step 4: Combine Dry Ingredients
In a separate bowl, sift together all-purpose flour, baking soda, and salt. Gradually add this dry mixture to your wet ingredients, mixing on low speed until just combined. Be careful not to overmix—stop as soon as no flour streaks remain to ensure your cookies remain tender.
Step 5: Form the Dough Balls
Using your hands or a cookie scoop, roll the dough into 1-inch balls and place them spaced evenly on the prepared baking sheet. For added flair, use a fork to create a crisscross pattern on the tops of each ball, pressing down gently to flatten them slightly.
Step 6: Bake the Cookies
Transfer the baking sheet to the preheated oven and bake the cookies for about 10 minutes. Watch closely for the edges to turn light golden while the centers remain soft. Avoid overbaking to achieve a perfect chewy texture characteristic of Classic Peanut Butter Cookies.
Step 7: Cool Before Serving
Once baked, remove the cookies from the oven and let them cool on the pan for 10 minutes. This step is crucial as it allows the cookies to set. Afterward, carefully transfer them to a wire rack to cool completely, giving them the perfect chewy consistency that you’ll love!
Storage Tips for Peanut Butter Cookies
Room Temperature: Store your peanut butter cookies in an airtight container at room temperature for up to 1 week to maintain freshness and chewiness.
Fridge: For extended freshness, keep the cookies in the refrigerator for up to 2 weeks. Just make sure to seal them well to prevent them from drying out.
Freezer: Freeze the cookies by laying them flat in a single layer on a baking sheet until solid, then transfer to a freezer-safe bag or container for up to 3 months.
Reheating: To enjoy a warm cookie, reheat it in the microwave for about 10-15 seconds, or in the oven at 350°F (175°C) for a few minutes until warmed through.
What to Serve with Classic Peanut Butter Cookies
The perfect peanut butter cookies deserve equally delightful companions for a complete experience; let’s build the ultimate treat platter together!
-
Glass of Milk:
The rich creaminess of milk perfectly balances the sweet, nutty flavor and provides a classic pairing that never fails. -
Hot Coffee:
The warm, bitter notes of coffee contrast beautifully with the sweetness of the cookies, making every bite feel indulgent. -
Ice Cream Scoop:
A scoop of vanilla or chocolate ice cream turns these beloved cookies into an irresistible dessert. Picture indulging in warm cookies paired with creamy coldness. -
Chocolate Dipping Sauce:
Drizzle on warm melted chocolate for a luxurious twist. It adds a rich, sweet layer that enhances the peanut butter flavor exquisitely. -
Fresh Fruit Salad:
A mix of vibrant fruits adds a refreshing contrast to the chewy cookies, providing both nutrition and a burst of sweetness to your afternoon snack. -
Caramel Sauce:
Drizzling a little caramel over your cookies introduces an incredible toasty flavor. The gooey sweetness complements the nutty taste in a divine way, creating a dessert experience worth savoring. -
Chai Tea:
This spicy, comforting drink pairs beautifully with the cookies, offering warmth and a fragrant mix of spices that enhance the peanut butter’s richness. -
Nutty Trail Mix:
A side of trail mix adds a satisfying crunch and extra nuttiness, making it an energizing snack alongside your cookies. Enjoy the delightful textural contrast!
Expert Tips for the Best Peanut Butter Cookies
-
Use Natural Peanut Butter: It’s essential for achieving the right flavor and texture, as processed versions may yield dry cookies.
-
Don’t Overmix: When combining your dry and wet ingredients, mix just until combined. Overmixing can lead to tough cookies.
-
Fork Technique: Press the dough balls with a fork to create a crisscross pattern. This not only adds style but helps the cookies spread evenly while baking.
-
Monitor Baking Time: Stay attentive while baking! Look for a light golden edge and soft center to ensure your cookies are perfectly chewy.
-
Cool Properly: Allow cookies to cool on the pan for 10 minutes before transferring. This helps them firm up and retain their delightful texture.
-
Experiment with Add-ins: Feel free to add chocolate chips or nuts! These variations can elevate the classic peanut butter cookie experience.
Peanut Butter Cookie Variations & Substitutions
Feel free to customize these cookies with your favorite twists and substitutions to create a unique treat!
-
Dairy-Free: Substitute unsalted butter with margarine or coconut oil for a dairy-free version that’s just as tasty.
-
Gluten-Free: Use a gluten-free flour blend instead of all-purpose flour to accommodate those with gluten sensitivities.
-
Nut-Free: Replace peanut butter with sunflower seed butter for a delicious nut-free alternative that’s still packed with flavor.
-
Chocolate Lovers: Stir in semi-sweet or dark chocolate chips for a delightful chocolate blast that complements the peanut butter beautifully.
-
Oatmeal Twist: Mix in rolled oats to the dough for added chewiness and a hearty texture that takes your cookie experience to the next level.
-
Spiced Up: Consider adding a teaspoon of cinnamon or a pinch of nutmeg to the dough for a warm, spiced flavor that’s perfect for the fall season.
-
Crunch Factor: Add chopped nuts, such as walnuts or pecans, to introduce a delightful crunch that contrasts the soft cookie texture.
-
Sugar Swap: For a healthier option, try substituting honey or maple syrup for the granulated sugar, adjusting the flour accordingly for moisture.
And if you’re feeling adventurous, why not create a fun cookie platter by pairing these beauties with other delightful treats like Cranberry Orange Cookies or Black Forest Cookies? The possibilities are endless!
Make Ahead Options
These Classic Peanut Butter Cookies are perfect for meal prep enthusiasts! You can prepare the cookie dough up to 3 days in advance; simply mix all the ingredients and store the formed dough balls in an airtight container in the refrigerator. It’s essential to keep the dough covered to prevent drying out and to allow the flavors to meld beautifully. When you’re ready to bake, just place the dough balls on the baking sheet and add a few extra minutes to your baking time if baking from cold. With these make-ahead options, you can enjoy warm, chewy peanut butter cookie bliss with minimal effort on busy weeknights!
Classic Peanut Butter Cookies Recipe FAQs
What type of peanut butter should I use for the best flavor?
Absolutely! For the best flavor and texture in your Classic Peanut Butter Cookies, I recommend using natural, creamy peanut butter. Avoid processed varieties as they can contain additives that make the cookies dry and less flavorful.
How should I store my cookies to keep them fresh?
To maintain their deliciousness, store your peanut butter cookies in an airtight container at room temperature for up to 1 week. If you want to keep them even longer, refrigerate them for up to 2 weeks, ensuring they are well-sealed to prevent drying out.
Can I freeze these peanut butter cookies?
You can definitely freeze your cookies for longer shelf life! First, place them in a single layer on a baking sheet and freeze until solid. Then transfer them to a freezer-safe bag or container, where they can stay fresh for up to 3 months. To enjoy them warm, microwave for about 10-15 seconds or reheat in the oven at 350°F (175°C) for a few minutes.
What should I do if my cookies turn out too hard?
If your cookies are too hard, check that you didn’t overbake them. Peanut butter cookies should be soft in the center and slightly golden at the edges. Next time, try reducing the baking time by a couple of minutes. Additionally, making sure you cream the butter and sugars well before adding dry ingredients can help maintain chewiness.
Are there any allergy considerations for this recipe?
Yes! If you’re baking for someone with a peanut allergy, consider substituting peanut butter with almond or cashew butter, as these alternatives can yield similarly delightful cookies. Always check for gluten-free flour options if gluten is a concern for your guests.
How can I modify the recipe for added flavors?
The more the merrier! You can add chocolate chips, chopped nuts, or even oats to the dough for extra flavor and texture. Simply fold in these ingredients after combining your dry and wet ingredients to create a deliciously different variation of your classic peanut butter cookie recipe.

Peanut Butter Cookie Bliss: Chewy Comfort in Every Bite
Ingredients
Equipment
Method
- Preheat your oven to 350°F (175°C) and prepare a baking sheet with parchment paper.
- In a large mixer bowl, cream together the peanut butter and softened butter until smooth. Add in granulated sugar and brown sugar, mixing until light and fluffy.
- Add the egg and vanilla extract, beating until combined.
- Sift together the flour, baking soda, and salt in a separate bowl. Gradually add to the wet ingredients, mixing until just combined.
- Roll the dough into 1-inch balls and place them on the baking sheet, creating a crisscross pattern with a fork.
- Bake for about 10 minutes, until edges turn light golden while centers remain soft.
- Cool on the pan for 10 minutes before transferring to a wire rack to cool completely.
Leave a Reply