
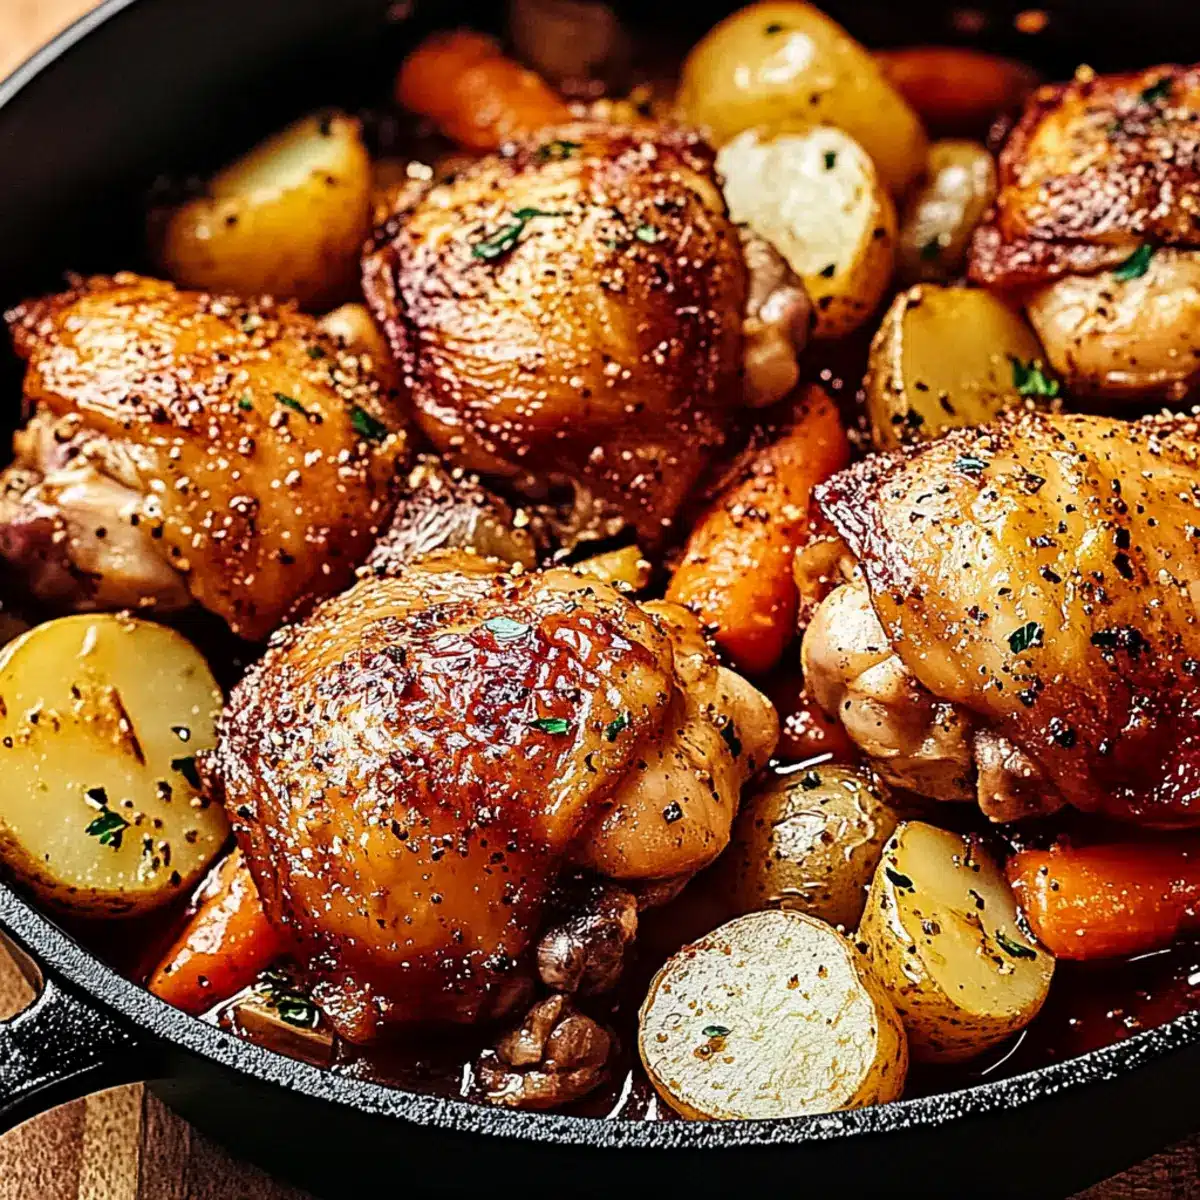
As I pulled the Dutch oven from the oven, the heavenly scent of braised chicken thighs enveloped my kitchen, transporting me back to my grandmother’s cozy home. This Dutch Oven Braised Chicken Thighs recipe is a comforting hug on a plate, beautifully fragrant and undeniably satisfying. Not only does it boast a simple prep process that fits perfectly into a busy weeknight, but it also elevates any family dinner into a memorable occasion. With tender meat that melts in your mouth and hearty vegetables that soak up all the rich flavors, this dish is sure to please even the pickiest eaters. So, are you ready to warm your kitchen and your heart with this delightful feast?
Why is Braised Chicken a Family Favorite?
Ease of Preparation: You’ll love how quickly this dish comes together! With just a few simple steps, your Dutch oven will do the heavy lifting while you spend quality time with your loved ones.
Hearty and Delicious: Each bite bursts with flavor, thanks to the combination of tender chicken thighs and perfectly cooked veggies. It’s like getting a taste of home-cooked goodness with every forkful!
Versatile Pairing: Serve it alongside crusty bread or a crisp salad, and you have a complete meal that can be enjoyed any night of the week. If you’re a fan of cozy comfort foods, check out my Blueberry French Toast for a delightful breakfast option!
Crowd-Pleaser: Perfect for family gatherings or an intimate dinner, this dish is sure to impress all your guests—young or old! You can even make it ahead of time and reheat it to enjoy without stress.
Aromatic Experience: The irresistible blend of garlic, thyme, and paprika fills your home with a warm, inviting aroma that everyone will love. It’s more than just food; it’s an experience that enhances any occasion!
Dutch Oven Braised Chicken Thighs Ingredients
• Discover the simple yet essential ingredients for this comforting dish!
For the Chicken
• Bone-in Skin-on Chicken Thighs – The star of the dish, providing depth and richness; skinless thighs can be used but may lack flavor.
For the Seasoning
• Salt and Pepper – Essential for elevating flavors; adjust according to your personal taste preferences.
• Dried Thyme – A key herb adding an earthy note; Italian seasoning can work as a substitute.
• Paprika – Imparts mild heat and beautiful color; smoked paprika enhances the flavor even further.
For the Vegetables
• Medium-sized Potatoes – Offers a hearty base; sweet potatoes will add a delightful sweetness.
• Carrots – Adds natural sweetness; feel free to replace with other root vegetables like parsnips.
• Large Onion – Provides sweetness and depth; shallots can be a milder alternative.
• Garlic – Boosts the overall flavor; swap with roasted garlic for extra sweetness.
For Cooking
• Olive Oil – Ideal for searing the chicken, adding flavor; substitute with vegetable oil for a neutral taste.
• Chicken Broth – Combines moisture and flavor; low-sodium options are available for a healthier choice.
• Dry White Wine – Enhances the dish’s depth; omit if desired or use more broth or a splash of vinegar for acidity.
Let’s dive into creating this Dutch Oven Braised Chicken Thighs masterpiece that everyone will adore!
Step‑by‑Step Instructions for Dutch Oven Braised Chicken Thighs
Step 1: Preheat Oven
First, set your oven to 375°F (190°C). This temperature is essential for creating a perfectly braised Dutch oven chicken that achieves a tender texture. Preheating ensures that when you place the chicken in, it immediately begins to cook evenly, locking in those delightful flavors.
Step 2: Prepare Chicken
While the oven heats up, season the bone-in skin-on chicken thighs generously with salt and pepper. This simple step infuses the chicken with essential flavor from the get-go, enhancing the overall taste. Allow the thighs to rest for a moment to absorb the seasoning while you prepare to sear them.
Step 3: Sear Chicken
In a large Dutch oven over medium-high heat, heat a drizzle of olive oil until shimmering. Carefully place the seasoned chicken thighs skin-side down in the pot. Sear for about 5-7 minutes, or until the skin is golden brown and crispy. Flip them over and brown the other side for another 5 minutes, then remove the chicken and set aside.
Step 4: Sauté Vegetables
With the chicken out, add chopped potatoes, carrots, and onion to the same pot, stirring to coat them in the flavorful drippings. Sauté for about 5 minutes until they begin to soften, absorbing those delicious flavors left behind by the chicken. This step prepares a fragrant base for your dish.
Step 5: Add Aromatics
Next, stir in minced garlic, dried thyme, paprika, along with a pinch of salt and pepper into the vegetable mixture. Cook for an additional 1-2 minutes until the garlic becomes fragrant and starts to soften. This is key to layering flavors in your Dutch oven braised chicken thighs.
Step 6: Combine & Cook
Now, pour in the chicken broth and dry white wine, scraping up any browned bits from the bottom of the pot. Return the browned chicken thighs to the pot, nestling them into the liquid skin-side up. This step is critical as the liquid will help keep the chicken moist and infuse every bite with rich flavor.
Step 7: Bake
Cover the Dutch oven with its lid and place it in the preheated oven. Bake for about 1 hour, or until the chicken is tender and the juices run clear when pierced. You’ll know it’s done when the aroma starts to fill your home, beckoning everyone to the table for your delicious braised chicken thighs.
Step 8: Serve
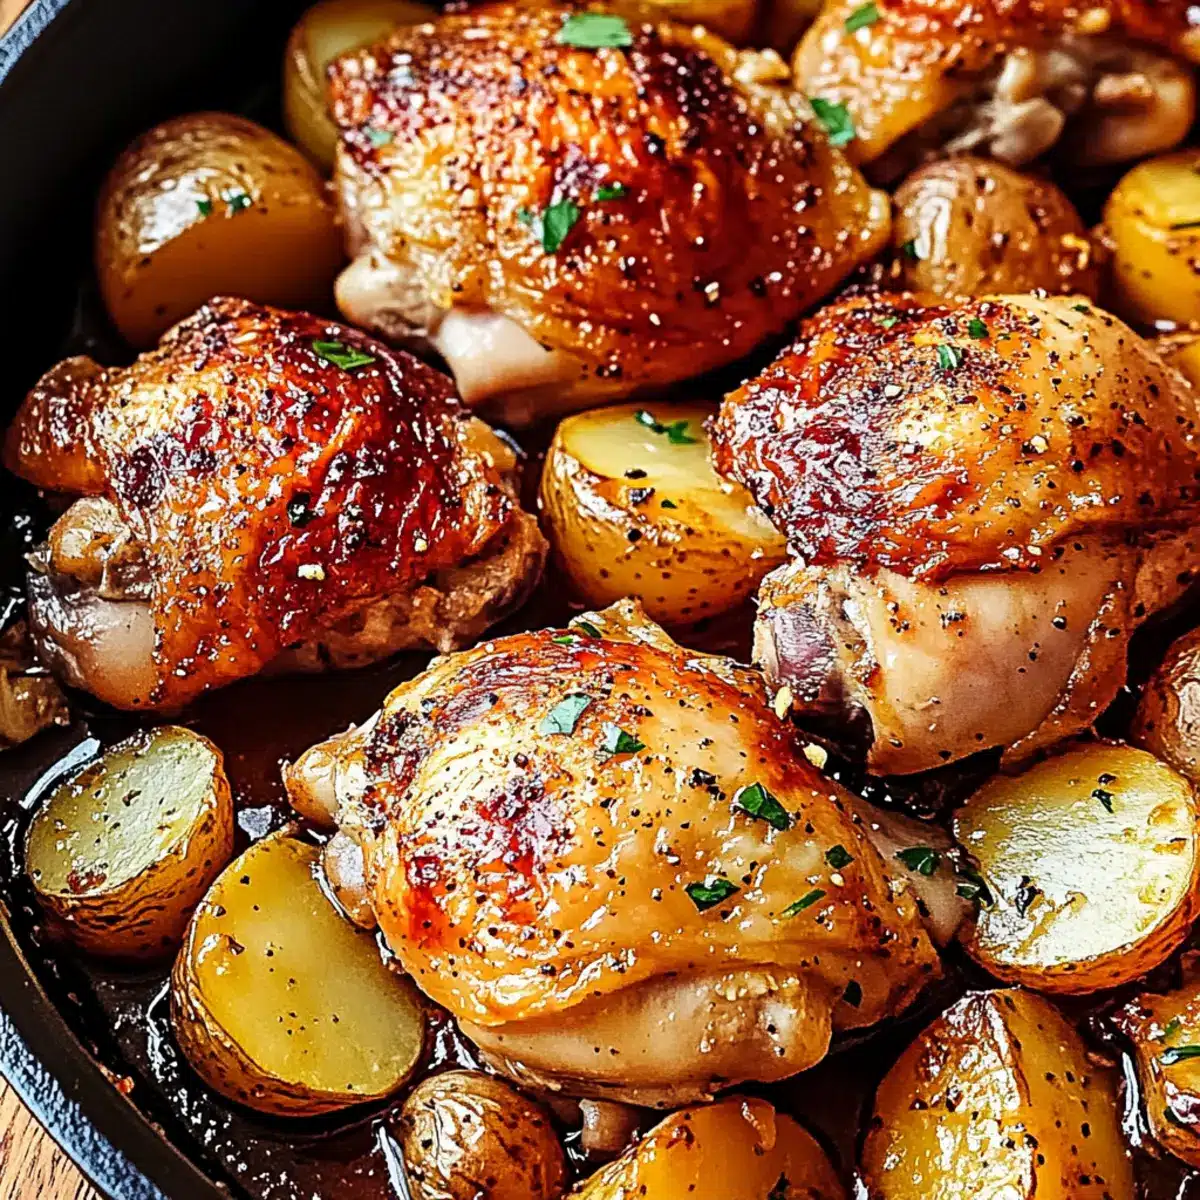
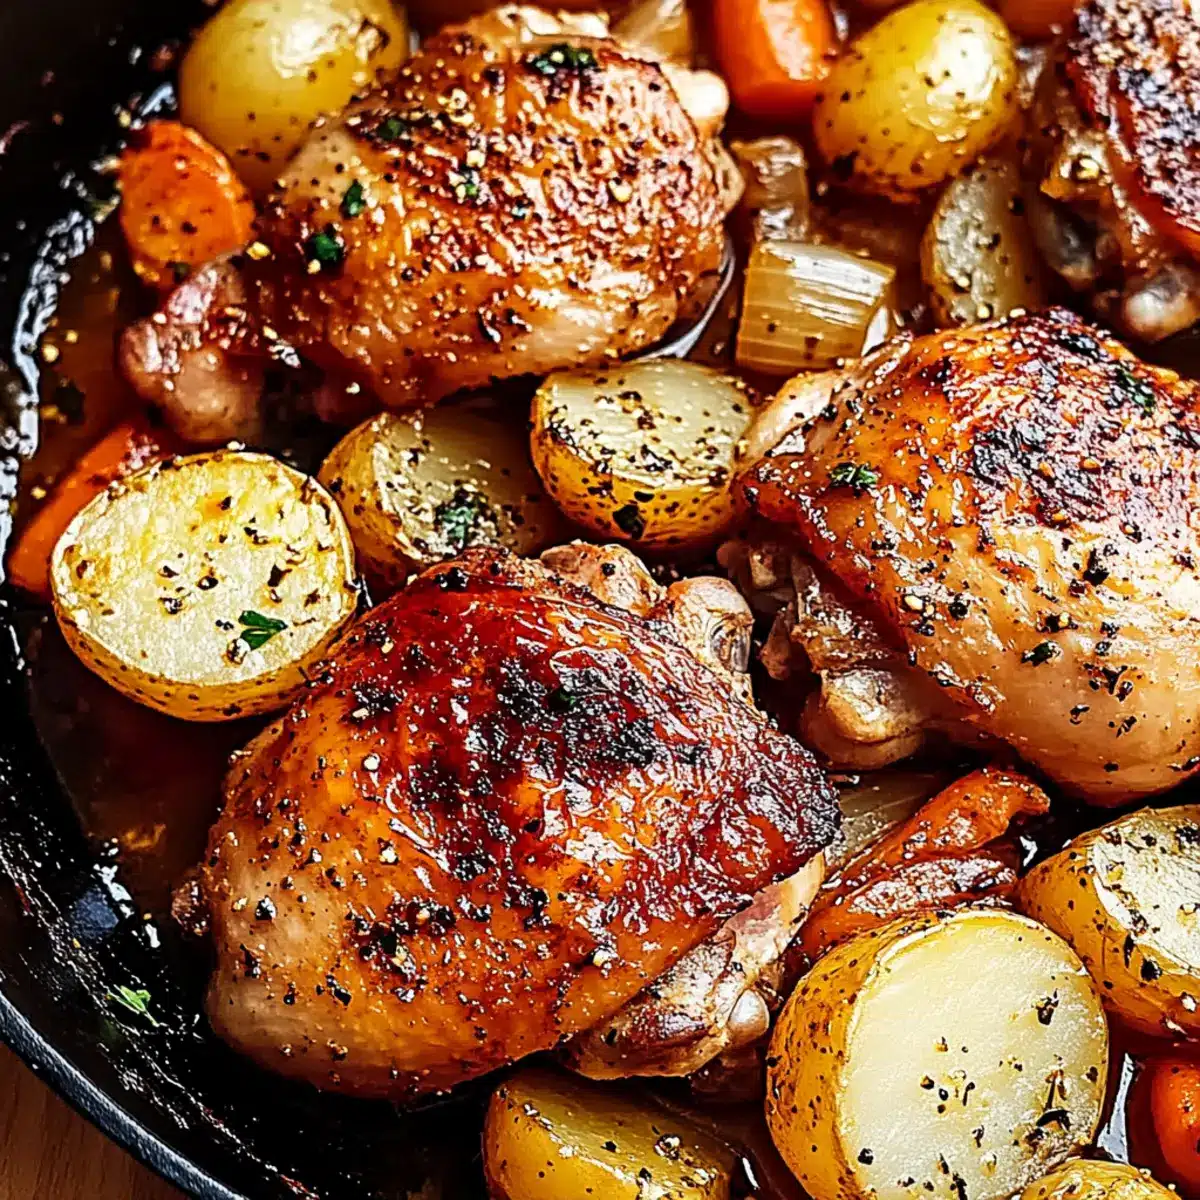
Once done, carefully remove the Dutch oven from the oven and let it rest uncovered for a few minutes. This resting period allows the juices to redistribute throughout the chicken. Serve warm, spooning the hearty vegetables and flavorsome broth over the chicken for a comforting family meal that everyone will love.
What to Serve with Dutch Oven Braised Chicken Thighs
The aroma of slow-cooked chicken wafts through your home, inviting everyone to gather at the table for a delicious family feast.
-
Creamy Mashed Potatoes: The velvety texture of mashed potatoes complements the tender chicken perfectly, soaking up every flavorful drop of the savory sauce.
-
Garlic Green Beans: Fresh green beans sautéed with garlic bring a pop of color and a light crunch, balancing the richness of the braised dish.
-
Hearty Crusty Bread: Served warm, crusty bread is perfect for mopping up the delicious gravy, adding a satisfying chew to every bite.
-
Crisp Garden Salad: A refreshing salad with mixed greens and tangy vinaigrette adds a bright and healthy contrast to the savory chicken, enhancing the overall experience.
-
Roasted Brussels Sprouts: The caramelized outer leaves of Brussels sprouts provide a delightful bitterness that cuts through the dish’s heavier flavors, offering a well-rounded meal.
-
Homemade Apple Pie: A warm dessert like apple pie brings a sweet finish to the meal, creating a comforting sense of nostalgia with every slice.
-
Chardonnay or Pinot Grigio: A glass of chilled white wine complements the savory nature of the dish, adding a refreshing element that enhances the flavors of the chicken.
Let your culinary creativity shine as you create a memorable meal around this delightful centerpiece!
Variations & Substitutions for Roasted French Garlic Chicken
Feel free to play around with these variations to put your unique spin on this delicious dish!
-
Herb Infusion: Swap out dried thyme for rosemary or sage to give your chicken a delightful aroma and distinct flavor twist.
-
Add Heat: For a little kick, sprinkle red pepper flakes or add diced jalapeños to the vegetable mix before baking. This adds enticing heat that balances the rich flavors.
-
Vegetable Swap: Use root vegetables like parsnips or turnips instead of potatoes for an earthy flavor. You can also toss in your favorite seasonal veggies for a fresh twist.
-
Smoky Flavor: Trade regular paprika for smoked paprika to infuse a deep, rich bond of smokiness with every bite. It gives a whole new dimension to the dish!
-
Wines & Broths: If you prefer not to use wine, feel free to add more chicken broth or a splash of white balsamic vinegar to elevate tanginess without compromising flavor.
-
Zesty Touch: Just before serving, a splash of fresh lemon juice brightens the dish, offering a refreshing contrast to the hearty flavors.
-
Creamy Finish: For a touch of creaminess, stir in a tablespoon of heavy cream right before serving. This smooths out the broth beautifully while keeping it comforting.
Embrace your creativity in the kitchen! And if you love rich, garlicky flavors, be sure to check out my Garlic Butter Chicken or add a warm bowl of Roasted Garlic Soup to your meal plan. Each serves as a fantastic compliment to this braised chicken!
Expert Tips for Dutch Oven Braised Chicken Thighs
-
Perfect Sear: Ensure the Dutch oven is adequately preheated to achieve a golden-brown skin. A proper sear locks in all the chicken’s juices for ultimate flavor.
-
Mind the Overcrowding: Avoid overcrowding your pot when searing the chicken. If necessary, work in batches to ensure each piece gets the attention it needs for a perfect finish.
-
Flavors Galore: Don’t skimp on seasoning! Adjust salt and pepper according to your taste preferences to elevate the overall flavor of the dish.
-
Temperature Check: Use an instant-read thermometer for precision. Chicken is perfect at 165°F (75°C); this ensures it’s juicy and safe to eat.
-
Aromatic Boost: For an extra kick, you can mix in other herbs like rosemary or sage. This will enhance the flavor profile of your Dutch Oven Braised Chicken Thighs and impress your family!
How to Store and Freeze Dutch Oven Braised Chicken Thighs
Fridge: Store any leftover Dutch oven braised chicken thighs in an airtight container for up to 3 days. This keeps them tender and flavorful for future meals.
Freezer: For longer storage, freeze the chicken and vegetables in a freezer-safe container for up to 3 months. Allow the dish to cool completely before freezing to preserve texture.
Reheating: To reheat, thaw in the fridge overnight, then warm in the oven at 350°F (175°C) for about 20-25 minutes. This method retains moisture and flavor.
Make Ahead Options
These Dutch Oven Braised Chicken Thighs are perfect for meal prep enthusiasts! You can season the chicken thighs and chop the vegetables up to 24 hours in advance, storing them in the refrigerator in airtight containers to maintain freshness. This allows the flavors to meld beautifully before cooking. Additionally, you can fully cook the dish and refrigerate it for up to 3 days. When ready to enjoy, simply reheat gently on the stove over low heat until warmed through, adding a splash of broth if necessary to keep it moist. With these make-ahead tips, you can effortlessly serve a delicious, stress-free meal anytime!

Dutch Oven Braised Chicken Thighs Recipe FAQs
How do I select the best chicken thighs?
Absolutely! When picking chicken thighs, look for pieces that are plump and have smooth, unblemished skin. The meat should be a nice shade of pink, and avoid any with dark spots or a dull color. Fresh chicken should have a clean, mild smell.
How long can I store leftovers, and what’s the best way?
You can store leftover Dutch oven braised chicken thighs in an airtight container in the fridge for up to 3 days. To keep it tasting great, ensure it’s sealed well to prevent any odors from other foods.
Can I freeze the braised chicken thighs?
Very! To freeze, let the chicken cool completely. Place it in a freezer-safe container or a heavy-duty freezer bag, and store it for up to 3 months. When you’re ready to enjoy it again, thaw in the refrigerator overnight, then reheat gently in your oven for optimal texture.
What if my chicken thighs are tough after cooking?
If your chicken turns out tougher than expected, it may need more cooking time. To rescue it, return the chicken to the Dutch oven with a bit of broth or liquid, cover, and cook on low for an additional 15-20 minutes. This should help tenderize it further.
Are there any dietary considerations I should keep in mind?
Definitely! If you’re preparing this dish for someone with allergies, be cautious with ingredients like chicken broth and white wine, as they can contain sulfites or other allergens. For a kid-friendly version, keep seasonings mild and avoid adding too much salt. Always check product labels to ensure safety!
Roasted French Garlic Chicken: Your Ultimate Family Dinner Delight
Ingredients
Equipment
Method
- Preheat your oven to 375°F (190°C) for a perfectly braised Dutch oven chicken.
- Season the bone-in skin-on chicken thighs generously with salt and pepper, then let them rest.
- In a large Dutch oven, heat olive oil over medium-high heat and sear the chicken thighs skin-side down for 5-7 minutes until golden brown.
- Remove the chicken and sauté chopped potatoes, carrots, and onion in the same pot for about 5 minutes until they begin to soften.
- Stir in minced garlic, dried thyme, paprika, and a pinch of salt and pepper; cook for 1-2 minutes until fragrant.
- Pour in chicken broth and dry white wine, scraping up any browned bits. Return chicken thighs skin-side up into the pot.
- Cover the Dutch oven and bake for about 1 hour or until the chicken is tender and juices run clear.
- Let it rest for a few minutes before serving warm, spooning the vegetables and broth over the chicken.
Leave a Reply