
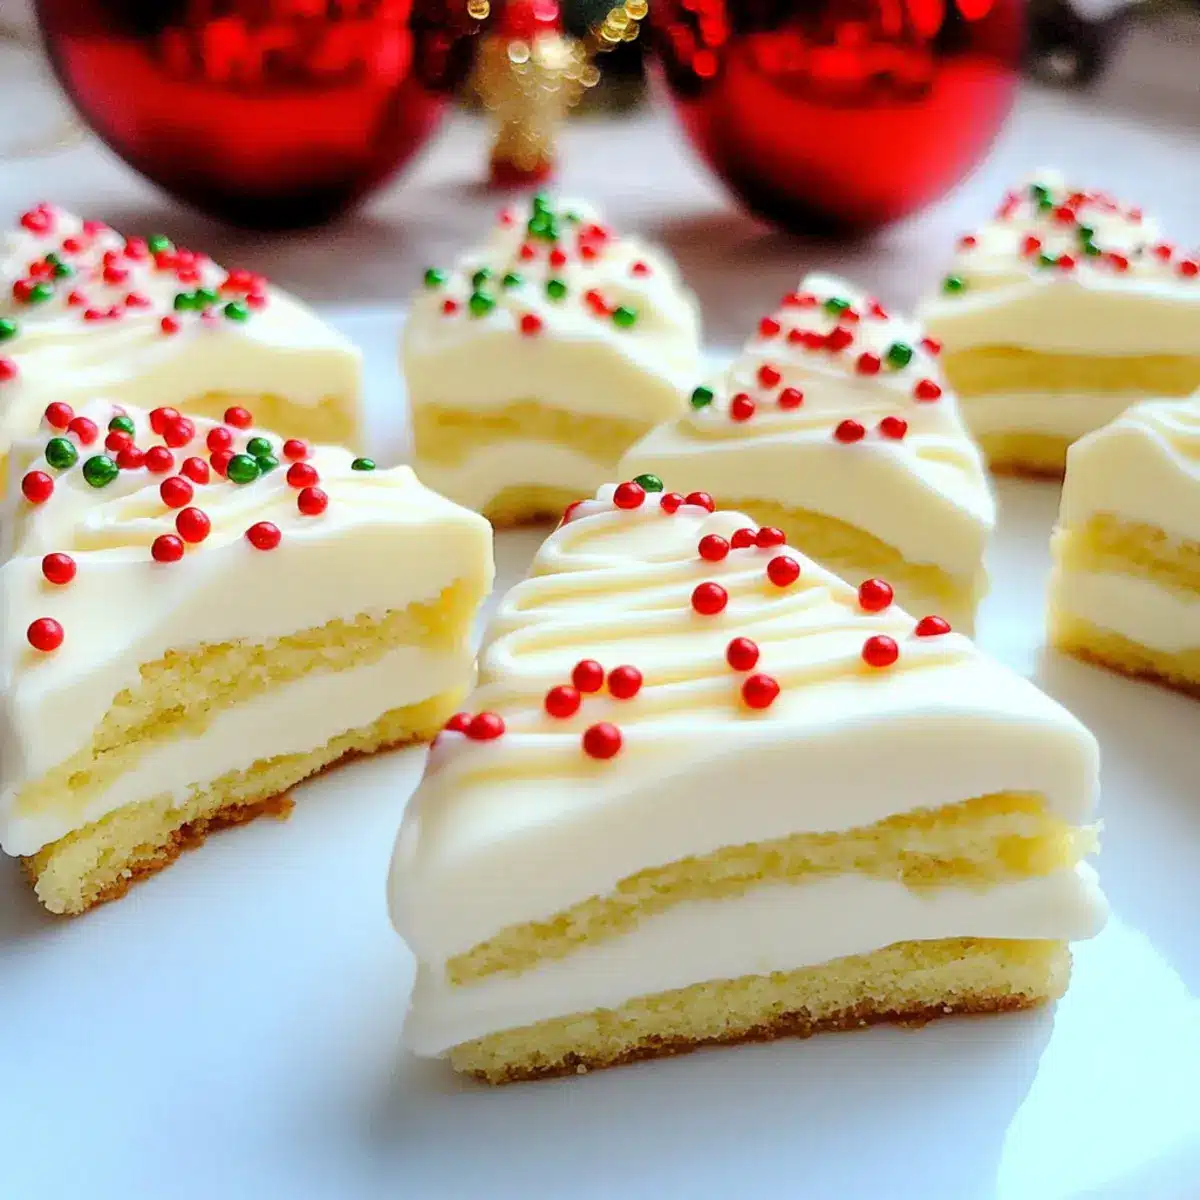
As I unwrapped this nostalgic treat, it hit me: the joy of childhood holidays could be captured in a cake. My Homemade Little Debbie Christmas Tree Cakes are the essence of festive spirit, bringing back the excitement of finding those iconic green trees in my lunchbox. These charming delights combine fluffy vanilla cake with a heavenly marshmallow filling, making them a kid-friendly holiday treat that’s easy to whip up at home. Not only do they evoke cherished memories, but they also provide a delightful diversion from store-bought sweets, allowing you to bring a personal touch to your celebrations. Curious to see how to create these sweet little trees? Let’s dive into the magic of homemade holiday baking!
Why Make Homemade Christmas Tree Cakes?
Nostalgic Charm: These delightful cakes take you back to childhood, reminding you of cozy holiday moments filled with sweet treats.
Homemade Magic: Made entirely from scratch, they offer a personalized touch that store-bought versions just can’t match.
Kid-Friendly Fun: Kids will love both the fun shape and the sweet marshmallow filling—perfect for holiday gatherings or as creative gifts.
Easy Baking Process: You don’t need fancy skills—just mix, bake, and assemble these charming cakes! Plus, they come together quickly for a time-saving festive treat.
Endless Creativity: Feel free to explore variations by swapping flavors, such as making chocolate cake or adding a splash of peppermint extract for a seasonal twist.
Perfect for Sharing: Your family and friends will adore these tasty treats, making them a hit at holiday parties or family dinners. Try pairing them with other festive ideas like Cheesy Christmas Tree or Mini Christmas Cakes for a complete holiday spread!
Little Debbie Christmas Tree Cake Ingredients
For the Cake:
- All-Purpose Flour – Provides structure and stability to the cake; opt for gluten-free flour for a lovely alternative.
- Baking Powder – Acts as the leavening agent to help the cake rise; freshness is key for the best results.
- Salt – Enhances flavor and balances the sweetness perfectly.
- Unsalted Butter (room temperature) – Adds richness and moisture; can be replaced with margarine if preferred.
- Sugar – Gives sweetness and contributes to the cake’s delightful texture.
- Eggs (room temperature) – Binds ingredients and adds moisture; flax eggs or applesauce make great substitutes.
- Vanilla Extract – Brings a lovely aromatic flavor; using pure vanilla enhances the overall taste.
- Buttermilk (room temperature) – Tenderizes the cake and adds a touch of tanginess; easily made with milk and vinegar if you’re short on supplies.
For the Filling:
- Marshmallow Fluff – The star of the filling, providing a sweet, fluffy consistency that kids will adore.
- Confectioner’s Sugar – Adds sweetness and thickness to both the filling and coating; essential for that perfect texture.
For the Coating:
- Candy Melts (white) – Creates a smooth, attractive coating; feel free to substitute with tempered white chocolate.
- Coconut Oil – Used with candy melts to maintain consistency; if using chocolate, you might not need it at all.
For the Decoration:
- Green Sugar Sprinkles – Adds a festive touch for visual appeal and fun; sprinkle generously!
- Red Food Dye – Use to enhance your decorations and make your cakes truly festive.
Diving into these ingredients will put you well on your way to creating your very own little taste of nostalgia with Little Debbie Christmas Tree Cakes. Happy baking!
Step‑by‑Step Instructions for Homemade Little Debbie Christmas Tree Cakes
Step 1: Prepare Your Pans
Begin by preheating your oven to 350°F (175°C). While it heats, prepare two quarter sheet pans or one half sheet pan by greasing them well and lining with parchment paper. This will ensure that your cake layers release easily after baking, which is crucial for the final assembly of your Homemade Little Debbie Christmas Tree Cakes.
Step 2: Combine Dry Ingredients
In a medium mixing bowl, whisk together the all-purpose flour, baking powder, and salt until evenly mixed. This step is vital as it ensures the leavening agents are dispersed throughout the flour, which will help your cakes rise evenly. Set this mixture aside while you work on the wet ingredients for your cakes.
Step 3: Cream Butter and Sugar
In a large mixing bowl, beat the room-temperature unsalted butter and granulated sugar together using an electric mixer on medium speed until the mixture is light and fluffy, about 3-5 minutes. This process adds air to the batter, contributing to the fluffy texture of your Homemade Little Debbie Christmas Tree Cakes. Then, add in the eggs and vanilla extract, mixing until fully incorporated.
Step 4: Mix Wet and Dry Ingredients
Gradually add the dry flour mixture to the butter mixture while alternating with buttermilk, beginning and ending with the dry ingredients. Mix just until everything is combined; over-mixing might yield a dense cake. You should see a thick, smooth batter that’s ready to transform into irresistible cake layers.
Step 5: Bake the Cake Layers
Pour the batter evenly into the prepared pans, and smooth the tops with a spatula. Place the pans in the preheated oven and bake for 25-30 minutes, or until a toothpick inserted into the center comes out clean. Once done, the cakes should be golden brown with a slight bounce when touched. Remove them from the oven and allow them to cool in the pans for about 10 minutes before transferring them to wire racks.
Step 6: Prepare the Filling
While the cakes cool, prepare the filling. In a clean bowl, beat the softened butter and marshmallow fluff together with an electric mixer until smooth and combined. Gradually incorporate the confectioner’s sugar, beating until the mixture reaches a thick and spreadable consistency. This fluffy filling is what makes your Homemade Little Debbie Christmas Tree Cakes divine, so make sure it’s perfectly whipped.
Step 7: Assemble the Layers
Once the cake layers are completely cooled, stack one layer on a serving plate or cutting board. evenly spread the marshmallow filling over the top before gently placing the second cake layer on top. To make later cutting easier, place the stacked cakes in the freezer for about 30 minutes. This chilling step helps firm up the layers and makes for cleaner edges.
Step 8: Prepare the Coating
In a microwave-safe bowl, combine the white candy melts and coconut oil. Microwave in 30-second intervals, stirring in between, until melted and smooth. It’s important to have a consistent, creamy texture that can coat your cakes well. If necessary, adjust with a bit more coconut oil to achieve the right pouring consistency.
Step 9: Dip the Cakes
Remove the chilled stacked cakes from the freezer. Carefully dip the entire cake into the melted candy coating, ensuring that all sides are covered. Allow the excess coating to drip off before placing the coated cakes on a wire rack lined with parchment paper to set. This is the final touch that transforms your Homemade Little Debbie Christmas Tree Cakes into festive delights.
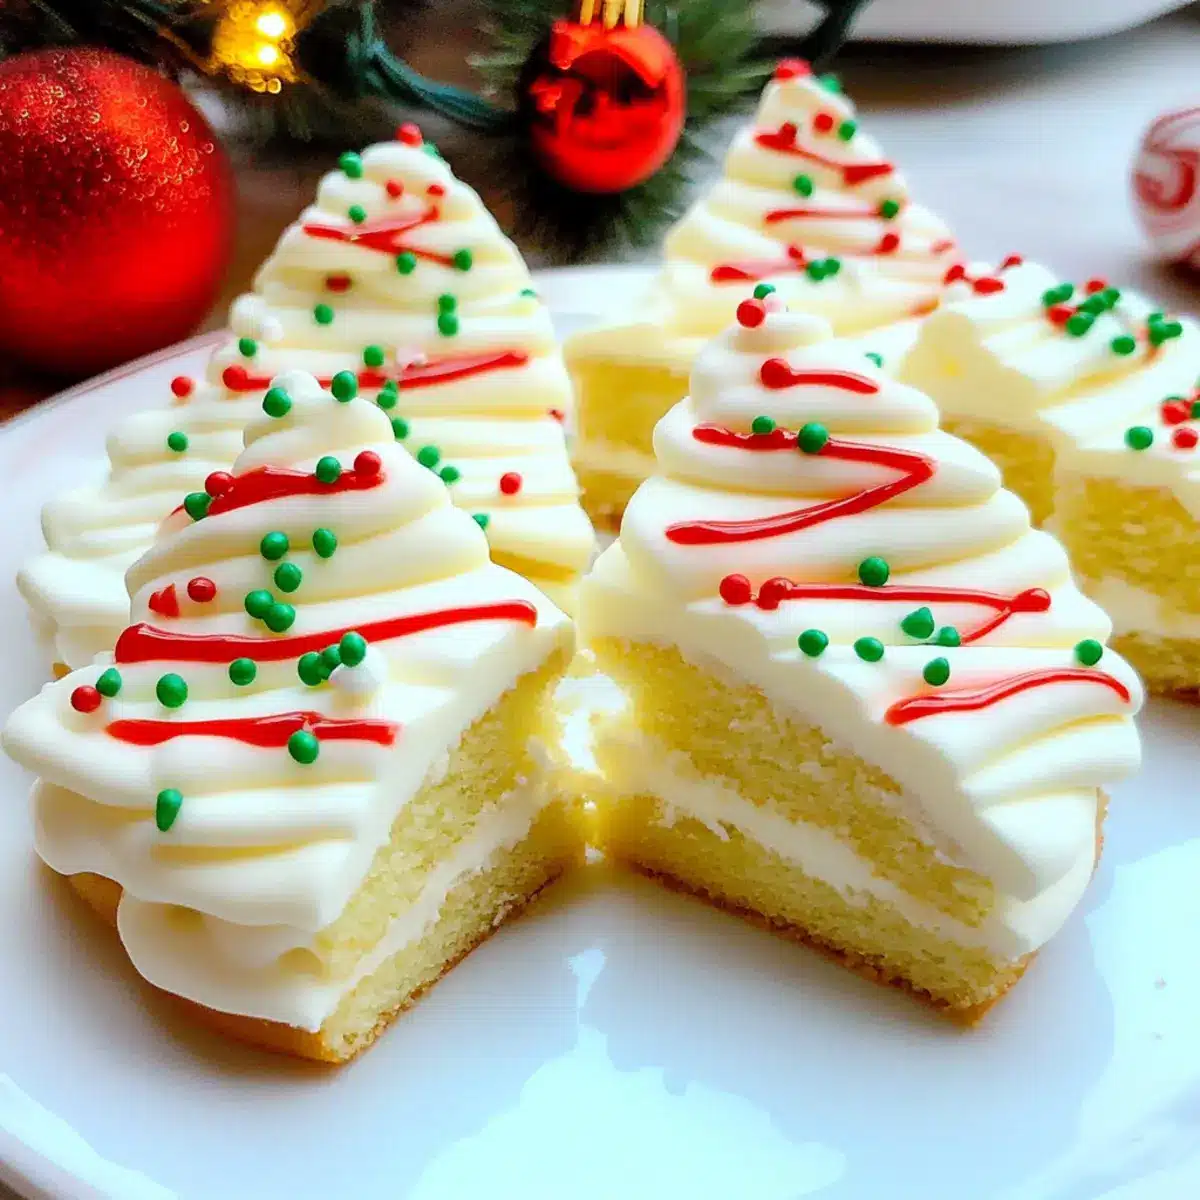
Step 10: Add Festive Decorations
Once the coating has set, it’s time to decorate! Sprinkle green sugar sprinkles generously over the top for that classic Christmas tree look. For an extra festive touch, use red food dye to create accents or decorations as desired. These finishing touches not only make your cakes visually appealing but also add a bit of sparkle to your festive treats.
Make Ahead Options
These Homemade Little Debbie Christmas Tree Cakes are perfect for busy holiday bakers looking to save time! You can prepare the cake layers up to 3 days in advance by baking, cooling, and wrapping them tightly in plastic wrap before refrigerating. The marshmallow filling can also be whipped up a day ahead and stored in an airtight container to maintain its fluffy texture. When ready to serve, simply assemble the layers with the filling, freeze for about 30 minutes to make cutting easier, and then dip in the candy coating. This approach ensures your festive treats remain just as delicious, allowing you to enjoy hassle-free holiday baking!
What to Serve with Homemade Little Debbie Christmas Tree Cakes
Pairing these delightful holiday treats with the right accompaniments can transform your festive gathering into something truly special.
-
Warm Spiced Apple Cider: The cozy spices in this drink complement the sweet marshmallow filling perfectly, enhancing the holiday spirit.
-
Holiday Peppermint Bark: A crunchy, sweet treat that adds a refreshing contrast to the soft, fluffy cakes—perfect for showcasing festive flavors.
-
Chocolate Ganache: A rich and velvety addition that drizzles beautifully over the cakes, intensifying the chocolate flavors and adding a touch of elegance.
-
Vanilla Ice Cream: Creamy, cold ice cream pairs wonderfully with the warm, festive cakes, providing a luscious balance of textures and flavors.
-
Sugary Cookie Platter: Offer assorted Christmas cookies for guests to enjoy alongside; their varied textures and flavors will complement the cakes beautifully.
-
Fresh Fruit Salad: A light, refreshing choice that adds bright flavors, ease, and color to your dessert table—a palate cleanser alongside the rich cakes.
-
Homemade Hot Chocolate: Luxurious and velvety, this hot beverage will warm hearts, making it the ideal pairing to enjoy while indulging in holiday memories.
-
Cheesecake Bites: Rich, creamy bites that contrast with the airy cakes; these are perfect as a rich accompaniment for those who crave decadence.
These delightful pairings not only enhance the experience of enjoying Homemade Little Debbie Christmas Tree Cakes but also create a warm atmosphere for sharing joy and laughter during the holiday season.
Little Debbie Christmas Tree Cake Variations
Feel free to let your creativity shine with these delicious twists on the classic!
-
Chocolate Cake: Swap the vanilla base for a rich chocolate cake for a decadent variation that’s sure to impress.
-
Almond Extract: Replace vanilla extract with almond extract in the filling for a delightful nutty flavor that adds a unique touch.
-
Peppermint Twist: A few drops of peppermint extract in the filling can create a refreshing holiday flavor, perfect for winter gatherings.
-
Gluten-Free: Use a high-quality gluten-free flour blend to make these cakes suitable for gluten-sensitive family members without sacrificing taste.
-
Nutty Texture: Add chopped nuts to the filling for a delightful crunch that complements the soft cake, making each bite even more enjoyable.
-
Colorful Decorations: Instead of just green sprinkles, mix in alternate colors like red or gold for a vibrant festive appearance that dazzles every holiday table.
-
Mini Versions: Bake the batter in mini cake molds for charming bite-sized treats; they’ll be perfect for parties or as fun kids’ gifts.
Make sure to pair these with other festive recipes like the delightful Mini Christmas Cakes or the whimsical Cheesy Christmas Tree for an unforgettable holiday spread. Let the baking magic begin!
Expert Tips for Little Debbie Christmas Tree Cakes
-
Room Temperature Ingredients: Ensure your butter and eggs are at room temperature for better emulsion, resulting in a fluffier cake.
-
Chill Before Cutting: Once assembled, chilling the cakes in the freezer for at least 30 minutes makes cutting more precise and cleaner.
-
Smooth Filling: When whipping the marshmallow fluff filling, cream the butter and fluff until completely smooth before adding sugar to avoid lumps.
-
Monitor Baking Time: Keep an eye on the cakes as they bake; overbaking can lead to dryness. A toothpick should come out clean but the cakes should not be too brown.
-
Decorative Sprinkling: For the green sugar sprinkles, sprinkle generously but shake off any excess to avoid clumping on your Little Debbie Christmas Tree Cakes.
Storage Tips for Little Debbie Christmas Tree Cakes
Fridge: Store your cakes in an airtight container in the refrigerator for up to 1 week. This helps maintain their freshness and prevents them from drying out.
Freezer: For longer storage, wrap individual cakes tightly in plastic wrap and then foil, placing them in the freezer for up to 3 months. Thaw in the fridge before serving.
Reheating: If you prefer a warm treat, pop your thawed cakes in the microwave for about 10-15 seconds. Enjoy the delightful marshmallow filling as it softens again.
Room Temperature: If you plan to eat them within a couple of days, they can be kept at room temperature in a covered container but consume within 2 days for best taste.
Little Debbie Christmas Tree Cakes Recipe FAQs
How do I choose the right ingredients for my Christmas Tree Cakes?
Absolutely! For the best results, ensure your ingredients are fresh. Use all-purpose flour that’s not expired, and check that your baking powder is active by adding a teaspoon to water; it should fizz! Choose room temperature butter and eggs for better mixing and a fluffier texture, and if you can, use pure vanilla extract for the richest flavor.
What’s the best way to store these cakes after baking?
Very! Once your Homemade Little Debbie Christmas Tree Cakes have cooled completely, store them in an airtight container in the refrigerator for up to 1 week. This will keep them fresh and moist. Just remember to layer parchment paper between cakes if you stack them to avoid sticking!
Can I freeze the Christmas Tree Cakes?
Absolutely! To freeze, wrap each cake tightly in plastic wrap, followed by a layer of aluminum foil, then place them in the freezer. They can be stored this way for up to 3 months. When you’re ready to enjoy them, simply thaw in the refrigerator overnight, and they’ll taste as delightful as when they were first made!
What should I do if my cake layers seem dry after baking?
If you find your cake layers are dry, it could be due to overbaking or using cold ingredients. Always check your cakes around the 25-minute mark and look for a fluffy texture and a toothpick that comes out clean without crumbs. If your layers do turn out dry, simply add a drizzle of buttermilk or milk over them before adding the marshmallow filling; this can help reintroduce moisture.
Can I make these cakes gluten-free?
Yes, indeed! To accommodate gluten-free diets, substitute the all-purpose flour with a 1:1 gluten-free baking flour blend. Just make sure the blend contains xanthan gum for the best texture. You can also check the labels on other ingredients like baking powder and confectioner’s sugar to ensure they are gluten-free. Enjoy baking these tasty creations without worry!
Irresistible Little Debbie Christmas Tree Cake Made at Home
Ingredients
Equipment
Method
- Preheat your oven to 350°F (175°C) and prepare pans by greasing and lining with parchment paper.
- In a medium bowl, whisk together flour, baking powder, and salt. Set aside.
- In a large bowl, beat butter and sugar until fluffy. Add eggs and vanilla.
- Gradually mix in dry ingredients with buttermilk until combined.
- Pour the batter into pans and bake for 25-30 minutes until a toothpick comes out clean. Cool for 10 minutes before transferring to racks.
- Beat butter and marshmallow fluff until smooth, gradually adding confectioner’s sugar.
- Spread filling on one layer of cake, stack another layer on top, and freeze for 30 minutes.
- Melt candy melts and coconut oil until smooth. Dip the cakes into the coating and allow excess to drip off.
- Once set, sprinkle with green sugar sprinkles and use red dye for decorations.
Leave a Reply