
In the heart of winter, there’s something magical about a cookie that melts in your mouth—and these Peppermint Meltaways perfectly capture that enchantment! As the holiday season approaches, the joy of treating family and friends to homemade delights becomes a cherished ritual. This easy, no-bake recipe allows you to whip up light and buttery cookies that combine the refreshing zing of peppermint with a melt in your mouth texture. Whether you’re looking to impress guests at festive gatherings or simply craving a sweet indulgence, these cookies are a brilliant crowd-pleaser. Plus, they store wonderfully, making them a go-to treat throughout the season. Ready to bring some holiday cheer to your kitchen? Let’s dive into the simple steps for crafting these delightful Peppermint Meltaways!
Why are Peppermint Meltaways a Must-Try?
Simplicity: The recipe is incredibly easy to follow, making it perfect for bakers of all skill levels.
Melt-in-Your-Mouth Texture: These cookies are designed to be light and buttery, literally melting away with each bite, which is always a hit during the holidays.
Festive Flavor: The refreshing peppermint extract makes these cookies ideal for holiday gatherings, offering a delightful taste that pairs perfectly with a warm drink.
Versatility: Feel free to experiment by adding nuts or chocolate chips, or even switch up the flavor profile by using different extracts.
Make-Ahead Convenience: Get a head start on your holiday baking! The dough can be prepared in advance and stored in the fridge for fresh cookies whenever the craving strikes.
Crowd-Pleasing Appeal: Whether for cookie exchanges, holiday parties, or just a sweet treat at home, these Peppermint Meltaways are a surefire way to spread joy.
Peppermint Meltaways Ingredients
• Get ready to create irresistible sweets!
For the Cookies
- Butter – Provides richness and a soft texture; use unsalted for better control over saltiness.
- Confectioners’ Sugar – Sweetens the cookies and helps achieve a meltaway texture; it’s key to the cookie’s lightness.
- Peppermint Extract – Infuses a fresh, minty flavor; substitute with vanilla extract for a different twist.
- All-Purpose Flour – Gives structure to the cookies; for a gluten-free version, use a gluten-free flour blend.
- Cornstarch – Ensures a tender meltaway texture; do not substitute if seeking traditional meltaway consistency.
- Salt – Enhances flavor balance; keep it minimal; kosher or sea salt can also be used.
For the Frosting
- Butter – Combines with sugar for a creamy frosting; ensure it’s softened for easy mixing.
- Confectioners’ Sugar – Sweetens and thickens the frosting; it helps create that lovely, smooth layer on top.
- Milk – Adds creaminess to the frosting; substitute with a non-dairy alternative for vegan options.
- Peppermint Extract – Provides a delicious mint flavor for frosting; enhances the overall peppermint experience.
- Food Coloring – Gives visual appeal; add a few drops to elevate the festive spirit!
For Finishing Touches
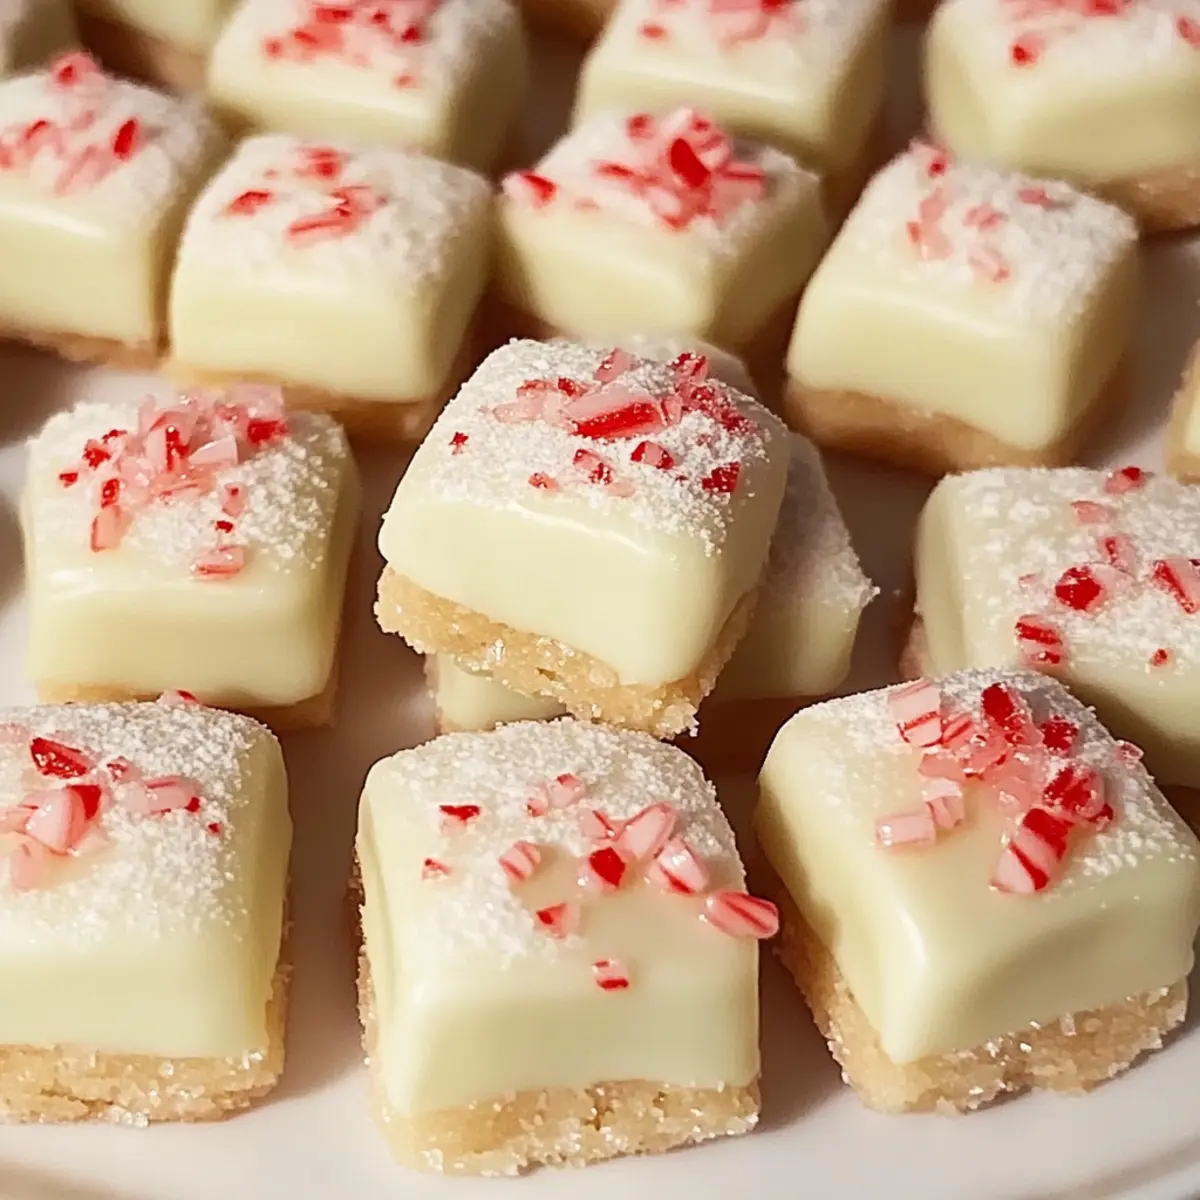
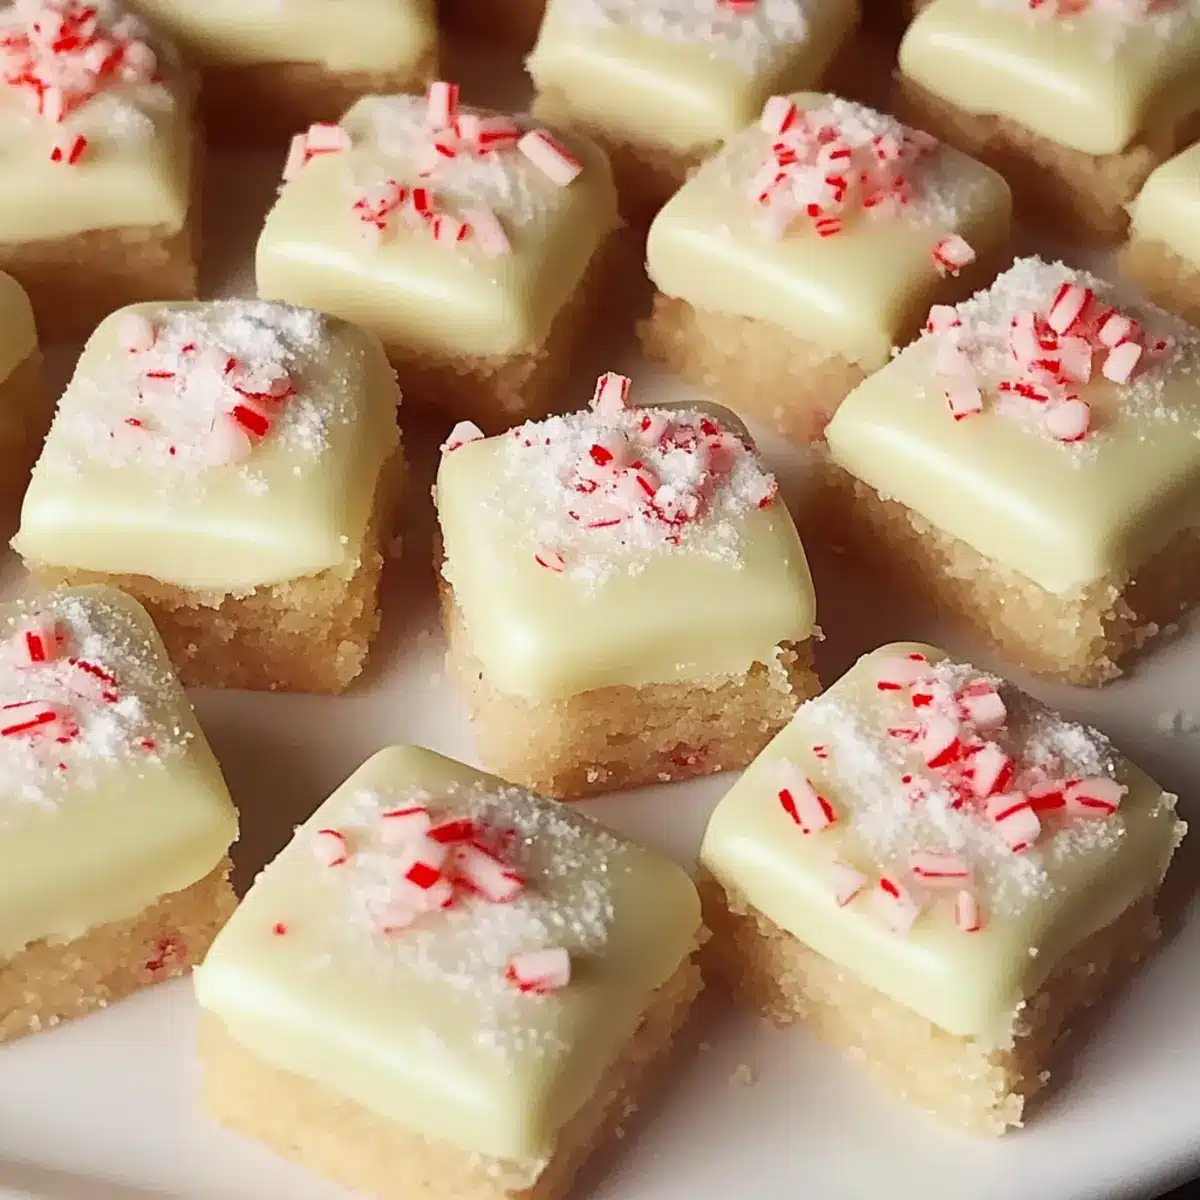
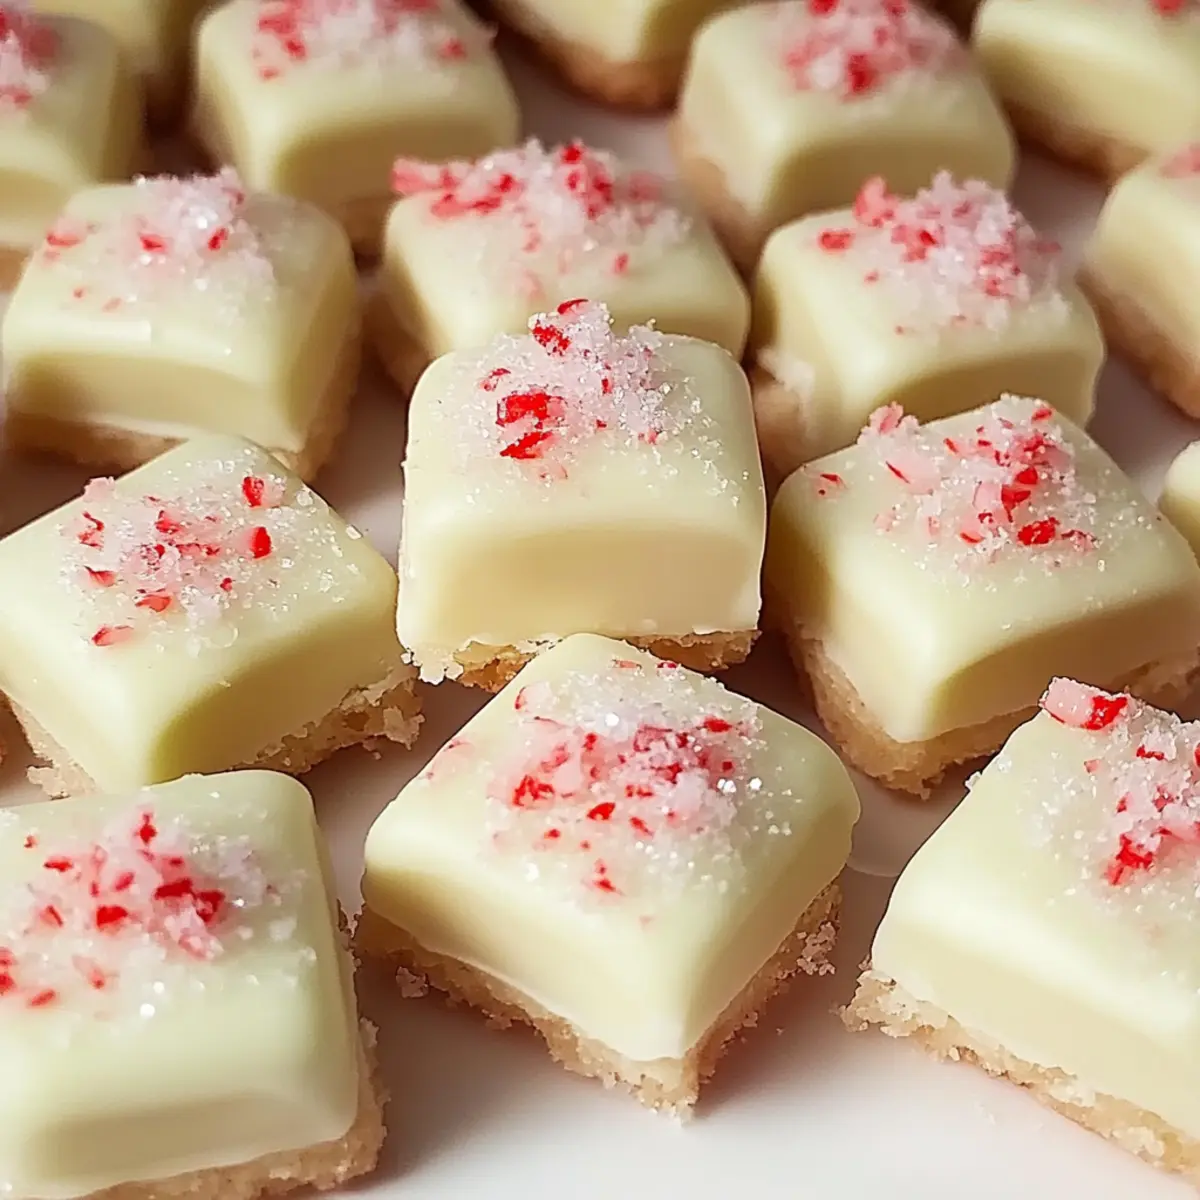
- Crushed Peppermint Candies – Used as a garnish for added crunch and festive appeal; they’re perfect for a holiday touch.
Step‑by‑Step Instructions for Peppermint Meltaways
Step 1: Cream the Butter and Sugar
In a large mixing bowl, use an electric mixer to cream together 1 cup of softened unsalted butter and 1 cup of confectioners’ sugar until the mixture appears light and fluffy, about 3-5 minutes. This step helps create that melt-in-your-mouth texture crucial for your Peppermint Meltaways, so ensure there are no lumps in the mixture.
Step 2: Incorporate the Peppermint
Slowly add in 1 teaspoon of peppermint extract to the creamed butter and sugar mixture, mixing until fully incorporated. This addition will give your cookies a refreshing minty flavor, enhancing the holiday spirit. Make sure to scrape down the sides of the bowl to capture all the ingredients.
Step 3: Mix the Dry Ingredients
In a separate bowl, whisk together 2 cups of all-purpose flour, 1/4 cup of cornstarch, and 1/4 teaspoon of salt until well blended. This combination of dry ingredients is essential for giving your Peppermint Meltaways structure while maintaining their tender texture. Gradually incorporate this dry mix into the wet ingredients, ensuring a smooth dough forms.
Step 4: Shape the Dough
Once the dough comes together, use your hands to shape it into small balls, about 1 inch in diameter. Roll each ball in additional confectioners’ sugar for a sweet coating before placing them evenly spaced on a lined baking sheet. This little extra sugar will create a beautiful dusted effect on your meltaways.
Step 5: Chill the Dough
Cover the baking sheet with plastic wrap and place it in the refrigerator for at least 30 minutes. Chilling the dough will help it maintain its shape during baking, ensuring those adorable round cookies emerge perfectly from the oven. While you wait, preheat your oven for the next step!
Step 6: Bake the Cookies
Preheat your oven to 350°F (175°C). Once the dough is chilled, bake the cookies for 10-12 minutes, until they are set but not browned. Your Peppermint Meltaways should look soft and lightly puffed—keep an eye on them to prevent overbaking, which can lead to a dry texture.
Step 7: Cool the Cookies
After baking, remove the cookies from the oven and allow them to cool on the baking sheet for about 5 minutes before transferring them to a wire rack. This cooling time helps them firm up slightly while retaining their meltaway quality, making them easier to frost later.
Step 8: Prepare the Frosting
In a medium bowl, beat together 1/4 cup of softened butter and 1 cup of confectioners’ sugar until creamy. Gradually mix in 2 tablespoons of milk, 1 teaspoon of peppermint extract, and a few drops of food coloring, adjusting the consistency until it’s smooth and spreadable.
Step 9: Frost and Garnish
Once the cookies are completely cool, spread a layer of frosting on top of each Peppermint Meltaway. Sprinkle crushed peppermint candies on top for a festive crunch and impressive finish. Allow the frosting to set slightly before serving, making them a delightful treat for any holiday gathering.
What to Serve with Peppermint Meltaways
Indulging in these creamy, melt-in-your-mouth cookies calls for delightful pairings to create the perfect holiday spread.
- Rich Hot Chocolate: The classic warmth of hot chocolate is a cozy companion, enhancing the minty freshness with its chocolaty depth.
- Whipped Cream Topping: A dollop of lightly sweetened whipped cream provides an airy texture that beautifully balances the cookies’ richness.
- Spiced Eggnog: This creamy, spiced drink adds a festive touch that complements the holiday flavors of peppermint perfectly.
- Mocha Coffee: The coffee’s robust flavor pairs wonderfully with the peppermint, making for a delightful combination that invigorates the palate.
- Chocolate-Dipped Strawberries: These add a sweet yet slightly tart freshness, creating an enjoyable contrast to the cookies’ buttery texture.
- Vanilla Ice Cream: The classic vanilla flavor brings cool creaminess to the party, making each bite of meltaway even more decadent and dreamy.
- Peppermint Bark: For a delightful mint explosion, serve alongside this crunchy treat—chocolate lovers will be in blissful harmony!
- Fruit Platter: Fresh fruits like oranges and strawberries provide a refreshing touch, cutting through the sweetness and adding vibrant color to your spread.
- Spiced Apple Cider: This warm beverage envelops you in festive warmth, harmonizing with the holiday spirit radiating from your Peppermint Meltaways.
Make Ahead Options
These Peppermint Meltaways are perfect for busy home cooks looking to save time during the holiday rush! You can prepare the dough up to 3 days in advance, keeping it refrigerated in an airtight container to maintain its quality. If you’d like to bake fresh cookies whenever the mood strikes, simply shape the dough into balls and freeze them for up to 1 month; just add a couple of extra minutes to the baking time when you’re ready to enjoy. For the frosting, whip it up ahead of time and store it in the refrigerator; just remember to give it a quick stir before using. With these make-ahead options, you’ll have delicious Peppermint Meltaways on hand, making your holiday gatherings more enjoyable with less stress!
Expert Tips for Peppermint Meltaways
-
Use Softened Butter: Ensure your butter is softened but not melted; this keeps the cookies from spreading too much while baking.
-
Chill the Dough: Don’t skip chilling! This helps the dough maintain its shape and results in the perfect meltaway texture.
-
Monitor Baking Time: Check for doneness at 10 minutes; overbaking will lead to dry cookies, ruining the melt-in-your-mouth experience of these Peppermint Meltaways.
-
Frost After Cooling: Wait until the cookies are completely cool before frosting to prevent melting and ensure beautiful, smooth icing.
-
Experiment with Flavors: Feel free to swap out peppermint extract for other flavors like vanilla or almond for a delicious twist on this classic holiday treat.
How to Store and Freeze Peppermint Meltaways
Airtight Container: Store your Peppermint Meltaways in an airtight container at room temperature for up to 1 week to maintain their delightful melt-in-your-mouth texture.
Refrigerator: For extended freshness, these cookies can be refrigerated for up to 2 weeks. Just ensure they’re in a sealed container to prevent them from drying out.
Freezer: Freeze the baked cookies for up to 3 months by placing them in a freezer-safe container with parchment paper between layers. To enjoy, simply thaw at room temperature and frost when ready.
Reheating: If desired, gently reheat in a microwave for a few seconds to regain that warm, soft texture before serving.
Peppermint Meltaways Variations & Substitutions
Feel free to get creative with your Peppermint Meltaways—each variation offers a delicious twist!
-
Gluten-Free: Use a gluten-free flour blend to make these meltaways suitable for gluten-sensitive friends and family.
-
Vegan: Substitute butter with coconut oil or a plant-based butter and use a non-dairy milk in the frosting for a vegan delight.
-
Chocolate Lovers: Add mini chocolate chips to the dough for a delightful surprise with each bite.
-
Nutty Twist: Incorporate finely chopped nuts, like walnuts or pecans, into the dough for an added crunch and flavor boost.
-
Citrus Zest: Grate some orange or lemon zest into the cookie mix for a refreshing citrus zing that complements the peppermint beautifully.
-
Different Extracts: Swap out peppermint extract for almond or vanilla extract for a whole new flavor profile; just remember to adjust the amount to taste!
-
Spicy Touch: For those who love a bit of heat, try adding a pinch of cayenne pepper or ground ginger to the dough for a unique flavor kick.
-
Alternative Frosting: Consider using a cream cheese frosting instead for a tangy, rich flavor that pairs fantastically with the cookies.
Each suggestion opens the door to a new version of these beloved cookies, allowing you to share even more joy during the holiday season! If you’re interested in learning more about holiday treat ideas or how to store cookies, check out my posts on easy cookie storage tips and fun holiday baking ideas.
Peppermint Meltaways Recipe FAQs
What type of butter should I use for the cookies?
Absolutely! I recommend using unsalted butter for these Peppermint Meltaways. It allows you to have full control over the saltiness of your cookies, ensuring they taste just right.
How should I store my Peppermint Meltaways?
You can store your Peppermint Meltaways in an airtight container at room temperature for up to 1 week. For extended freshness, refrigerate them for up to 2 weeks, but make sure they are in a sealed container to prevent drying out.
Can I freeze my Peppermint Meltaways?
Yes, you can! To freeze your baked cookies, place them in a freezer-safe container with parchment paper between layers to prevent sticking. These cookies can be frozen for up to 3 months. When you’re ready to enjoy, simply thaw them at room temperature and frost them before serving.
What if my dough is too crumbly?
If your dough is too crumbly, it may need a little more moisture. You can add a teaspoon of milk at a time until it comes together. Be careful not to add too much, as the dough can become too wet, affecting the texture of your cookies.
Can I make these cookies gluten-free?
Very much so! For a gluten-free version of your Peppermint Meltaways, you can substitute all-purpose flour with a gluten-free flour blend. Make sure to use one that has a one-to-one ratio for best results.
Is peppermint extract safe for pets?
While peppermint extract is delightful for human consumption, it’s important to note that mint plants, including peppermint, can be toxic to pets. Keep these cookies away from your furry friends to ensure their safety.

Irresistible Peppermint Meltaways That Melt in Your Mouth
Ingredients
Equipment
Method
- In a large mixing bowl, use an electric mixer to cream together 1 cup of softened unsalted butter and 1 cup of confectioners' sugar until light and fluffy, about 3-5 minutes.

- Slowly add in 1 teaspoon of peppermint extract, mixing until fully incorporated. Scrape down the sides of the bowl.
- In a separate bowl, whisk together 2 cups of all-purpose flour, 1/4 cup of cornstarch, and 1/4 teaspoon of salt until well blended.
- Gradually incorporate the dry mix into the wet ingredients to form a smooth dough.
- Shape the dough into small balls, about 1 inch in diameter, and roll in confectioners' sugar. Place on lined baking sheet.
- Cover with plastic wrap and chill in the refrigerator for at least 30 minutes.
- Preheat oven to 350°F (175°C). Bake cookies for 10-12 minutes until set but not browned.
- Cool on the baking sheet for about 5 minutes, then transfer to a wire rack.
- In a medium bowl, beat together 1/4 cup softened butter and 1 cup confectioners' sugar until creamy. Gradually mix in 2 tablespoons milk, 1 teaspoon peppermint extract, and food coloring until smooth.
- Frost cooled cookies and sprinkle with crushed peppermint candies. Allow frosting to set before serving.
Leave a Reply