
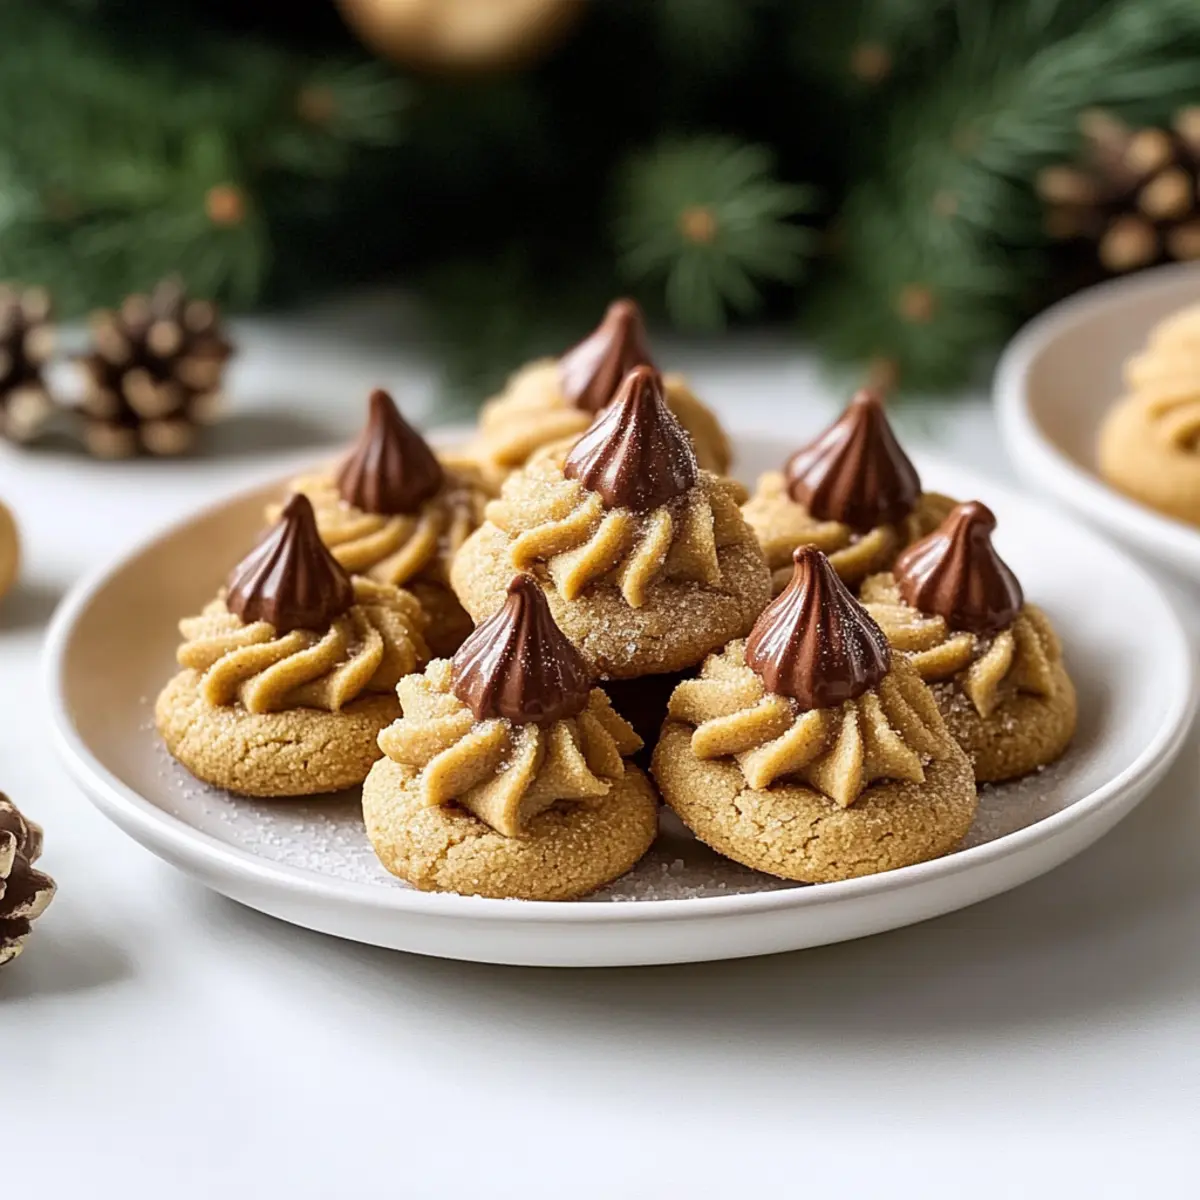
The comforting scent of warm sugar cookies wafts through the air, beckoning both young and old to the kitchen. That’s the magic of these Peanut Butter Blossoms, a timeless treat that combines the creamy allure of peanut butter with the melty sweetness of chocolate. This recipe isn’t just about indulging your sweet tooth—it’s quick enough to whip up on busy days and a guaranteed crowd-pleaser at holiday gatherings. With each soft, chewy bite, you’ll savor the perfect harmony of sweet and salty, making these cookies a staple in my home, especially during the festive season. Ready to bring a little joy to your baking routine? Let’s dive in and create some delightful memories together with this Peanut Butter Blossoms Recipe!
Why are Peanut Butter Blossoms a Must-Bake?
Nostalgic Delight: The combination of peanut butter and chocolate evokes cherished memories of holiday celebrations, filling your home with warmth and joy.
Easy to Make: With straightforward steps, this recipe welcomes everyone, from novice bakers to seasoned chefs, fostering a fun kitchen experience.
Crowd-Pleasing Treat: These cookies charm guests of all ages at gatherings, making them ideal for sharing during festive moments.
Versatile Flavors: Experiment with dark chocolate or peppermint-flavored Kisses for exciting twists that keep your baking fresh.
Make-Ahead Option: You can prepare the dough in advance, reducing stress and allowing you to enjoy more quality time with loved ones.
Guilt-Free Indulgence: At approximately 120 calories each, these cookies offer a delicious treat without the guilt, perfect for holiday indulgence. For more delightful recipes, check out our Moist Banana Bread or Pancake Breakfast Treat for your next kitchen adventure!
Peanut Butter Blossoms Recipe Ingredients
For the Cookie Dough
- All-purpose flour – Ensures your cookies have the right structure; you can swap it with gluten-free flour if needed.
- Granulated sugar – Adds sweetness and helps form that delightful crispy coating; reserve some for rolling the dough.
- Brown sugar – Brings moisture and depth; feel free to choose light or dark based on your taste preference.
- Unsalted butter – Contributes rich flavor and tenderness; vegan butter works as a great substitute for dairy-free cookies.
- Creamy peanut butter – The star of the show, lending its creamy goodness; stick to well-stirred natural peanut butter for best results.
- Large egg – Acts as a binder to keep your cookies perfectly soft and chewy.
- Vanilla extract – Adds a layer of flavor complexity that enhances all other ingredients.
- Baking soda – A must for leavening, helping your cookies rise to fluffy perfection.
- Salt – Balances out the sweetness and elevates the overall taste.
For the Chocolate Topping
- Milk chocolate Hershey’s Kisses – The classic topping that provides a beautiful burst of chocolate; consider dark chocolate or peppermint-flavored Kisses for a fun twist.
Enjoy your baking, and let the smell of these Peanut Butter Blossoms invite warmth and joy into your home this holiday season!
Step‑by‑Step Instructions for Peanut Butter Blossoms Recipe
Step 1: Preheat the Oven
Begin by preheating your oven to 375°F (190°C). While it’s heating, prepare your baking sheets by lining them with parchment paper or silicone baking mats to ensure your Peanut Butter Blossoms don’t stick. This initial step sets the stage for those beautifully baked cookies that everyone will love.
Step 2: Cream the Wet Ingredients
In a large mixing bowl, combine ½ cup of softened unsalted butter, ½ cup of granulated sugar, and ½ cup of brown sugar. Using an electric mixer, cream these ingredients together until light and fluffy, which typically takes about 2-3 minutes. Next, mix in ¾ cup of creamy peanut butter, followed by one large egg and 1 teaspoon of vanilla extract, blending everything until smooth and cohesive.
Step 3: Combine the Dry Ingredients
In a separate bowl, whisk together 1 ¾ cups of all-purpose flour, 1 teaspoon of baking soda, and ½ teaspoon of salt. Gradually add this dry mixture to the wet ingredients, stirring gently until just combined. Be careful not to overmix! You want a thick dough that is ready for shaping into those delightful Peanut Butter Blossoms.
Step 4: Shape the Cookies
Once your dough is mixed, it’s time to create those iconic cookie shapes. Roll the dough into 1-inch balls, ensuring they are uniform for even baking. Roll each ball in granulated sugar to coat, giving them a lovely sparkling finish. Arrange these dough balls on your prepared baking sheets, spacing them about 2 inches apart to allow for spreading.
Step 5: Bake the Cookies
Slide the baking sheets into the preheated oven and bake your cookies for 10-12 minutes. You’ll know they’re ready when the edges are golden and the centers look puffy, almost set. Don’t worry; they’ll continue to firm up as they cool. Keep an eye on them, as oven temperatures can vary slightly.
Step 6: Add the Chocolate Kisses
As soon as you pull the cookies from the oven, it’s time for the fun part! Take a milk chocolate Hershey’s Kiss and gently press it into the center of each cookie while they are still warm. This will create that signature look and melt-in-your-mouth chocolate experience that everyone loves in a Peanut Butter Blossom.
Step 7: Cool the Cookies
Allow the cookies to cool on the baking sheets for about 5 minutes. This allows them to set perfectly while still warm. After they’ve had a moment to cool, carefully transfer the cookies to a wire rack to cool completely. Their delicious aroma will be filling the air, making it hard to resist sampling one!
Peanut Butter Blossoms Recipe Variations
Feel free to get creative with these delicious variations and make this classic recipe your own!
-
Dairy-Free: Substitute unsalted butter with vegan butter to create a delightful dairy-free version that everyone can enjoy.
-
Gluten-Free: Use a 1:1 gluten-free flour blend instead of all-purpose flour for a tasty gluten-free cookie that doesn’t skimp on flavor.
-
Dark Chocolate: Swap milk chocolate Kisses for dark chocolate Kisses for a richer taste that pairs beautifully with the peanut butter.
-
Peppermint Twist: Use peppermint-flavored Kisses for a festive twist, infusing your holiday baking with the refreshing scent of peppermint.
-
Nutty Alternative: Replace peanut butter with almond or cashew butter. Each nutty spread offers a unique spin, enriching the cookie’s flavor profile. It’ll surprise your taste buds!
-
Choco-Chip Bonus: Add ½ cup of chocolate chips to the dough for an extra chocolaty kick that adds delightful texture with every bite.
-
Spicy Kick: Incorporate a pinch of cayenne pepper into the dough for a surprising heat that contrasts deliciously with the sweetness, creating a captivating flavor experience.
-
Mini Cookies: Roll smaller dough balls (½ inch) for bite-sized treats that are perfect for holiday platters or gifting alongside our Baked Feta Eggs. They’ll disappear in no time!
These Peanut Butter Blossoms can truly be anything you want them to be. Happy baking!
What to Serve with Peanut Butter Blossoms?
The joy of baking these delightful cookies is only enhanced by the perfect pairings to complete your holiday feast.
-
Creamy Hot Cocoa: A warm cup of hot cocoa brings out the rich chocolate flavors, creating a cozy and indulgent treat.
-
Spiced Chai Latte: The aromatic spices in chai beautifully complement the sweet and salty notes of the cookies, making each bite an adventure.
-
Festive Fruit Salad: A vibrant mix of fresh fruits adds a refreshing contrast to the richness of Peanut Butter Blossoms, balancing sweetness with a burst of brightness.
-
Roasted Nuts: Serve a bowl of mixed nuts alongside for a crunchy texture that enhances the cookies’ creamy peanut butter flavor, inviting guests to snack.
-
Vanilla Ice Cream: A scoop of vanilla ice cream melting over warm cookies creates a heavenly dessert experience, perfect for family gatherings.
-
Minty Chocolate Milkshake: Combining the classic taste of mint and chocolate elevates these cookies to a whole new level of deliciousness.
-
Gingerbread Cookies: Pairing with other holiday favorites like gingerbread brings a delightful variety of flavors to your cookie platter, adding festive cheer.
-
Hot Apple Cider: The warm spices in apple cider harmonize perfectly with the sweetness of the cookies, making it a delightful beverage choice during the holiday season.
Make Ahead Options
These Peanut Butter Blossoms are perfect for busy home cooks looking to save time during the hectic holiday season! You can prepare the cookie dough up to 24 hours in advance by storing it in an airtight container in the refrigerator, which helps maintain its quality and flavor. Additionally, you can shape the dough into balls and roll them in sugar before refrigerating for a quick bake later. When you’re ready to bake, simply place the dough on a baking sheet and pop them in the oven as described, adding the chocolate kisses right after baking. This way, you’ll enjoy fresh, warm cookies with minimal effort, keeping the holiday spirit alive!
Expert Tips for Peanut Butter Blossoms
-
Perfect Butter Consistency: Ensure your butter is softened, not melted. This crucial step guarantees the cookies are fluffy and chewy rather than flat and greasy.
-
Chill the Dough: For best results, chill your cookie dough for 20-30 minutes before baking. This helps prevent spreading and keeps your Peanut Butter Blossoms nice and thick.
-
Rolling Technique: Roll the dough balls in granulated sugar until fully coated. This adds a lovely crunch to your cookies and encourages that sweet-salty balance.
-
Watch the Bake Time: Keep a close eye on your cookies as they bake. They should be golden around the edges and puffy in the center. Overbaking will lead to dry cookies.
-
Chocolate Variations: Experiment with different chocolate flavors! Using dark chocolate or peppermint-flavored Kisses can add delightful twists to your classic Peanut Butter Blossoms.
How to Store and Freeze Peanut Butter Blossoms
Room Temperature: Store finished cookies in an airtight container at room temperature for up to 5 days, ensuring they stay soft and delicious.
Fridge: For a slightly firmer texture, refrigerate cookies in a sealed container for up to 2 weeks. Just remember to let them come to room temperature before enjoying!
Freezer: Freeze cookies in an airtight container or freezer bag for up to 3 months. Layer parchment paper between cookies to prevent sticking and maintain quality.
Reheating: To revive frozen cookies, let them thaw on the counter for a few minutes; then, warm them in the microwave for 10-15 seconds for that fresh-baked feel.
Peanut Butter Blossoms Recipe FAQs
How do I choose ripe ingredients for my Peanut Butter Blossoms?
Absolutely! When selecting peanut butter, opt for a creamy variety that is well-stirred, avoiding those with excessive oil on top. For butter, pick unsalted for better control of the sweetness in your cookies. If you’re using flour, make sure to check for freshness—no one wants stale flour in their baking!
How should I store Peanut Butter Blossoms after baking?
You can store finished cookies in an airtight container at room temperature for up to 5 days. This keeps them soft and delicious. If you want to enjoy them longer, refrigerate them in a sealed container for up to 2 weeks. Just let them return to room temperature before you take a bite!
Can I freeze my Peanut Butter Blossoms?
Absolutely! To freeze your cookies, place them in an airtight container or freezer bag, but be sure to layer parchment paper between cookies to prevent sticking. They can be kept frozen for up to 3 months. When you’re ready to enjoy them, simply let them thaw and warm them in the microwave for about 10-15 seconds for that fresh, just-baked taste.
What if my cookies spread too much while baking?
Very! If your cookies spread excessively, it could be due to overly soft butter or not chilling the dough beforehand. For best results, ensure your butter is just softened—not melted—and chill the dough for 20-30 minutes before baking to help maintain their shape. This helps create those lovely puffy cookies everyone loves!
Can I make these cookies dairy-free or gluten-free?
Indeed! You can easily make the Peanut Butter Blossoms dairy-free by substituting unsalted butter with vegan butter. For a gluten-free option, simply swap all-purpose flour with a gluten-free flour blend. Just be sure to check the labels to ensure all your ingredients are safe for your dietary needs. Happy baking!
Are Peanut Butter Blossoms safe for pets?
Keep in mind that while peanut butter is generally safe for dogs in moderation, be cautious with the chocolate topping, as chocolate is toxic to dogs. Always ensure your cookies are stored safely out of reach of your furry friends.
Peanut Butter Blossoms Recipe: Soft, Chewy Holiday Treats
Ingredients
Equipment
Method
- Preheat your oven to 375°F (190°C) and prepare your baking sheets by lining them with parchment paper or silicone baking mats.
- In a large mixing bowl, cream together softened unsalted butter, granulated sugar, and brown sugar until light and fluffy. Mix in creamy peanut butter, egg, and vanilla extract until smooth.
- In a separate bowl, whisk together all-purpose flour, baking soda, and salt. Gradually add this dry mixture to the wet ingredients, stirring gently until just combined.
- Roll the dough into 1-inch balls, coat each ball in granulated sugar, and arrange them on prepared baking sheets, spacing about 2 inches apart.
- Bake the cookies for 10-12 minutes until edges are golden and centers look puffy. Remove from oven.
- Gently press a milk chocolate Hershey’s Kiss into the center of each warm cookie.
- Allow cookies to cool on baking sheets for 5 minutes before transferring to a wire rack to cool completely.
Leave a Reply